 Boats For Sale:


Starting 87 SN Floor/Stinger Repair |
Post Reply 
|
Page <1 23456 11> |
| Author | |
Gangster 
Newbie 
Joined: February-17-2007 Location: Canada Status: Offline Points: 14 |
 Post Options Post Options
") Thanks(0) Thanks(0)
 Quote Reply Quote Reply
 Posted: February-24-2007 at 8:02pm Posted: February-24-2007 at 8:02pm |
|
When I flipped over my boat I was fortunate enough to have an overhead crane. I picked it up and looped 4" straps around the boat. Then we lifted it by the straps and friend and I were able to rotate it as the straps just slid in the crane hooks. Then it just sat down on the trailer perfectly. I realize if I was trying to do it at home it wouldn't be that easy.
|
|
|
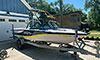
76 Ski Nautique
|
|
 |
|
|
SkiBum
Gold Member 

Joined: November-17-2006 Location: United States Status: Offline Points: 587 |
Post Options
Thanks(0)
Quote Reply
Posted: February-24-2007 at 6:33pm |
|
The camera is about destroyed at this point. The spots, I learned, are from dust in the air. Sorry about the quality of the pics.
I hate to admit defeat, but...I was unable to flip the boat over today. I lifted it in the back with my engine crane then put 3/4" plywood supported by 2x8s across the trailer. When I lowered the boat back down it was only leaning slightly to one side. I rigged a strap so I could lift from one side. The lift did not go high enough. Tried removing the plywood and supports to allow enough room to roll the boat. Just could not do it. Not sure what route I am going to follow now? |
|
|
|
|
79nautique
Grand Poobah 

Joined: January-27-2004 Location: United States Status: Offline Points: 7872 |
Post Options
Thanks(0)
Quote Reply
Posted: February-24-2007 at 9:02am |
|
boy you need to clean the lens of your camera, notice all the spots in the picture.
looking good, I would gel the base it'll last longer and look better I think. |
|
|
|
|
SkiBum
Gold Member
Joined: November-17-2006 Location: United States Status: Offline Points: 587 |
Post Options
Thanks(0)
Quote Reply
Posted: February-23-2007 at 9:07pm |

Sneak preview of the new observer bench for the SN. Trying to replicate the '07 model. Old Vietnam Soldier down the street owns an upholstery shop. He will recover the bench for 30 bucks. I used filler and sanded it all smooth. Not sure if I'll gel the base or paint it and cover with carpet. |
|
|
|
|
SkiBum
Gold Member
Joined: November-17-2006 Location: United States Status: Offline Points: 587 |
Post Options
Thanks(0)
Quote Reply
Posted: February-23-2007 at 9:02pm |

Here is a shot of the inside of the boat. I applied gelcote to this area just inside the gunwale. It is sanded with 220 and 400 at this point. I did not apply over the top or side because I plan to flip the boat and that will just get damaged. The picture below is the boat minus the windshield. I took it out in one piece. I am preparing to flip the boat. 
|
|
|
|
|
79nautique
Grand Poobah
Joined: January-27-2004 Location: United States Status: Offline Points: 7872 |
Post Options
Thanks(0)
Quote Reply
Posted: February-23-2007 at 10:23am |
it's bolted on one of two ways it's either screwed on from the top or it will have t-bolts and you have to remove them from under the dash. You can remove it as one piece, which I would or into mutiple pieces. Along the base of the windshield frame you should see a plasic strip that covers the t-bolts or screw heads which ever the case maybe, just slowly pry it out and you will see the screws or bolt heads. Actually I would look under the dash first and see if you see a bunch of nuts layedout like the base of the windshield, if so then you have the t-bolts and really don't need to remove the plastic strip just remove the nuts and lift the windshield off. |
|
|
|
|
David F
Platinum Member
Joined: June-11-2004 Location: United States Status: Offline Points: 1770 |
Post Options
Thanks(0)
Quote Reply
Posted: February-23-2007 at 9:11am |
Yes, my boat was the same way. The blue accent color was underneath the silve cloud (white). I imagine CC masks off the accent colors directly on the mold. Then they spray the predominant color on the mold, remove the masks and then spray the accent colors right over the top of the primary color. Hence, you have two or three layers of colors. During my repairs, I sanded (grind) through first silver cloud, then electric blue, then black. This was on the side of the hull where all three colors were present, the bottom of the hull only had silver cloud. I suggest you mask off the line between each color and apply one at a time. Otherwise, you will end up with build-up at the overlap that you will surely sand through trying to flatten coplanar. Pinstriping usually hides the color change line as the line is almost impossible to make perfect. |
|
|
|
|
SkiBum
Gold Member
Joined: November-17-2006 Location: United States Status: Offline Points: 587 |
Post Options
Thanks(0)
Quote Reply
Posted: February-22-2007 at 9:40pm |
|
All very good ideas. I can lift the stern just off the trailer by myself.
I have a question for you...does the windshield come apart in several pieces without a lot of difficulty (or breaking it into a couple of pieces). Or...does it have to come off in one piece? Thanks. |
|
|
|
|
bkhallpass
Grand Poobah

Joined: March-29-2005 Location: United States Status: Offline Points: 4723 |
Post Options
Thanks(0)
Quote Reply
Posted: February-22-2007 at 7:42pm |
Well, they could just do it out of the kindness of their hearts for their old pal the Sarge. Seriously though. The empty boat is probably 1400lbs. 10 guys should be able to lift it easily, but you probably want a few more because it's bulky and you don't want it dropped. BKH |
|
|
Livin' the Dream
|
|
|
|
|
79nautique
Grand Poobah
Joined: January-27-2004 Location: United States Status: Offline Points: 7872 |
Post Options
Thanks(0)
Quote Reply
Posted: February-22-2007 at 7:29pm |
|
get a couple of cable winches hang the boat from the lift rings, pull the trailer out from under have some one push on one side to tilt it. then lower it down slowly and roll it over. It's not that heavy with all of the gear out of it. Try picking up the back by yourself and judge the weight that way. .02
|
|
|
|
|
SkiBum
Gold Member
Joined: November-17-2006 Location: United States Status: Offline Points: 587 |
Post Options
Thanks(0)
Quote Reply
Posted: February-22-2007 at 7:06pm |
|
David,
I have switched to using tracer and 220 to knock down the orange peel. I will be careful with the 220. I had an inside corner where I ended up sanding away all the new gel. I think it will be easy enough (compared to gelcote on the entire boat) to repair. As far as the color goes I am using white as the primary hull color with navy blue on the stripe. When grinding the gelcote off the stern I noticed CC applied the navy first then the silver/grey color second. I don't know if Ill go that route because the white won't hide the blue very well if it gets thin. Unfortunately, I cannot put those young boys to work for my own personal gain. Otherwise, I would never cut 3.5 acres of gra$$ again while I am stationed at Knox. I can pull the boat out of the garage to roll it over. I thought about rigging a post at the bow, then using the engine crane and a harness to raise the stern. I also considered simply lifting the stern with the crane and working from stern to bow...when finished, lower the stern and lift the bow in the same fashion. I just really don't know how I am going to approach it just yet. I have a few more things to do inside the boat before I must decide. I appreciate the advice. Thank you. |
|
|
|
|
David F
Platinum Member
Joined: June-11-2004 Location: United States Status: Offline Points: 1770 |
Post Options
Thanks(0)
Quote Reply
Posted: February-22-2007 at 9:13am |
You got that right! Are you starting with 120 grit to knock the orange peel down if sanding by hand? Don't remove ALL the tracer with the 120 or you risk sanding through by the time you get the 120 scratches sanded out with the higher grit papers. Also, make sure you change your sanding direction often. This really helps in letting the paper cut faster. |
|
|
|
|
8122pbrainard
Grand Poobah

Joined: September-14-2006 Location: Three Lakes Wi. Status: Offline Points: 41040 |
Post Options
Thanks(0)
Quote Reply
Posted: February-22-2007 at 6:57am |
|
Skibum, I've rolled many wood boats over to do bottoms. You will find it ALLOT easyier to not have to work upside down. Rolling it over on old tires and movers pads with lots of help is the cheapest and simplest. Farmers way is the safest but requires lots of rigging. Do you have enough room to roll it over?
|
|
|
|
|
leo0648
Senior Member 
Joined: January-30-2007 Location: United States Status: Offline Points: 115 |
Post Options
Thanks(0)
Quote Reply
Posted: February-21-2007 at 10:53pm |
|
Thats an awesome idea.
What color are you painting the outside? |
|
|
|
|
87BFN owner
Grand Poobah

Joined: August-25-2006 Location: Ypsilanti, MI Status: Offline Points: 2194 |
Post Options
Thanks(0)
Quote Reply
Posted: February-21-2007 at 10:33pm |
|
well in that case I would say go for flipping it over.
|
|
|
|
|
bkhallpass
Grand Poobah
Joined: March-29-2005 Location: United States Status: Offline Points: 4723 |
Post Options
Thanks(0)
Quote Reply
Posted: February-21-2007 at 10:13pm |
|
Ski Bum's a Drill Sergeant. I'm thinking he will have no problem finding 20 strong young men who will have no problem picking that boat up, flipping it over, and ever so delicatlely placing it on blocks. BKH
|
|
|
Livin' the Dream
|
|
|
|
|
87BFN owner
Grand Poobah
Joined: August-25-2006 Location: Ypsilanti, MI Status: Offline Points: 2194 |
Post Options
Thanks(0)
Quote Reply
Posted: February-21-2007 at 9:22pm |
|
skibum do you have a way to flip the boat over? 79 is right it would be a good idea to flip it over, but only if you have a safe way to do it. BY safe I mean a sure way of doing and not putting yourself or the boat at risk. The project really looks like it coming along nicely.
|
|
|
|
|
SkiBum
Gold Member
Joined: November-17-2006 Location: United States Status: Offline Points: 587 |
Post Options
Thanks(0)
Quote Reply
Posted: February-21-2007 at 9:09pm |
Damn good idea! It would make grinding, sanding, spraying, and sanding much easier. |
|
|
|
|
SkiBum
Gold Member
Joined: November-17-2006 Location: United States Status: Offline Points: 587 |
Post Options
Thanks(0)
Quote Reply
Posted: February-21-2007 at 9:05pm |
I hope so. |
|
|
|
|
SkiBum
Gold Member
Joined: November-17-2006 Location: United States Status: Offline Points: 587 |
Post Options
Thanks(0)
Quote Reply
Posted: February-21-2007 at 9:02pm |
I am not going to put any screws into the boat unless there is no other choice. I replaced the bilge pump a few seasons back. Scrubbed the mounting location with soap, water, and a green scratch pad. Wiped the area with acetone then used a dab of 5200 marine sealant to stick the base to the hull. That's how I'll do it again. |
|
|
|
|
79nautique
Grand Poobah
Joined: January-27-2004 Location: United States Status: Offline Points: 7872 |
Post Options
Thanks(0)
Quote Reply
Posted: February-21-2007 at 3:13pm |
|
Bill Looks nice, but you might want to re-think putting the motor in to quickly. If your going to do the outside of the hull, then why not just flip it over and do it, then flip it back finish the rest of the inside and do the graphics, unless your gel-koting them on, that might be a little more challenging upside down.
|
|
|
|
|
88 Nautique
Senior Member

Joined: September-20-2006 Location: United States Status: Offline Points: 221 |
Post Options
Thanks(0)
Quote Reply
Posted: February-21-2007 at 2:24pm |
|
Bill,
You know better than anyone how to mount the bildge pump. I have to replace mine. Are you going to glue it in or can you screw it into the hump in front of the bildge drain? My old one was glued but the plastic mount broke so I have to remove the old mount to replace it. I don't want to do anything until I hear back from you guys. Thanks Kurt |
|
|
|
|
TRBenj
Grand Poobah

Joined: June-29-2005 Location: NWCT Status: Offline Points: 21131 |
Post Options
Thanks(0)
Quote Reply
Posted: February-21-2007 at 1:58pm |
|
Bill, the bilge looks terrific. You making the trip to GL? Id love to see it in person.
|
|
|
|
|
SkiBum
Gold Member
Joined: November-17-2006 Location: United States Status: Offline Points: 587 |
Post Options
Thanks(0)
Quote Reply
Posted: February-21-2007 at 1:50pm |
|
You know what, it does look like a jacuzzi!
The gelcote spraying is going well. The sanding is not. It is very labor intensive. I hope to be quite proficient by the time I work my way to the outside of the boat. |
|
|
|
|
eric lavine
Grand Poobah
Joined: August-13-2006 Location: United States Status: Offline Points: 13413 |
Post Options
Thanks(0)
Quote Reply
Posted: February-21-2007 at 7:33am |
|
that looks like my jacuzzi tub, must be a new option, I commend you on the work that you did to the boat and your right only a few (you have to experience it to know) can appreciate the work you put into her.
I would say you have many hours in it to this point Eric |
|
|
"the things you own will start to own you"
|
|
|
|
|
8122pbrainard
Grand Poobah
Joined: September-14-2006 Location: Three Lakes Wi. Status: Offline Points: 41040 |
Post Options
Thanks(0)
Quote Reply
Posted: February-21-2007 at 6:53am |
|
Bill, You know that some boats don't look that good on the outside!! I do know what you went through to get it to look that way. How's the spraying going?
|
|
|
|
|
leo0648
Senior Member
Joined: January-30-2007 Location: United States Status: Offline Points: 115 |
Post Options
Thanks(0)
Quote Reply
Posted: February-20-2007 at 7:37pm |
|
Wow, that is beautiful.
Excellant job Bill. Watching this project come together like this is amazing. I am sure you are starting to feel pretty excited about your new boat. 81nautique-I thought it was kind of relevant being that this thread is on redoing the interior. Thanks for you input, please do make a post on your rebuild. I would like to see what parts you had in mind. |
|
|
|
|
SkiBum
Gold Member
Joined: November-17-2006 Location: United States Status: Offline Points: 587 |
Post Options
Thanks(0)
Quote Reply
Posted: February-20-2007 at 7:28pm |


Couple of things going on here. First, only a few people would be able to appreciate how difficult it was to produce these photos. It certainly took a ton of man hours. In fact, I would estimate as many as forty hours spent in the bilge. Also, the other day I did a test fit on the engine cradle. Turns out I built up so much gla$$ on the floor and filler on the bilge that it actually increased the stringer height by 1/4" to 3/8". I had to cut away the portion of the floor over top of the engine cradle. Then I ginded down the build up and fixed the injury with epoxy. In the background on the third picture you can see where I applied gelcote. I have lots of practice sanding. Guess I'll get more now. Good news, the engine cradle fits nicely now. Also, the bilge is smooth and shiny. Bad news, Once I put the engine cradle I have to put that piece of floor back without having resin run into the bilge. Anyhow, I am working the gelcote from the inside of the boat. Then, I'll do the bottom along where the running gear is installed. That way, I'll be able to put the inside of the boat back together, the running gear, and the engine. Then, I'll be able to work on the gelcote outside the boat. |
|
|
|
|
81nautique
Grand Poobah

Joined: September-03-2005 Location: Big Rock, Il Status: Online Points: 5772 |
Post Options
Thanks(0)
Quote Reply
Posted: February-20-2007 at 5:46pm |
|
Leo, Kind of a strange place to post this question. But IMHO there's not enough info there to know what you're getting. Lots of variables there, are the rings moly or just plain cast iron, pistons cast, hypereutictic, I'm sure thy're not forged. Bearings sound standard, should be H series Trimetal. IS the timing set double roller with extra key slots for degreing the cam? Compression ratio chart for pistons comparing head cc's. No Cam? What makes the set reverse roataion, just an oil seal?
Not enough info...call, if he can't answer your questions run.. I'd bet it's a pretty standard performance rebuild kit. I'm currently rebuilding mine and I think I'll start a new thread listing the parts I'm using, I'm sure there will be some feedback on my selections. Curious to see what some of the gurus here think. |
|
|
You can’t change the wind but you can adjust your sails
|
|
|
|
|
leo0648
Senior Member
Joined: January-30-2007 Location: United States Status: Offline Points: 115 |
Post Options
Thanks(0)
Quote Reply
Posted: February-20-2007 at 4:43pm |
|
Hey guys, for anyone interested. I found a guy on ebay who is selling engine kits for reverse rotation engines.
http://cgi.ebay.com/ebaymotors/ws/eBayISAPI.dll?ViewItem&ih=010&sspagename=STRK%3AMEWA%3AIT&viewitem=&item=200080332234&rd=1,1 What do you guys think about this? I am going to rebuild the engine when I redo the stringers. |
|
|
|
|
Post Reply
|
Page <1 23456 11> |
 Tweet
Tweet
|
| Forum Jump | Forum Permissions You cannot post new topics in this forum You cannot reply to topics in this forum You cannot delete your posts in this forum You cannot edit your posts in this forum You cannot create polls in this forum You cannot vote in polls in this forum |


 Topic Options
 SkiBum wrote: