 Boats For Sale:


1960 Atom Skier Fin Boat Recondition |
Post Reply 
|
Page <1 23456 14> |
| Author | ||
SNobsessed 
Grand Poobah 
Joined: October-21-2007 Location: IA Status: Offline Points: 7102 |
 Post Options Post Options
") Thanks(0) Thanks(0)
 Quote Reply Quote Reply
 Posted: December-02-2012 at 11:57am Posted: December-02-2012 at 11:57am |
|
|
That's a great way to get to the dash wiring!
|
||
|
“Beer is proof that God loves us and wants us to be happy.”
Ben Franklin |
||
 |
||
|
juniorwoody
Gold Member 
Joined: August-09-2011 Location: Oak Hill, Fl Status: Offline Points: 937 |
Post Options
Thanks(0)
Quote Reply
Posted: December-02-2012 at 12:17pm |
|
I can see it but I'm not touching it Chris! Good for the most part except a couple pieces of Romex cable I'd like to replace. Romex has no place in boat wiring. |
||
|
The value of money spent on new adventure far exceeds the value of money saved for the future
|
||
|
||
|
8122pbrainard
Grand Poobah

Joined: September-14-2006 Location: Three Lakes Wi. Status: Offline Points: 41040 |
Post Options
Thanks(0)
Quote Reply
Posted: December-02-2012 at 12:33pm |
|
|
Blond areas of wood get a "natural" color of paste wood grain filler.
Wiring, I found CC use SO rubber cord in my Atom. Actually, it was common in wood boats back in the 50's. |
||
|
||
|
juniorwoody
Gold Member
Joined: August-09-2011 Location: Oak Hill, Fl Status: Offline Points: 937 |
Post Options
Thanks(0)
Quote Reply
Posted: December-02-2012 at 1:34pm |
|
Thanks for the information Pete. You don't suggest the Romex cable is original do you? What should I use as a replacement to be more authentic? Seems to feed the electric fuel pump and nav lights. |
||
|
The value of money spent on new adventure far exceeds the value of money saved for the future
|
||
|
||
|
juniorwoody
Gold Member
Joined: August-09-2011 Location: Oak Hill, Fl Status: Offline Points: 937 |
Post Options
Thanks(0)
Quote Reply
Posted: January-26-2013 at 11:59am |
|
|
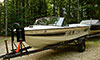
Slow progress here in the Atom Skier "Fin" boat. The repairs have been made and loose structural members refastened in prep for the new deck material. All has been CPESed and the fitting of the new material is in progress. I have also purchased the new naugahide for the seats so, much to do in the next month. Fishing, shrimping and boating is taking much of my work time.
   
|
||
|
The value of money spent on new adventure far exceeds the value of money saved for the future
|
||
|
||
|
bwinn
Senior Member 
Joined: July-13-2009 Location: ct Status: Offline Points: 391 |
Post Options
Thanks(0)
Quote Reply
Posted: January-29-2013 at 1:59pm |
|
|
That deck is gunna look fintastic!
|
||
|
||
|
juniorwoody
Gold Member
Joined: August-09-2011 Location: Oak Hill, Fl Status: Offline Points: 937 |
Post Options
Thanks(0)
Quote Reply
Posted: February-01-2013 at 12:11pm |
|
  
|
||
|
The value of money spent on new adventure far exceeds the value of money saved for the future
|
||
|
||
|
Riley
Grand Poobah
Joined: January-19-2004 Location: Portland, ME Status: Offline Points: 7948 |
Post Options
Thanks(0)
Quote Reply
Posted: February-01-2013 at 12:19pm |
|
|
Looks great, Jack. Do you have a windshield for that boat?
|
||
|
||
|
juniorwoody
Gold Member
Joined: August-09-2011 Location: Oak Hill, Fl Status: Offline Points: 937 |
Post Options
Thanks(0)
Quote Reply
Posted: February-02-2013 at 12:05pm |
|
Thanks Bruce, I do have the plastic windshield that came with the boat. It might be original, but I am not sure. The classic one that was on the boat hull I got from you is much more desireable. Wish I had one. In my research I think I recall there were both options available. The plastic one has a lower profile also and no wing windows. |
||
|
The value of money spent on new adventure far exceeds the value of money saved for the future
|
||
|
||
|
juniorwoody
Gold Member
Joined: August-09-2011 Location: Oak Hill, Fl Status: Offline Points: 937 |
Post Options
Thanks(0)
Quote Reply
Posted: February-02-2013 at 12:16pm |
|
|
I am presented with a new situation here as I progress. The gas tank had been blocked up on one end so I decided it should be down in the cradles provided. As I lifted and removed the blocks I realized why it had been done. The neck on the tank had been repaired at some point and the weld job had left the filler at an angle. The only way to get it through the deck was to block the tank. Question is do I try to get it bent back properly or get a new tank?
|
||
|
The value of money spent on new adventure far exceeds the value of money saved for the future
|
||
|
||
|
Riley
Grand Poobah
Joined: January-19-2004 Location: Portland, ME Status: Offline Points: 7948 |
Post Options
Thanks(0)
Quote Reply
Posted: February-02-2013 at 12:26pm |
|
|
Jack, the split glass was probably available as an option, but was part of the Deluxe package, which was what the boat you got from us is, Atom Deluxe. I picked up some Atom parts and a windhsield last summer from the guy that was converting his Atom into that I/O hull I posted last year.
|
||
|
||
|
FINS
Senior Member

Joined: August-04-2007 Location: United States Status: Offline Points: 170 |
Post Options
Thanks(0)
Quote Reply
Posted: February-06-2013 at 12:51pm |
|
|
I am not sure how much room there is on Nomad, but on the '59 there is a good 3" between the tank and the filler neck. I plan on making that connection with a short section of rubber (fuel rated of course). Maybe you could cut the pipe back to the tank and do the same. But with that "thirsty" V8, your tank maybe larger and not enough space. The deck is looking great! Can't wait to see some varnish on that!
|
||
|
||
|
john b
Grand Poobah
Joined: July-06-2011 Location: lake Sweeny Status: Offline Points: 3236 |
Post Options
Thanks(0)
Quote Reply
Posted: February-06-2013 at 3:33pm |
|
|
It is a real treat to have two woody restoration threads to pass the winter with. It looks like you have made good progress!
|
||
|
1970 Mustang "Theseus' paradox"
If everyone else is doing it, you're too late! |
||
|
||
|
juniorwoody
Gold Member
Joined: August-09-2011 Location: Oak Hill, Fl Status: Offline Points: 937 |
Post Options
Thanks(0)
Quote Reply
Posted: February-07-2013 at 11:09am |
|
I think there is about three inches space Brien so I may be able to cut the nipple going in and sleeve it with rubber hose to make the slight angle necessary to get through the deck. Hope I cab find the proper hose in the proper size. As of today I have one more piece of ply to bond on and then the sanding and finishing begins. Been watching the calendar and realize I must stick with it or I may be going boatless to Mt. Dora this year. I need to return to Ct for three weeks in March so no work will get done during that time. |
||
|
The value of money spent on new adventure far exceeds the value of money saved for the future
|
||
|
||
|
juniorwoody
Gold Member
Joined: August-09-2011 Location: Oak Hill, Fl Status: Offline Points: 937 |
Post Options
Thanks(0)
Quote Reply
Posted: February-10-2013 at 11:32am |
|
|
Deck material installed. Now for the finishing part. Hope for good weather to continue during that process. The first side of the deck ply went down easily and I opted to install nails after dry or possibly not at all. Good squeeze out all the way around with the 5200 makes for an impossible bond to break in my estimation. The port side however needed to be nailed down at the seam as I bonded it in place. Just wouldn't flush out otherwise. I now have a parallel row of nails down the bow deck seam and none on the perimeter. There is a temptation to leave them out and the reasoning being that the adhesive will do the job. The time spent to install the nails and putty, etc. is inconsequential but I feel the end result finishing may be a bit better. Please advise.
  
|
||
|
The value of money spent on new adventure far exceeds the value of money saved for the future
|
||
|
||
|
john b
Grand Poobah
Joined: July-06-2011 Location: lake Sweeny Status: Offline Points: 3236 |
Post Options
Thanks(0)
Quote Reply
Posted: February-10-2013 at 4:08pm |
|
|
I'm curious, how do you put the pattern in the decking? A router perhaps? Is the pattern copied from the original, or is there a standard width for the "planks" in the pattern? Do you have to make a template for the radius?
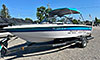
Whatever the method, it looks very nice. I have always had the idea of owning another wood boat in the back of my mind. A fin boat like yours or an Atom like Pete's would be my choices. There is a beautiful looking 57 Atom in the "For Sale" forum that seems reasonably priced. I love to look at it and dream. The fin boats seem to be few and far between, but they are beautiful, as the photo of yours on blocks illustrates. I know enough about woodworking to buy one that was a very nice original or had been completed by someone else. Maybe it will be on the radar after 2015 if I finish all the projects I have now. Thanks for sharing your "Finnish" boat! |
||
|
1970 Mustang "Theseus' paradox"
If everyone else is doing it, you're too late! |
||
|
||
|
juniorwoody
Gold Member
Joined: August-09-2011 Location: Oak Hill, Fl Status: Offline Points: 937 |
Post Options
Thanks(0)
Quote Reply
Posted: February-11-2013 at 12:18pm |
|
|
Thanks for showing an interest John, it's what keeps me motivated at times. I used a router with a bottom cutting bit to route the simulated planks in the deck material. The decking I removed seemed to be original and I was able to take a rubbing off it for the eliptical curve that borders the planking. The photos may not show but the border is not even by design so I was glad I could follow the old instead of making an educated guess. I used a collet on my router to follow the 1/4 in. plywood template and held it back about 1/4 in from where I wanted the detail to go. It did take some careful setup and steady hand as there are no second chances and the marine ply is rather expensive.
|
||
|
The value of money spent on new adventure far exceeds the value of money saved for the future
|
||
|
||
|
81nautique
Grand Poobah

Joined: September-03-2005 Location: Big Rock, Il Status: Offline Points: 5768 |
Post Options
Thanks(0)
Quote Reply
Posted: February-11-2013 at 12:26pm |
|
LOL, No second chances and NO turning back. There are so many ways to screw this up, lets see: trip on the power cord, power cord snags on the saw horse legs, slip on saw dust, Wife yells Dinners ready, an untimely sneeze, or the phone in your pocket is set to vibrate and neighbor calls asking if you can put their cat out. Been there done that. Great work Jack. |
||
|
||
|
john b
Grand Poobah
Joined: July-06-2011 Location: lake Sweeny Status: Offline Points: 3236 |
Post Options
Thanks(0)
Quote Reply
Posted: February-11-2013 at 1:36pm |
|
|
Thanks for the explanation. I'm more convinced than ever that I could never do this. . She's a beautiful boat. I like the thin fins on yours better than the one I posted way back too. Maybe someday....... I'll keep dreaming.
|
||
|
1970 Mustang "Theseus' paradox"
If everyone else is doing it, you're too late! |
||
|
||
|
8122pbrainard
Grand Poobah
Joined: September-14-2006 Location: Three Lakes Wi. Status: Offline Points: 41040 |
Post Options
Thanks(0)
Quote Reply
Posted: February-11-2013 at 8:20pm |
|
|
I have to agree since I've been there with the router!!

|
||
|
||
|
65 'cuda
Platinum Member

Joined: July-12-2005 Location: Cincinnati, OH Status: Offline Points: 1091 |
Post Options
Thanks(0)
Quote Reply
Posted: February-11-2013 at 10:40pm |
|
|
First, look down, make sure there is nothing to trip on, then drape the power cord in the direction of travel, make sure the plug (where it plugs into the extension cord) will not hang up at a bad moment, take a deep breath, steady your hand and go!
I used to freehand trash cutouts in Corian tops. (easier than it looks, there is no "grain" in corian) Sharp router bits, and porter cable routers! |
||
|
||
|
juniorwoody
Gold Member
Joined: August-09-2011 Location: Oak Hill, Fl Status: Offline Points: 937 |
Post Options
Thanks(0)
Quote Reply
Posted: February-12-2013 at 10:51am |
|
|
LOL, any who have run a router has been on edge with the potential for disaster. Allen hit on many of the demons out there waiting to strike. The one he missed was the one where you are trimming off the excess overhang and the bearing on the flushcut bit loosens up. Saw that developing as I was routing on the deck and caught it just in time before it dropped and I ended up chowdering the rail. I also have routed miles of corian and agree Porter Cable and sharp bit. Only forgivness with the Corian is that`you can add back on and never see it if there is a problem.
I now have to find the materials to finish the deck and locally there isn't much. Guess I may have to buy on line. I need the appropriate stain for the dark and grain filler for all also. Then there is the bleach to be located. Any advice would be a big help. |
||
|
The value of money spent on new adventure far exceeds the value of money saved for the future
|
||
|
||
|
Riley
Grand Poobah
Joined: January-19-2004 Location: Portland, ME Status: Offline Points: 7948 |
Post Options
Thanks(0)
Quote Reply
Posted: February-12-2013 at 11:05am |
|
|
Jack, how do figure out what shade you want the boat to be and how glossy? The restos of most of the wood Correct Crafts I've seen, seem darker and shinier than I remember them being. This boat in the diaries I think is a good example of how the plywood boats looked when they were new.
http://www.correctcraftfan.com/diaries/details.asp?ID=1017&sort=&pagenum=2 |
||
|
||
|
81nautique
Grand Poobah
Joined: September-03-2005 Location: Big Rock, Il Status: Offline Points: 5768 |
Post Options
Thanks(0)
Quote Reply
Posted: February-12-2013 at 11:37am |
|
|
Yeah that was just an attempt at humor. I'm actually a fanatic on safety, before my current job I ran a manufacturing plant with over 100 employees. HR would give us unskilled people off the street and we had to turn them into machine operators running 20" saw blades that could take a hand off in the blink of an eye. I once rode in the ambulance holding a co workers foot as it dangled off his leg because of a forklift operator mistake. That accident was 30 years ago and I still see it every time I jump on a forklift. Back to boat building.
|
||
|
||
|
juniorwoody
Gold Member
Joined: August-09-2011 Location: Oak Hill, Fl Status: Offline Points: 937 |
Post Options
Thanks(0)
Quote Reply
Posted: February-12-2013 at 11:40am |
|
That would be the shade of stain I want for the outside border around the planking on top. Too bad there isn't a shot of the top. A removal of the paint on the old material suggests it had blond or natural finished areas on the transom and the planking in the bow area. Pete says this area must be filled with natural grain filler whereas the darker borded I believe must have the Criss Craft mahogany stain filler or something similar. The contrast should really pop. I have the Epifanes varnish to complete the job. Bet Correct Craft never put 10 coats of finish going out the door what do you think? I still plan to do a nice job. Finding the natural grain filler seems to be the challenge of the moment. |
||
|
The value of money spent on new adventure far exceeds the value of money saved for the future
|
||
|
||
|
81nautique
Grand Poobah
Joined: September-03-2005 Location: Big Rock, Il Status: Offline Points: 5768 |
Post Options
Thanks(0)
Quote Reply
Posted: February-12-2013 at 11:44am |
|
Jack your best bet for supplies is going to be Jamestown Distributors, they'll have what you need except for the bleach. I found that on line also but don't recall where. Make sure you get a two-part wood bleach of sodium hydroxide (caustic soda) and hydrogen peroxide. As for filler stain I used Interlux #0573 Chris Craft Red, call for a color chart because the color names don't represent whats in the can very well. |
||
|
||
|
juniorwoody
Gold Member
Joined: August-09-2011 Location: Oak Hill, Fl Status: Offline Points: 937 |
Post Options
Thanks(0)
Quote Reply
Posted: February-12-2013 at 11:58am |
|
Thanks for the stain color Allen. I have found a filler on line for the natural areas, Grain Filler Will get an order in to Jamestown today for the other. I have used the two part bleach before and it sometimes can be found at one of those older hardware stores that are disappearing so fast across the USA. Searching for it on line seems to be the best bet. |
||
|
The value of money spent on new adventure far exceeds the value of money saved for the future
|
||
|
||
|
8122pbrainard
Grand Poobah
Joined: September-14-2006 Location: Three Lakes Wi. Status: Offline Points: 41040 |
Post Options
Thanks(0)
Quote Reply
Posted: February-12-2013 at 8:49pm |
|
|
Jack,
Besides Jamestown for more marine type items, I've used Woodworkers supply for years. Besides the Behlen paste grain filler, they also have the two part bleach. I'm not a fan of the Epifanes. I know plenty of people that have issues with it. Adhesion seems to be the biggest problem. Have you used it before? My favorite is Flagship by Pettit/Interlux. |
||
|
||
|
juniorwoody
Gold Member
Joined: August-09-2011 Location: Oak Hill, Fl Status: Offline Points: 937 |
Post Options
Thanks(0)
Quote Reply
Posted: February-13-2013 at 10:55am |
|
|
Pete thanks for the input. I forgot about Woodworkers however have used them in the past. They do seem to have the bleach but out of stock and they only offer the gallon size when they have it for about 100 bucks. Seems a little pricy and way more than I need. Guess I'll look a little further. As for the varnish, I already have some Epifanes and have used it on the doghouse. Not a problem that I can see. Will look into switching though. If I don't get the bleach the project will slow down so hope to find some soon.
|
||
|
The value of money spent on new adventure far exceeds the value of money saved for the future
|
||
|
||
|
FINS
Senior Member
Joined: August-04-2007 Location: United States Status: Offline Points: 170 |
Post Options
Thanks(0)
Quote Reply
Posted: February-13-2013 at 1:31pm |
|
|
I got all of my stain and paint supplies from Sandusky Paint Company through online ordering for the little Tollycraft. They have the Chris Craft stains and filler formulas used originally inuding the blonde filler. Really happy with the "red" filler stain from them but would love to hear more from the Correct Craft side of things. I feel like the "red" is a little too dark but have no reference for what an "original" Correct Craft color was. Had the same issue with the Tolly but finally decided to go with the Chris color. Mre just curiousity than anything, but where the Correct Craft boats a little lighter from the factory or was it just that they were a little lacking on coats of finish?
Jack, the progress is looking great! Can't wait to see that little sucker in the water zipping around. In your spare time (right!) you should be restoring water skis. With that 327 you should be able to pull 10-12 skiers! Sandusky Paint |
||
|
||
|
Post Reply
|
Page <1 23456 14> |
 Tweet
Tweet
|
| Forum Jump | Forum Permissions You cannot post new topics in this forum You cannot reply to topics in this forum You cannot delete your posts in this forum You cannot edit your posts in this forum You cannot create polls in this forum You cannot vote in polls in this forum |


 Topic Options
 SNobsessed wrote: