 Boats For Sale:


Notes from my resto...lettering & stripes |
Post Reply 
|
| Author | |
Brktracer 
Senior Member 

Joined: December-20-2007 Location: South Carolina Status: Offline Points: 387 |
 Post Options Post Options
") Thanks(0) Thanks(0)
 Quote Reply Quote Reply
 Topic: Notes from my resto...lettering & stripes Topic: Notes from my resto...lettering & stripesPosted: July-01-2008 at 1:59am |
|
I've had a few questions about how I reproduced the graphics on my boat so I think a post is in order.
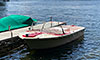
This is what I started with: 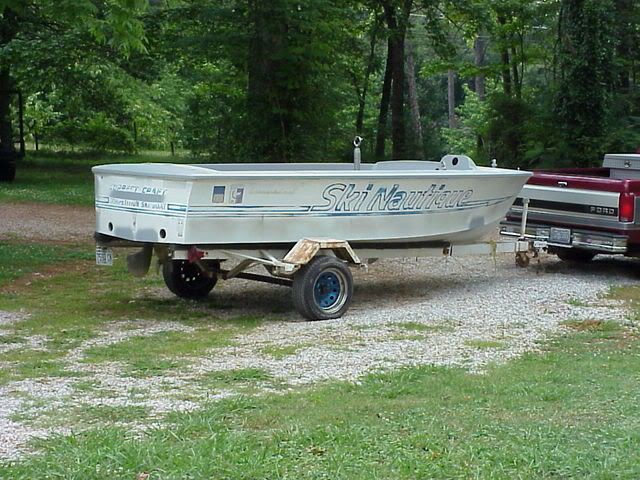
I literally spent months trying to figure out the best way. I also talked to some painting professionals. I came up with three options: 1. Trace everything onto "tracing paper" Sand down the boat, paint, and use the tracing paper to transfer the image back onto the boat. It is transferred back on by using a perforation wheel (I don't know the proper name for this) to perf the outline in the tracing paper. Then some type of coloring passes through the holes onto the boat. A panty hose with some carbon black or similar device will pass through the perfs and onto the boat. Then it must be taped off. 2. Tape off the inside of the design. Paint the hull. Tape off the outside of the design and paint the lettering and stripes. 3. Have a sign shop try to reproduce by taking a picture and cutting out a vinyl decal to install after painting. I chose option 2 with a twist of option 3. There were many reasons why�I�ll skip the details for now. I first sanded the entire boat and fixed all the dings and chips. I did my fare share of blocking and straightening. Conveniently enough the gel coat was protected by the original letter and stripe paint so I was able to see the outline after sanding the boat. It was vague but visible. I used a halogen light shining at an angle to see the outline more clearly. Using "thin line tape" I completed the daunting task of taping the inside of the outline. 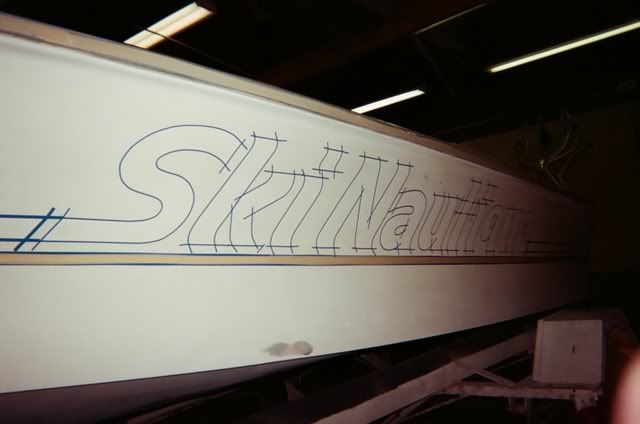
Next the edges had to be trimmed where the tape overlapped on the corners. This was done with a careful touch and a new utility knife blade. 
Next I taped over the whole thing with masking tape. 
After that the tape was trimmed with the utility knife blade on top of the thin line tape and the extra tape was pulled off. 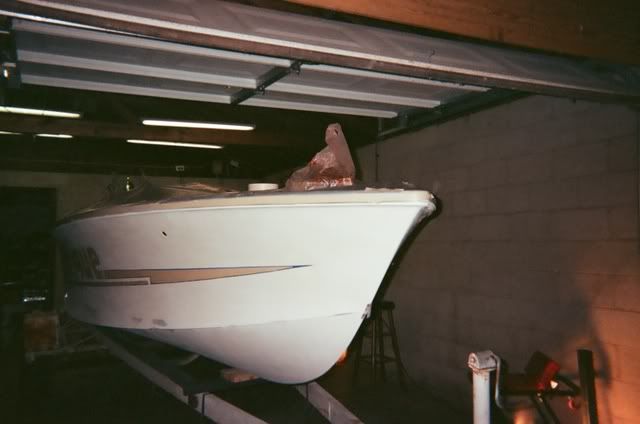
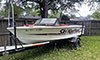
This completed the task of covering the inside of the lettering and now the hull could be painted. You can see some spots where repairs were made on the hull. This hull had it's fair share of nicks, dings, and gashes. When all the taping was done it looked like this: 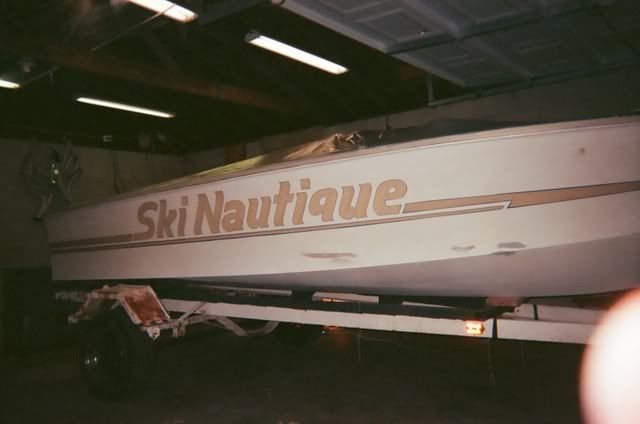
This pic shows the paint over the taped off area: 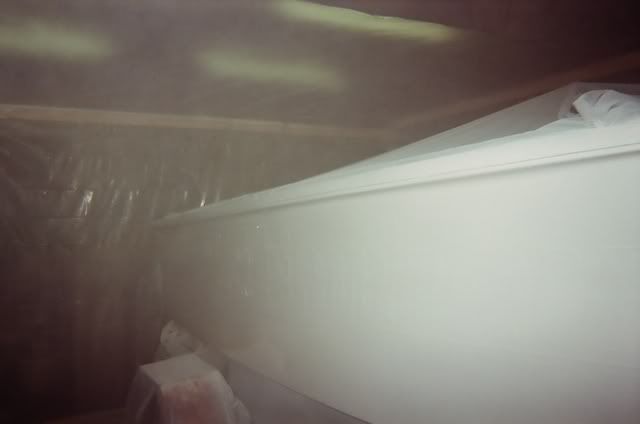
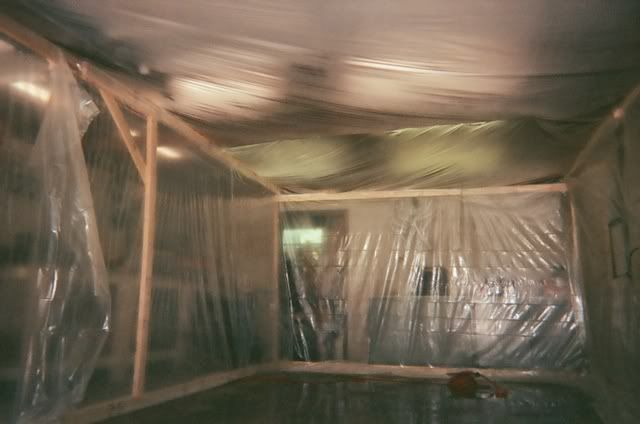
As you can see I painted the boat in a garage with a temporary paint booth that worked very well! 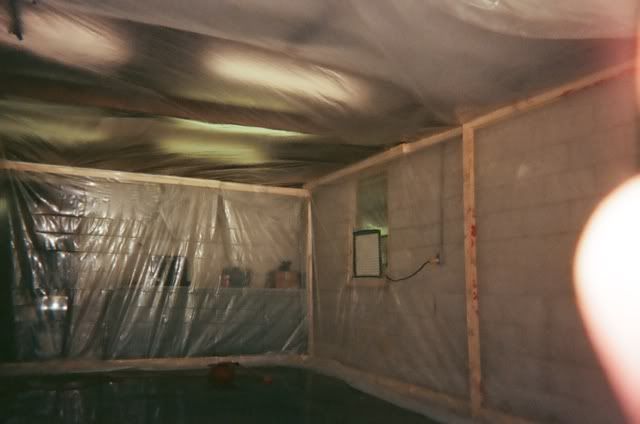
The next step was to tape off the outside of the lettering and the entire hull except for the lettering. 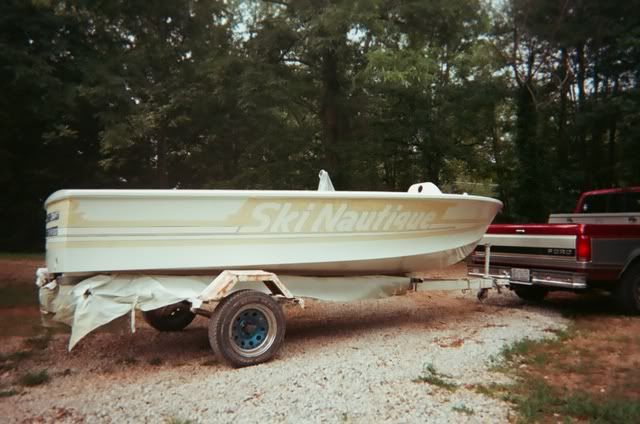
To give an idea of the scope of this, I started at about 7:00am on a Sunday morning. I finished taping off the boat around 7:00 pm that Sunday night. I immediately shot the paint. I finished painting around 11:00 pm. I showered and went to bed after setting the alarm clock for 4:00 am. I awoke and pulled the tape off finishing around 5:30 am. Showered and hit the road and made it to work by 7:00 am. What a long day! This was how she looked after I pulled her out for the first time. Talk about excited! 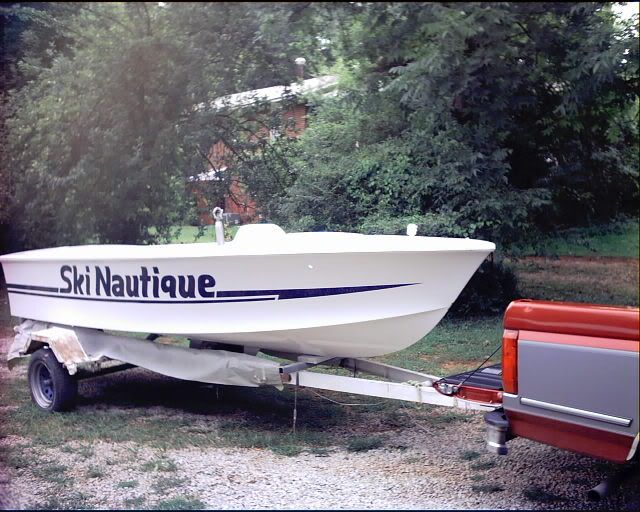
As mentioned earlier I used a combination of options 2 and 3 above. I have a friend that runs a sign shop. He made me a template for the back of the boat out of vinyl. Here�s a pic of it applied, just before painting. The vinyl worked very good as a masking. I could�ve never taped off all those small letters! 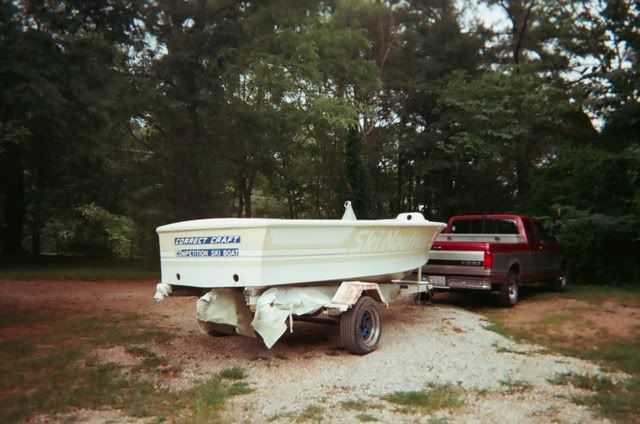
After... 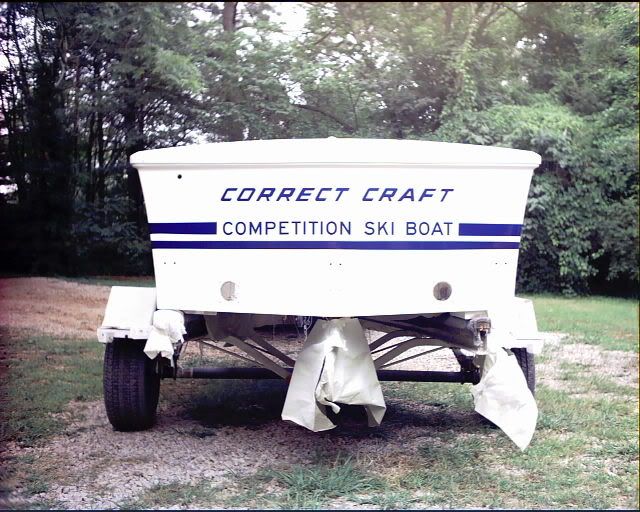
I spent weeks color sanding and buffing as I couldn�t paint that well at the time and ended up with pretty severe orange peel. This is a sample of the results after sanding and buffing: 
I�ve left out a lot of details but this is a decent summary of the work. All in all it took 8 months + to complete the paint. Overall this was a very labor intense process and I wouldn�t recommend it to anyone, but it can be done!!! |
|
 |
|
|
79nautique
Grand Poobah 

Joined: January-27-2004 Location: United States Status: Offline Points: 7872 |
Post Options
Thanks(0)
Quote Reply
Posted: July-01-2008 at 2:36pm |
|
well you should have asked about the transom lettering, we could have hooked you up with a sign shop that all ready has it ready to go in vynil.
|
|
|
|
|
pwningjr
Groupie 

Joined: December-07-2007 Location: IA Status: Offline Points: 36 |
Post Options
Thanks(0)
Quote Reply
Posted: July-01-2008 at 4:29pm |
|
Nice job, you should be proud of yourself!

|
|
|
Jay
"Proud to be a geek" Big Heavy (stephan): One can't always be perfect when water dancing on your shred stick. |
|
|
|
|
Brktracer
Senior Member
Joined: December-20-2007 Location: South Carolina Status: Offline Points: 387 |
Post Options
Thanks(0)
Quote Reply
Posted: July-01-2008 at 4:58pm |
I would have but this was in 2000 or 01 and you all weren't around then! I was on my own! Matt |
|
|
|
|
Kristof
Grand Poobah
Joined: October-08-2007 Location: Bree, Belgium Status: Offline Points: 3391 |
Post Options
Thanks(0)
Quote Reply
Posted: July-01-2008 at 8:04pm |
|
Very nice job!!
And done with a lot of love... that shows! |
|
|
- Gun control means: using BOTH hands!
- Money doesn't make one happy, but when it rains cats and dogs, it's still better to cry in a Porsche than on a bicycle... |
|
|
|
|
Sam B
Senior Member

Joined: November-17-2007 Location: StevensPoint WI Status: Offline Points: 393 |
Post Options
Thanks(0)
Quote Reply
Posted: July-02-2008 at 12:03pm |
|
Looks Great!!!!
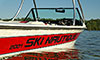
Im not so patient so I had a paint mask made. It's a decal of the word but only the outside. 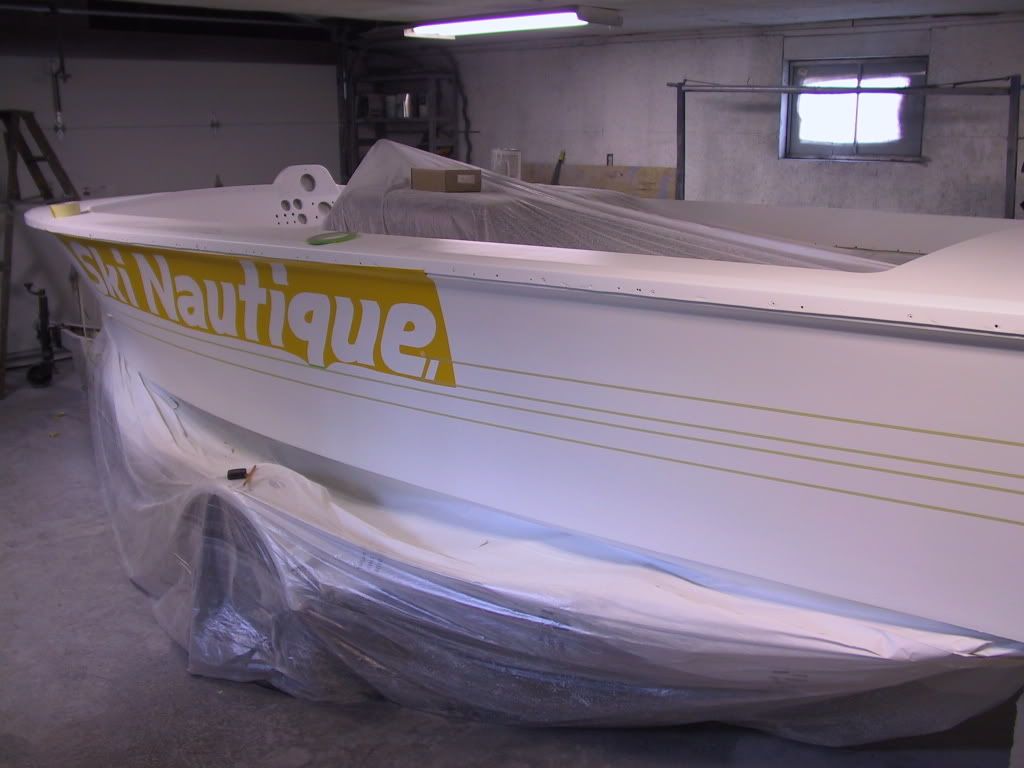
|
|
|
|
|
MADTOWN78
Groupie
Joined: July-12-2007 Location: United States Status: Offline Points: 67 |
Post Options
Thanks(0)
Quote Reply
Posted: July-02-2008 at 1:21pm |
|
Boat looks great!!!
What paint did you use? Did you spray with a HPLV (high pressure low volume)? How many coats? Clear over the top? It appears that you sprayed it while it remained on the trailer? What did you do about the spots that were covered by supports and did not get sprayed? What would you have done differently? sorry so many questions, but I am still weighing my optionson what to do about my hull. |
|
|
livin', lovin', lovin' livin'
|
|
|
|
|
Brktracer
Senior Member
Joined: December-20-2007 Location: South Carolina Status: Offline Points: 387 |
Post Options
Thanks(0)
Quote Reply
Posted: July-02-2008 at 5:07pm |
|
Thanks.
I used PPG Concept - single stage urethane for the white and black dash. Concept is kind of like clear coat (urethane) with the color mixed in. Before spraying the hull I used a single stage epoxy primer/sealer from PPG to promote adhesion. Concept is not recommended below the water line but the paint store said local marinas are using it and have not had any problems. It looks and feels very similar to gel coat with more gloss and holds a great shine. I've not had any problem with adhesion and it was painted about 7 years ago. The letters are PPG base/clear. The paint shop recommended base/clear be used on any metallic especially for inexperienced painters (like myself). I think the white is two coats primer, three coats of paint. The application was wet on wet. I can't remember exactly how many coats I used. Of course, some of the paint was sanded and buffed off. 
I did paint it on the trailer. The bottom was not completely painted, only as much as I could get to. It has the original gel coat. I did not find it practical to make the bottom of the boat perfect. It is not visible unless you really try to see it. "What did you do about the spots that were covered by supports and did not get sprayed?" They didn't get sprayed! I used some wood to raise the hull off the trailer bunks so the spots are relatively small. Differently? Not much. Maybe done a trace of the lettering or mask like Sam suggested. (I did this for the small letters on the stern) As long as I live I've vowed to never tape off lettering like that agian. It was way too cumbersome but at the time it was the best way I knew to do it. However, it turned out better than I though it would. I'd love to restore another SN one day. Keep the questions coming. I'm glad to help! Matt |
|
|
|
|
MADTOWN78
Groupie
Joined: July-12-2007 Location: United States Status: Offline Points: 67 |
Post Options
Thanks(0)
Quote Reply
Posted: July-02-2008 at 6:35pm |
|
Thanks Matt. More questions
Where did you get the PPG (an automotive paint store)? You never did say, did you use a HPLV sprayer? Did you have to thin the PPG or was it already the right thinness for spraying? You applied wet on wet? Does this mean you sprayed the second coat immediately after the first? or, let the first tack up a little? Did you have any troubles pulling your tape? How long after the white was sprayed did you wait for it to cure before taping off the hull? What was the total cost for your paint? How much did you use? primer, white, black, letter color? The letter color was metalic? Did it actually have metal flake in it, or was it just called metalic beacause of the "metalic" sheen? Did you do any final coats of clear after the lettering and hull were both done? A top coat of sorts for extra protection? So, it sounds like there are lettering templates out there to save the work of taping the letters by hand. Where can I find these? Sam, where did you get your side lettering template made? Matt, Does your friend with the sign shop still have the back template? Lastly, if you had any blistering or hull dings that needed repair --- what did you use? thanks again |
|
|
livin', lovin', lovin' livin'
|
|
|
|
|
Sam B
Senior Member
Joined: November-17-2007 Location: StevensPoint WI Status: Offline Points: 393 |
Post Options
Thanks(0)
Quote Reply
Posted: July-02-2008 at 6:54pm |
|
Madtown,
For the paint masks Call Andy at freelance lettering. 317-244-9272 www.freelanceindy.com Andy is a nautique nut like us. hope this helps |
|
|
|
|
Brktracer
Senior Member
Joined: December-20-2007 Location: South Carolina Status: Offline Points: 387 |
Post Options
Thanks(0)
Quote Reply
Posted: July-03-2008 at 1:05am |
|
Sam,
Looking back, I would've paid some big bucks for that!!! I mean some real big bucks! Madtown..."More questions" no problem. I used a siphon feed gun. Binks model 7. The old style gun. I went by the product data sheet on mixing and recoat times. I did add a little extra thinner for the siphon feed. I learned - use the least amount of air pressuren required to spray the paint and it will eliminate the orange peel. I bought the paint at an automotive paint supply store. It is standard automotive paint. Wet on wet basically means no sanding between coats. This includes the primer and paint coats. Follow the recoat times on the product data sheet - the paint store will have them. I pulled the tape about 4-5 hours after the paint was sprayed. I color sanded and buffed the white before taping off for the blue so it was quite a while in between. Maybe 2-3 weeks. Let's put the memory in gear. I would say I spent somewhere around $1,000 on the paint. I recall 3 quarts of white (I had to do some blending to fix some spots I messed up), 1 quart of primer, 1 quart of black (I repainted the dash 3 times due to runs, mistakes, etc. It's black and black shows everything), 1 pint of blue basecoat, 1 pint of clear, probably about 1 quart of urethane primer for spot repairs. The top was so beat up I had to do substantial "body work" Letter color has metal flake. I recall the colors are 2001 Ford "Performance White" 2001 Mazda "Innocent Blue" and black. I think most paint manuf. change the names from the auto manuf. No top coats over the letters and hull. After the color sanding/buffing you can barely feel the tape edge. Talk to Sam for the template. I can get you a template for the rear if you need one. He still has the computer file. Sand the dings/damage out. Fix it just like a dent in a car. Can use Bondo glass, Bondo, polyester glazing putty, urethane primer. DO NOT use laquer primer (gloss hold out is poor) I used a combination of all the above. Just sand out all cracks and defect first. Cracks will continue if you dont. I hope this helps and I didn't miss any of your q's. I'll be glad to talk on the phone if you're interested. Shoot me an email: brktracer@hotmail.com Glad to help, Matt |
|
|
|
|
MADTOWN78
Groupie
Joined: July-12-2007 Location: United States Status: Offline Points: 67 |
Post Options
Thanks(0)
Quote Reply
Posted: July-03-2008 at 1:41pm |
|
Thanks Matt.
Great answers. Thanks for taking the time. I think this will provide me the info and confidence to tackle the paint. It also helped to make up my mind that paint is the way to go for me (I could never gel and paying someone else would make the regel cost more than the whole boat) I will not be starting such a project till after the summer season. At that time I will probably email for advise on specifics as I go. If that is OK. I would like to track down the templates now. How much for the rear template? or, can I get the computer file? Sam, did you give freelance andy the measurements and he made your mask from it? What did he charge you per mask? Your lettering looks to be a bit different from mine (maybe not, but sytle looks a bit different). Actually my lettering is the same as Matt's (or at least appears to be -- mine is severly faded) |
|
|
livin', lovin', lovin' livin'
|
|
|
|
|
Post Reply
|
|
 Tweet
Tweet
|
| Forum Jump | Forum Permissions You cannot post new topics in this forum You cannot reply to topics in this forum You cannot delete your posts in this forum You cannot edit your posts in this forum You cannot create polls in this forum You cannot vote in polls in this forum |


 Topic Options
 79nautique wrote: