 Boats For Sale:


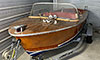


85 2001 LVL Stringer Project |
Post Reply 
|
Page <1 89101112 13> |
| Author | |
uk1979 
Platinum Member 
Joined: June-13-2007 Location: United Kingdom Status: Offline Points: 1411 |
 Post Options Post Options
") Thanks(0) Thanks(0)
 Quote Reply Quote Reply
 Posted: February-22-2011 at 11:09am Posted: February-22-2011 at 11:09am |
|
Its not just you that's loosing weight,the is boat too

Stringer with glass on 
|
|
|
Lets have a go
56 Starflite 77 SN 78 SN 80 BFN |
|
 |
|
|
Big Pappa
Senior Member 

Joined: March-08-2006 Location: United States Status: Offline Points: 322 |
Post Options
Thanks(0)
Quote Reply
Posted: February-21-2011 at 8:48pm |
|
Hey everyone it had been a while since I last gave an update. Things are still moving forward enven though rather slowly!! After loosing 50 pounds in 2009 I decided that I wanted to help others do the same so I studied and got my personal trainer certification. I now am an online personal trainer with the site I used to loose the weight. So that combined with my normal job has kept me very busy. I also competed in a 10K mud run, an 8k run and an adventure race last year so training for those has kept me away.
The final thing is my Dad had a heart attack last year and passed away so that was a big hit on me as well. This has made me even more health conscious than ever, seeing as I made the weight change to improve my health in the first place. I have started back to work now, the second main stringer is out and I have cleaned up the hull of all the old fiberglass from the old stringer. The new LVL stringer is cut out, shaped, coated with CPES, then a layer of mat and the drain installed. All that is left is to install it, then lay up some mat on it. After that all the stringers will be in. Woo Hoo, it only took like 3 years. LOL I am shooting to really get at it and have the boat ready for water in June or July. It will be nice to finally have a boat to take out on the water again!! Kris |
|
|
|
|
Big Pappa
Senior Member
Joined: March-08-2006 Location: United States Status: Offline Points: 322 |
Post Options
Thanks(0)
Quote Reply
Posted: June-15-2010 at 4:56pm |
I mainly wanted to make sure everything was going to be flat where I filled the lap Joints and to give a layer over where I filled for the drain and steering mount hole. It is probably overkill but Oh well, Better over engineered then under. 
|
|
|
|
|
8122pbrainard
Grand Poobah 

Joined: September-14-2006 Location: Three Lakes Wi. Status: Offline Points: 41040 |
Post Options
Thanks(0)
Quote Reply
Posted: June-15-2010 at 4:55pm |
|
Kris,
I like it. Very nice!!! The LVL will be great for those not wanting to go composite and have a hard time finding Doug Fir in their area. I'm glad we now have someone who's using it. Even if the Fir is available, I really think it's a great product for the application. |
|
|
|
|
Big Pappa
Senior Member
Joined: March-08-2006 Location: United States Status: Offline Points: 322 |
Post Options
Thanks(0)
Quote Reply
Posted: June-15-2010 at 4:53pm |

Here is the drain in completely (In the wrong Place though)  I cut a half circle like the original but I then placed a Piece of 1" PVC in there and filled the rest with thickened resin. Again working to make sure the stringer will hopefully not see water. I covered it when I was covering the stringer with mat, so What I will do is drill a small hole in there then fill the PVC with resin. Hopefully that will take care of it. I cut a half circle like the original but I then placed a Piece of 1" PVC in there and filled the rest with thickened resin. Again working to make sure the stringer will hopefully not see water. I covered it when I was covering the stringer with mat, so What I will do is drill a small hole in there then fill the PVC with resin. Hopefully that will take care of it.
The stringer is in the boat now (I did not notice the problem until after I had it installed). So I think I am going to take a hole saw and drill a new hole in the correct place then fill it in the same way I did this one. It will take some time, but it is what I am going to have to do to pay for my mistake. LOL 
Here is where I filled one of the laps in the LVL. It is now nice and smooth. 
The stringer ready to go in. 

And here it is bedded into the boat and weighed down. I got it filleted yesterday and hopefully will get the 2" strips on today. |
|
|
|
|
JoeinNY
Grand Poobah

Joined: October-19-2005 Location: United States Status: Offline Points: 5696 |
Post Options
Thanks(0)
Quote Reply
Posted: June-15-2010 at 4:52pm |
|
why the layer of mat before putting it in?
|
|
|
|
|
Big Pappa
Senior Member
Joined: March-08-2006 Location: United States Status: Offline Points: 322 |
Post Options
Thanks(0)
Quote Reply
Posted: June-15-2010 at 4:40pm |
|
OK guys, the first LVL main stringer is in. Woo Hoo I will describe as I post the pictures.

Here is the stringer shaped laying next to the original. 
Here is the shaped raw wood stringer on the scale, coming in at 27 pounds. Does anyone know what the stringer in Douglas Fir weighs? 
OK, here I decided to move the drain a little to try and add some strength, so it was located where there would be more wood and not make a thin spot. I found out later that this was a mistake because it is now in front of where the stringer is exposed.

Here is the stringer CEPSed, filled and covered with 1 layer of mat ready to go in the boat. 
As others have done I decided to drill out a large (Either 1" or 1.5" I do not remember off the top of my head) hole in the stringer and fill it with a thickened resin (Milled fibers) where the Steering cable mounts. This way there will hopefully be no way water will be able to get to the wood. |
|
|
|
|
Big Pappa
Senior Member
Joined: March-08-2006 Location: United States Status: Offline Points: 322 |
Post Options
Thanks(0)
Quote Reply
Posted: May-20-2010 at 2:16pm |
Awesome, thanks for the input!! 
|
|
|
|
|
8122pbrainard
Grand Poobah
Joined: September-14-2006 Location: Three Lakes Wi. Status: Offline Points: 41040 |
Post Options
Thanks(0)
Quote Reply
Posted: May-19-2010 at 3:26pm |
|
Kris,
Looking good!! The coating on the LVL is a water repellent just there for when they're out in the weather on the contruction site. Just take the belt sander to them. I wouldn't worry too much about the voids in the plys. I'd CPES first and then inject some regular epoxy with a glue syringe. You don't need to fill them up completely. |
|
|
|
|
Big Pappa
Senior Member
Joined: March-08-2006 Location: United States Status: Offline Points: 322 |
Post Options
Thanks(0)
Quote Reply
Posted: May-19-2010 at 2:45pm |
|
Updated Pictures for you all.
This is the Passenger side Secondary all fiberglassed in. Bedded with 2 layers of mat and glassed in with 2", then 4" woven glass on opposite 45 deg angles then 8" woven glass all the way up the side and at least 4" on the hull. 
Same side just the rear of the secondary 
This is the Drivers side hull after the Main was cut out. 
Here is the Fiberglass off of the Main. It took about 5 minutes to pop this off as it was hardly holding on to the wood. 
Here is the Main Stringer laying next to the lvl. If you look close you can see I have traced it out already. 
Old Stringer on top of the LVL 
Old stringer on top of LVL Thickness comparison. Main on top 1.5" LVL on bottom 1.75". I did measure and I have 5.5" between the main and the secondary stringer now and the muffler with carpet is 5" so I should have room. I will just have to make sure and maintain that 5.25" when I install the main. 
A couple of notes about the lvl. There are lap joints that will have to be filled on the outside to keep air bubbles out when you fiberglass it in. I plan to fillet the joint then lay a layer of mat over the whole thing before installing so I have a good even surface to bond to when I install it in the boat. 
One other thing is the laps on the interior of the boards. I plan to take a needle and injecting some resin in these holes to fill the void and make sure it is solid all the way through. Any ideas on good ways to do this effectively? Thinning the epoxy resin maybe? 
All in all I think this is going to be a good option I am going to take extra precaution as I go with this and make sure these are installed the best I can. I have some CPES that should be here later in the week so I will be able to coat this baby good then putting a layer of glass on then glassing it in the boat. Hopefully It should never be touched by water. It is very strong even laterally, these are 13' sticks and they do not bend and bounce with you pick up and carry them like other 2X material I have dealt with does. As far as weight It may be a little heavier than stock I am not sure yet once I get it cut out and pretty close to install shape I plan to put it on the scale and see what it weighs for comparison. There is a varnish like coating (Glue?) that is on the sides that I am going to sand off before I cover it with cpes so I can be sure I get good penetration. That is about it for now, more to come soon. Kris |
|
|
|
|
8122pbrainard
Grand Poobah
Joined: September-14-2006 Location: Three Lakes Wi. Status: Offline Points: 41040 |
Post Options
Thanks(0)
Quote Reply
Posted: May-18-2010 at 9:42pm |
|
Kris,
It's great you're getting back on the boat project. Keep us informed on how the LVL goes. To my knowledge you're the first to use it here. I really feel it's a great alternate to finding Doug Fir and I know it will be a excellent material. |
|
|
|
|
bkhallpass
Grand Poobah

Joined: March-29-2005 Location: United States Status: Offline Points: 4723 |
Post Options
Thanks(0)
Quote Reply
Posted: May-18-2010 at 7:12pm |
|
Since you have already set your secondary stringer, and since you are using a thicker board for the primaries, be sure there is enough room for the muffler before you bed that stringer down. BKH
|
|
|
Livin' the Dream
|
|
|
|
|
storm34
Grand Poobah

Joined: November-03-2008 Location: Dexter Iowa Status: Offline Points: 4492 |
Post Options
Thanks(0)
Quote Reply
Posted: May-18-2010 at 7:04pm |
|
welcome back! Keep us updated!
|
|
|
|
|
Hollywood
Moderator Group

Joined: February-04-2004 Location: Twin Lakes, WI Status: Offline Points: 13512 |
Post Options
Thanks(0)
Quote Reply
Posted: May-18-2010 at 6:49pm |
|
Good for you!
|
|
|
|
|
Big Pappa
Senior Member
Joined: March-08-2006 Location: United States Status: Offline Points: 322 |
Post Options
Thanks(0)
Quote Reply
Posted: May-18-2010 at 5:55pm |
|
I forgot to tell you why I have not been working on the boat. I decided to take time and get myself back in shape and hopefully prevent some health problems that run in my family. So I got to work starting at 238# with about 27% bodyfat and am currently am around 190 and about 10% BodyFat. It has been a lot of work and I still have a little bit more that I want to loose it has been so worth it just by the way I feel and the energy that I now have!!
So working out and I also got my Personal Trainer Certification so I can help others do the same as I have, is what has kept me from getting done with the boat. I guess this has been kind of an A.D.D.project for me. I get started working on it and Oooo something shiny, then I am off for a while then back on it for a bit then get distracted again!! LOL Hopefully this time I am on it until I finish!! |
|
|
|
|
Big Pappa
Senior Member
Joined: March-08-2006 Location: United States Status: Offline Points: 322 |
Post Options
Thanks(0)
Quote Reply
Posted: May-18-2010 at 5:38pm |
|
What's up guys!! It has been looks like almost a year since my last post on this project. It feels like it has been going on for years.... Oh, wait..

Anyway I have both the secondaries in now and the drivers side Primary is out. It was a bit of a pain to get out but it is done!! I was shocked to see how many places there were from the factory, that water could potentially get to the wood. Even though I should not be by now, I still was. Needless to say this will not be a problem with the stringers I am putting in!! I am heading out to pick up the LVL for my main stringers. I am going to give it a go it is a little thicker than what was in there 1.75" vs 1.5". Everything should fit back in without too much fuss. I figure as long as I keep my cradle as the baseline and work off of it everything else should fall into place. Now all that is left to do is do it!! I will post some updated pictures soon. Kris |
|
|
|
|
Big Pappa
Senior Member
Joined: March-08-2006 Location: United States Status: Offline Points: 322 |
Post Options
Thanks(0)
Quote Reply
Posted: June-02-2009 at 1:51am |
|
The stringer is in. I was real busy running around this weekend so I did not get a chance to work on the boat. I came home today though and vacuumed out the fiberglass dust from the grinding I did on it last week. Then I laid in the 2 layers of mat and sat in the secondary. I finally feel like I am making progress. This one stringer has been over a year in the making. The next 3 should hopefully go pretty quick. I still have to do the filling and strips up the side but I have it bedded!! :-)
Here is the stringer being laminated together. 
Here it is in the boat. Finally!!! Woo Hoo!! 
|
|
|
|
|
critter
Platinum Member

Joined: January-11-2008 Location: New Hill, NC Status: Offline Points: 1227 |
Post Options
Thanks(0)
Quote Reply
Posted: May-27-2009 at 2:17pm |
|
Kris,
Looks like you are ready to go. "Do I put down a layer of epoxy, lay on the mat, wet it out, then put some more on the other piece for good measure, then sandwich it all together and weight it down to hold it together good? Is that all there is to it?" Sounds like you have a plan. This will mate the materials together nicely. |
|
|
1980 Ski Nautique
1966 Barracuda |
|
|
|
|
Big Pappa
Senior Member
Joined: March-08-2006 Location: United States Status: Offline Points: 322 |
Post Options
Thanks(0)
Quote Reply
Posted: May-27-2009 at 2:12pm |
|
Well I have finally gotten back to work on the boat. Yeaaa!! This past weekend I got the boat back on the newly reworked braces so she is good and level and stable. I then got the stringers out and finished cutting the bracing cutouts on them. I then sanded them down good so everything was smooth and nice and clean. Then laminated both sides of all the pieces with mat and epoxy. Finally yesterday I pulled the pieces out and gave them a good soap and water scrubbing to knock the dust off from where I cut the edges off and sanded them smooth and make sure they were ready to be laminated together. I plan on putting them together tonight with a layer of mat and epoxy between each piece.
I do have a question on that though, Do I put down a layer of epoxy, lay on the mat, wet it out, then put some more on the other piece for good measure, then sandwich it all together and weight it down to hold it together good? Is that all there is to it? Here are all the pieces to the Drivers side Secondary laid out after getting a good scrub down. 
Here I stacked them up like they will be laminated. 
Here is a shot of my materials. I had a truck toolbox sitting in my garage and that turned out to be the perfect place to put all my glass materials. 
|
|
|
|
|
BuffaloBFN
Grand Poobah

Joined: June-24-2007 Location: Gainesville,GA Status: Offline Points: 6094 |
Post Options
Thanks(0)
Quote Reply
Posted: May-01-2009 at 10:55am |
|
Howdy Kris!
Don't you hate it when life gets in the way? I was most fortunate with an understanding wife and not having major changes going on...now she's got me busy! LOL |
|
|
|
|
Big Pappa
Senior Member
Joined: March-08-2006 Location: United States Status: Offline Points: 322 |
Post Options
Thanks(0)
Quote Reply
Posted: April-30-2009 at 5:45pm |
Yea we are in Gardendale now. We usually go up to Smith Lake. We like it up there, it is somewhat close and the water is always clean. |
|
|
|
|
85jws
Groupie 
Joined: October-05-2008 Location: United States Status: Offline Points: 53 |
Post Options
Thanks(0)
Quote Reply
Posted: April-29-2009 at 8:22pm |
|
Kris,
I will be following your thread as I too have an 85 and will be doing some floor work next winter. I have a soft spot under the observers seat and am a little scared at what I may get into. I am in Moody, AL. Did you move to Gardendale area? Which lake do you go to? jay |
|
|
Jay
Current 2000 Air Nautique Old 1985 Ski Nautique |
|
|
|
|
Big Pappa
Senior Member
Joined: March-08-2006 Location: United States Status: Offline Points: 322 |
Post Options
Thanks(0)
Quote Reply
Posted: April-29-2009 at 6:53pm |
|
Hey all I have not fell off of the planet, I am in our new house and have the boat sitting patiently in the garage. I finally have all of my honey do's completed for now and it is time to get back to work on the boat. Since it has just been sitting for over a year now I guess it is about time. :-) Anyway I just made my order from US Composites, I ordered everything I think I am going to need except the Foam. I figured I would order that once I got a little closer so it would not be taking up a bunch of space in my garage. The materials should be her early next week. I will have to adjust my hull supports to work with a level Floor. They were built to hold my floor level with a gravel drive below, now they dont work with concrete.
 I guess that is not to bad of a problem to have. I should be able to get to work on glassing the first stringer in once taht is done. Then it is off to the races, I figure it will probably take about 2 months or so get get it all done. (Reading between the lines... Probably more like 3 months) I guess that is not to bad of a problem to have. I should be able to get to work on glassing the first stringer in once taht is done. Then it is off to the races, I figure it will probably take about 2 months or so get get it all done. (Reading between the lines... Probably more like 3 months)
|
|
|
|
|
Big Pappa
Senior Member
Joined: March-08-2006 Location: United States Status: Offline Points: 322 |
Post Options
Thanks(0)
Quote Reply
Posted: July-14-2008 at 1:09am |
Yea I was watching it pretty close. I already had the long piece out and was just trying to get the rest out. I had cut most of it and was just trying to break the parts I could not get to easily. I am using a sawsall and 4.5" grinder as well. The grinder cuts through like butta!!! |
|
|
|
|
BuffaloBFN
Grand Poobah
Joined: June-24-2007 Location: Gainesville,GA Status: Offline Points: 6094 |
Post Options
Thanks(0)
Quote Reply
Posted: July-13-2008 at 12:03pm |
|
Kris, be careful with that foot hammer. The hull glass will flex some under the stringer, and too much force could cause cracking in glass you want to keep.
I used a combo of a sawzall, a metal cutting grinding wheel, and a 4.5" diamond blade to cut the stringers out at their base. There were places that I wished I had a 7" grinder because of the steeper hull angle, but I was still able to get them out without too much frustration. |
|
|
|
|
Big Pappa
Senior Member
Joined: March-08-2006 Location: United States Status: Offline Points: 322 |
Post Options
Thanks(0)
Quote Reply
Posted: July-13-2008 at 3:16am |
|
The first stringer is out!!! I leveled, and braced the boat back up. Taking BFN's advice I put the cradle and pylon back in to level the boat and for future stringer locating. After all that I pulled the Drivers Side Secondary. It was in good shape for the most part but there is rot there. Once I got it out and looked at the there was hardly any glass past half way up the stringer on the starboard side.
Here is the floor with the stringer out. 
Here is a shot of the stringer out of the boat. I broke it in the process of getting it out. I used the foot hammer a little too hard. :-) 
Here is the measurements of the stringer pieces. I am going to clean it up and create one on the computer for future people to have as a reference. 
|
|
|
|
|
Big Pappa
Senior Member
Joined: March-08-2006 Location: United States Status: Offline Points: 322 |
Post Options
Thanks(0)
Quote Reply
Posted: July-10-2008 at 1:13pm |
|
That is good to know. I was worried that there has been work done in both areas of my boat. It is working fine it is just reassuring to know that it was done by the factory.
|
|
|
|
|
horkn
Platinum Member

Joined: September-10-2007 Location: Cedarburg, Wi Status: Offline Points: 1511 |
Post Options
Thanks(0)
Quote Reply
Posted: July-09-2008 at 9:19pm |
I agree. My 78 martinique had the identical greyish material there. I know it is factory. |
|
|
78 martinique- refloored, reinforced, stringers re glassed, re engineered interior
GT40P heads Edelbrock Performer intake acme 4 blade http://img.photobucket.com/albums/v64/horkn/fish/nautique.jpg |
|
|
|
|
MADTOWN78
Groupie
Joined: July-12-2007 Location: United States Status: Offline Points: 67 |
Post Options
Thanks(0)
Quote Reply
Posted: July-09-2008 at 3:28pm |
|
The pylon mount and shaft thru hulls on my 78 and my buddies 81 SN have the identical greyish "patch" job. Same goes for the raw water intake thru hull. I mean identical!! Same approximate shape and size.
It makes me think that it is a factory job. |
|
|
livin', lovin', lovin' livin'
|
|
|
|
|
Big Pappa
Senior Member
Joined: March-08-2006 Location: United States Status: Offline Points: 322 |
Post Options
Thanks(0)
Quote Reply
Posted: July-09-2008 at 2:00pm |
I was planning on using the cradle to locate the stringers when replacing them but I had not though about using the pylon as well. Good I dea, the more things to keep constant the better likely hood it will go back together correctly!!! Thanks for the tip!!! Kris |
|
|
|
|
Post Reply
|
Page <1 89101112 13> |
 Tweet
Tweet
|
| Forum Jump | Forum Permissions You cannot post new topics in this forum You cannot reply to topics in this forum You cannot delete your posts in this forum You cannot edit your posts in this forum You cannot create polls in this forum You cannot vote in polls in this forum |


 Topic Options
 JoeinNY wrote: