 Boats For Sale:


Engine placement question |
Post Reply 
|
Page 12> |
| Author | ||
jblocal 
Senior Member 

Joined: September-06-2010 Location: Stuart, Florida Status: Offline Points: 203 |
 Post Options Post Options
") Thanks(0) Thanks(0)
 Quote Reply Quote Reply
 Topic: Engine placement question Topic: Engine placement questionPosted: February-13-2016 at 6:38pm |
|
|
I recently pulled my engine in my fish Nautique and replaced engine stringers, engine bay bulkheads and anything else that I could get to with wood core. I got new engine mounts and sett everything as close as possible to what it was. Dropped my engine back in and I'm sitting about 1/2 farther back. I can tell by the marks on shaft. It would be a real pain at this point to try move engine 1/2 forward so my question is any problem with leaving it where it is?
|
||
 |
||
|
8122pbrainard
Grand Poobah 

Joined: September-14-2006 Location: Three Lakes Wi. Status: Offline Points: 41040 |
Post Options
Thanks(0)
Quote Reply
Posted: February-13-2016 at 6:54pm |
|
|
Cole,
I know fore to aft placement on a small hull is critical but with the big Fish hull, I don't feel The 1/2" will make much difference. With the deep hull of the Fish, you shouldn't have a problem getting the engine lower so it will line up with the shaft. Keep us posted and don't forget pictures! 
|
||
|
||
|
jblocal
Senior Member
Joined: September-06-2010 Location: Stuart, Florida Status: Offline Points: 203 |
Post Options
Thanks(0)
Quote Reply
Posted: February-14-2016 at 1:44am |
|
|
Awesome! After I tightened everything up its more like 3/8". Here is some pics of my project. This is my first major fiberglass restoration project so lot of learning but I feel everything is much better then factory.
 Cut the top of first stringer off. Stringer Popped right out with pry bar. |
||
|
||
|
jblocal
Senior Member
Joined: September-06-2010 Location: Stuart, Florida Status: Offline Points: 203 |
Post Options
Thanks(0)
Quote Reply
Posted: February-14-2016 at 1:52am |
|
 Decided to go with pvc for new stringers. I know lot people claim wood is way to go and stick what was there but in the end I wanted wood free. I got a sheet of 3/4 pvc board from fiberglass Florida. I ripped it down to 4" by 8' and laminated the pieces together with 18 ounce cloth and epoxy staggering the joints to get my 12' by 1 1/2" wide. |
||
|
||
|
jblocal
Senior Member
Joined: September-06-2010 Location: Stuart, Florida Status: Offline Points: 203 |
Post Options
Thanks(0)
Quote Reply
Posted: February-14-2016 at 2:03am |
|
 I cut the top off the stringer and removed wood left everything else to hold new pvc stringers in right place. Sanded and cleaned out stringer area real good and mixed up a nice batch of thickend epoxy with cabosil to glue in new stringer. Got that set where I wanted and poured thickend epoxy to fill rest of voids. Then I went over it all with 4 layers of 18 oz cloth with epoxy which was probably over kill. I also removed those bulkheads and realized how much work I was getting into. |
||
|
||
|
jblocal
Senior Member
Joined: September-06-2010 Location: Stuart, Florida Status: Offline Points: 203 |
Post Options
Thanks(0)
Quote Reply
Posted: February-14-2016 at 2:11am |
|
 Fast forward. Second stringer and engine bay getting there. Used 1/2 foam for engine bay. Did 2 layers 18 oz glass on backside of engine bay sides and bulkhead before glued them in place. Then 2 more layers 18 oz on the frontside after. Anywhere any epoxy was getting layed I ground down to bare fiberglass and cleaned really well for good bond. |
||
|
||
|
jblocal
Senior Member
Joined: September-06-2010 Location: Stuart, Florida Status: Offline Points: 203 |
Post Options
Thanks(0)
Quote Reply
Posted: February-14-2016 at 2:18am |
|
   Tore out wet wood around the rudder and replaced with pvc and 3 layers 18 0z and 1 layer 1708 in between |
||
|
||
|
jblocal
Senior Member
Joined: September-06-2010 Location: Stuart, Florida Status: Offline Points: 203 |
Post Options
Thanks(0)
Quote Reply
Posted: February-14-2016 at 2:29am |
|
 Mocking up new motor mounts. Used 2x3 1/4"structural aluminum  All the removable decks I cut the old wood core out from the bottom and replaced with 3/4 pvc or foam depending if it's getting screws or not. Any deck in the back I could get to from underneath I replaced the coring. Was terrible working with epoxy upside down on my back glueing core in and doing lay ups over it all. The square notches in this piece is giving me just enough clearance for gas tank connections and hoses. |
||
|
||
|
jblocal
Senior Member
Joined: September-06-2010 Location: Stuart, Florida Status: Offline Points: 203 |
Post Options
Thanks(0)
Quote Reply
Posted: February-14-2016 at 2:36am |
|
 Some 545 epoxy primer  2 part poly topcoat. The bigger holes in the top of bulkhead are for access to thru bolts for the console. An aluminum backing plate was also added for console. |
||
|
||
|
8122pbrainard
Grand Poobah
Joined: September-14-2006 Location: Three Lakes Wi. Status: Offline Points: 41040 |
Post Options
Thanks(0)
Quote Reply
Posted: February-14-2016 at 6:38am |
|
|
Cole,
Very interesting and looking great.  I feel your laminating the PVC with the glass between and then the 3 layups over the stringers was a good move. It should make up the difference between the wood and lesser PVC flex modulus plus the joints making up longer lengths from the 8' PVC. The same technique was used by Tim and Joe with their Coosa stringer jobs. Several years ago we had a Fish owner come on site with his stringer job. He posted a couple times and then nothing. I have a feeling he gave up since the Fish stringer job is a big undertaking. I admire your job. Yes, working overhead is a real PITA! I've been there! I feel your laminating the PVC with the glass between and then the 3 layups over the stringers was a good move. It should make up the difference between the wood and lesser PVC flex modulus plus the joints making up longer lengths from the 8' PVC. The same technique was used by Tim and Joe with their Coosa stringer jobs. Several years ago we had a Fish owner come on site with his stringer job. He posted a couple times and then nothing. I have a feeling he gave up since the Fish stringer job is a big undertaking. I admire your job. Yes, working overhead is a real PITA! I've been there!
|
||
|
||
|
backfoot100
Platinum Member 
Joined: January-03-2007 Location: United States Status: Offline Points: 1897 |
Post Options
Thanks(0)
Quote Reply
Posted: February-14-2016 at 7:13am |
|
|
The work that guys do on this site to keep these boats running is purely amazing to me. Very nicely done!!!!
|
||
|
When people run down to the lake to see what's making that noise, you've succeeded.
Eddie |
||
|
||
|
Fl Inboards
Grand Poobah

Joined: January-20-2008 Location: United States Status: Offline Points: 2065 |
Post Options
Thanks(0)
Quote Reply
Posted: February-14-2016 at 10:15am |
|
1/2"farther back make sure you have propeller clearance with the rudder especially if you modernize your propeller with an ACME. Another option is to cut a 1/2" from the coupler end of the shaft and re dimple the shaft where the set screws go, there should be enough key way to support up to a 1/2" cut off. Also nice work on the project. |
||
|
Hobby Boats can be expensive when the hobbyist is limited on their own skill and expertise.
1993 Shamrock "fat" 20. 2008 Nautique 196 5.0 |
||
|
||
|
8122pbrainard
Grand Poobah
Joined: September-14-2006 Location: Three Lakes Wi. Status: Offline Points: 41040 |
Post Options
Thanks(0)
Quote Reply
Posted: February-14-2016 at 10:54am |
|
Jody, Excellent point. I'm glad you thought of it. Cole, I'd cut off the prop shaft even if you have the clearance to the rudder. You don't want to increase the overhung load on the cutlass bearing, strut as well as the shaft. The rule of thumb clearance between the strut and prop is one shaft diameter. I know Tim likes to go less and I agree with him. I sure wouldn't worry about less key and keyway considering about 85% or better of the torque is transmitted to the shaft via the heat shrink/press fit of the coupling. |
||
|
||
|
jblocal
Senior Member
Joined: September-06-2010 Location: Stuart, Florida Status: Offline Points: 203 |
Post Options
Thanks(0)
Quote Reply
Posted: February-14-2016 at 11:16am |
|
|
Thanks guys! I think I'm sitting right where I should be then. The prop was maybe about 1/2 from strut to begin with. Project was lot of work and I didn't really know what I got myself into. I been at it almost everyday after work and weekends since around thanksgiving. I also found out my boat master trailer is 30 years old so that got a complete overhaul also. Called up boat master and gave them serial number and they sent everything which bolted right back up perfectly.
 |
||
|
||
|
jblocal
Senior Member
Joined: September-06-2010 Location: Stuart, Florida Status: Offline Points: 203 |
Post Options
Thanks(0)
Quote Reply
Posted: February-14-2016 at 11:43am |
|
 Went out and measured the distance between prop and strut and I'm at 13/16". Still haven't tighted up the coupling bolts so I might get another 1/16. So they must have had it way to close before. Im going to try finish everything putting everything back this week so I can run the boat next weekend. I'll let everyone know how it goes. Also appreciate everyone on this site couldn't of done all this without all of you! |
||
|
||
|
8122pbrainard
Grand Poobah
Joined: September-14-2006 Location: Three Lakes Wi. Status: Offline Points: 41040 |
Post Options
Thanks(0)
Quote Reply
Posted: February-14-2016 at 12:14pm |
|
|
Cole,
I feel you are good to go with the current shaft length. Thanks for the picture. What's the double nut on the prop for? If there's not enough thread on the shaft to snug up the prop, a brass washer works great. If you replace the nut with ether a castellated or nylock type, make sure you do NOT use a stainless. (Eddie will confirm that!) Don't forget to lap the prop to the shaft ether. |
||
|
||
|
Gary S
Grand Poobah

Joined: November-30-2006 Location: Illinois Status: Offline Points: 14096 |
Post Options
Thanks(0)
Quote Reply
Posted: February-14-2016 at 12:44pm |
|
|
All Shamrocks have double nuts, if the Fish's shaft is long enough to have 2 maybe they did from the factory also. The only thing wrong with his is the one touching the prop should be the thinner jam style.
|
||
|
||
|
jblocal
Senior Member
Joined: September-06-2010 Location: Stuart, Florida Status: Offline Points: 203 |
Post Options
Thanks(0)
Quote Reply
Posted: February-14-2016 at 5:19pm |
|
|
It's been like this since I've had the boat. The second nut is a castellated nut and lines up perfectly once tightend up to accept a cotter pin so nuts won't back off. And the nuts are stainless sounds like they shouldn't be.
|
||
|
||
|
8122pbrainard
Grand Poobah
Joined: September-14-2006 Location: Three Lakes Wi. Status: Offline Points: 41040 |
Post Options
Thanks(0)
Quote Reply
Posted: February-14-2016 at 6:00pm |
|
|
Cole,
Stainless to stainless galls and locks up. This is the case when you use a stainless nut on a stainless prop shaft. Many have found out the hard way. Eddie (backfoot) just recently had the problem and posted the issue in his American Skier repair thread. I too had the problem when I purchased my Tique. Eddie as well as myself were able to save the shaft by carefully cutting the nut in several spots, expanding it to get it off and then chasing the threads with a die. Have you had the prop off? By your wording it sound like you have so you may be lucky. I wonder why the prop sits so far up on the taper? It could be that at one time it was damaged and when the prop was repaired the prop shop re reamed it making the taper larger? I highly recommend getting the prop off and replacing the nut. As mentioned, a brass washer can be used as a spacer or use a nylock brass nut. I also recommend Lapping the prop to the shaft. |
||
|
||
|
Gary S
Grand Poobah
Joined: November-30-2006 Location: Illinois Status: Offline Points: 14096 |
Post Options
Thanks(0)
Quote Reply
Posted: February-14-2016 at 6:38pm |
|
|
Maybe just maybe your used to seeing boats that never leave sight of land Pete? Just keeping it original
 Here is Shamrocks version of Art Cozier explanation- Atlantis is correct. The prop should be installed and seated with the large nut first. After the prop is correctly seated on the taper, remove the large nut and put on the small and snug it, don't do too much. Then install the large nut again and use it as you would a jam nut. As stated, when the jam nut is tightened, it effectively takes all the load on the threads. So what happens is the large nut acts both as a jam nut and the main load carrier. If it were the other way around (big nut first then small and using the small as the jam nut) then the small nut would unload the large. This has led to cases of galling, especially in stainless on stainless where the nuts would literally be welded to the shaft. Nay |
||
|
||
|
jblocal
Senior Member
Joined: September-06-2010 Location: Stuart, Florida Status: Offline Points: 203 |
Post Options
Thanks(0)
Quote Reply
Posted: February-14-2016 at 8:06pm |
|
|
Yes I have had the prop off. I actually had this shaft made couple years back by Stuart propellar. It's been a while but I think they just made it the same as what was there. The propellar is acme and only 1 year old and I bought new from acme so I hope it wasn't repaired lol. The old federal prop sat in the same spot. I will pull the prop, replace nuts, and lap prop.
|
||
|
||
|
8122pbrainard
Grand Poobah
Joined: September-14-2006 Location: Three Lakes Wi. Status: Offline Points: 41040 |
Post Options
Thanks(0)
Quote Reply
Posted: February-14-2016 at 9:36pm |
|
|
gary,
I have seen the jam nut used and it's not just an off shore method. I typically see it on older wood boats like old launches. My 1918 was double nutted. It may have been the very first method of ensuring the nut stays on? I was surprised to see it on Cole's Fish but his having a shaft made by Stuart explains why. |
||
|
||
|
Fabcon
Gold Member
Joined: August-27-2012 Location: Buffalo. Mn Status: Offline Points: 552 |
Post Options
Thanks(0)
Quote Reply
Posted: February-16-2016 at 4:26pm |
|
|
Very nice work
|
||
|
1976 Ski Nautique 351 Escort
1984 Barefoot Nautique (Parting Out) |
||
|
||
|
shierh
Gold Member
Joined: April-29-2015 Location: Florida Status: Offline Points: 605 |
Post Options
Thanks(0)
Quote Reply
Posted: February-19-2016 at 12:35am |
|
|
lol
the big nut small nut issue has been hashed and rehashed on every forum since al gore invented the internet. on my Hatteras we used big nut first i think. Anyhow walk around the bone yard at a big boat marina and its about 50/50. Makes no difference its simply loading the threads. I liked to hone the 2 surfaces so they got a nice smooth tight bite. also the most important thing is to make sure the prop doesnt ride the key. I also like to lap the prop hub to the shaft. I hate vibration. |
||
|
||
|
DayTony
Gold Member

Joined: June-30-2013 Location: Salem MA Status: Offline Points: 830 |
Post Options
Thanks(0)
Quote Reply
Posted: February-19-2016 at 2:12am |
|
|
Great job on the stringers, I hope to someday get the time to clean up my bilge and do my repower. Time is such a hard thing to come by. haha
another option over pvc for some of the smaller coring jobs like the rudder post and such is FRP. (not the stuff on your shower wall) They sell it in mcmastercarr in the same shapes and sizes as you can buy steel and alum. I love the stuff, and its is amazing to work with. check it out. The prop nut discussion. haha Contrary to what most say and everything you have seen in the past the large nut is designed to hold the prop and the smaller one is designed to be the "locking" nut on the end. The crazy thing is if you take a walk around any boat yard and 90% of them have it wrong. and still have no failures. |
||
|
1988 Barefoot nautique-454
|
||
|
||
|
shierh
Gold Member
Joined: April-29-2015 Location: Florida Status: Offline Points: 605 |
Post Options
Thanks(0)
Quote Reply
Posted: February-19-2016 at 10:45am |
|
|
Taper holds the prop which is why you lap it and also hone the key so it doesnt ride on it.
Once prop is seated properly you can take the nut off and its not going to fall off, at least in forward gear. |
||
|
||
|
Gary S
Grand Poobah
Joined: November-30-2006 Location: Illinois Status: Offline Points: 14096 |
Post Options
Thanks(0)
Quote Reply
Posted: February-19-2016 at 11:06am |
|
Except when the guy who built your boat tells you to install the thin nut first and has the documentation to back it up. |
||
|
||
|
8122pbrainard
Grand Poobah
Joined: September-14-2006 Location: Three Lakes Wi. Status: Offline Points: 41040 |
Post Options
Thanks(0)
Quote Reply
Posted: February-19-2016 at 11:10am |
|
Steve, Thanks for bringing this up. I've mentioned it several times plus stressed the fact regarding the holding power of a taper in the lapping the prop to the shaft thread. I've also mentioned I've seen a few boats through the years where the nut is gone and the props still on the shaft!! |
||
|
||
|
8122pbrainard
Grand Poobah
Joined: September-14-2006 Location: Three Lakes Wi. Status: Offline Points: 41040 |
Post Options
Thanks(0)
Quote Reply
Posted: February-19-2016 at 11:13am |
|
Yes, from an engineering standpoint, you want the load on the regular nut since it has more thread contact than the thin jam nut. |
||
|
||
|
jblocal
Senior Member
Joined: September-06-2010 Location: Stuart, Florida Status: Offline Points: 203 |
Post Options
Thanks(0)
Quote Reply
Posted: February-28-2016 at 10:47pm |
|
|
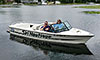
I finally got my boat back in the water today and it ran awesome! I upgraded to a sea star hydraulic steering and it is so much nicer.
|
||
|
||
|
Post Reply
|
Page 12> |
 Tweet
Tweet
|
| Forum Jump | Forum Permissions You cannot post new topics in this forum You cannot reply to topics in this forum You cannot delete your posts in this forum You cannot edit your posts in this forum You cannot create polls in this forum You cannot vote in polls in this forum |


 Topic Options
 jblocal wrote: