 Boats For Sale:


Stringer Repair 1985 2001 Ski Nautique |
Post Reply 
|
Page 123 10> |
| Author | ||
iplan 
Senior Member 

Joined: April-19-2010 Location: Lake Murry SC Status: Offline Points: 201 |
 Post Options Post Options
") Thanks(0) Thanks(0)
 Quote Reply Quote Reply
 Topic: Stringer Repair 1985 2001 Ski Nautique Topic: Stringer Repair 1985 2001 Ski NautiquePosted: July-01-2014 at 7:14pm |
|
 I went with a painted floor (2 coats of Interlux 200-e for the primer, 2 coats of Interlux Brightsides, then a final coat of Interlux Brightsides with Intergrip Non Skid)..... After the last coat of Brightsides was on, it was a matter of installing the furniture, and heading to the lake.  Victory! IF I CAN DO THIS ~ YOU CAN DO THIS! |
||
|
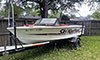
85 Ski Nautique 2001.
Stringer replacement job completed July 3 2014. Exterior painted June 2015. The Trailer is next. |
||
 |
||
|
iplan
Senior Member
Joined: April-19-2010 Location: Lake Murry SC Status: Offline Points: 201 |
Post Options
Thanks(0)
Quote Reply
Posted: June-07-2014 at 3:29am |
|
|
Seems like the last month of posts have been mostly monologues in nature ~ but I did want to keep you updated.
I decided to run a layer of biax over the layer of fiberglass cloth on the floor to strengthen the bond between the floor and hull. The engine is going in on Monday ~ it was supposed to go in today, but the garage was swamped..... Today's question if anyone is interested in helping out: I was installing the battery and running the battery cables, and it occured to me that a one of the wires in the electrical harness is supposed to attach to the battery, but I didn't make any notes on this when I was doing the tear down. Any idea which wire(s)? I assume it is one of the shorter wires in the harness, but there are several of them ~ as the bilge pump and automatic float switch are there also. I've been delaying so much on painting ~ trying to get the fiberglass absolutely perfect. Once that fiberglass is painted, there's no fixing it.... BTW, the decision to go with a non carpet floor has cost me at least a week if not more ~ as the carpet would cover many flaws in the finish (eg: a drop of epoxy that fell where it shouldn't have). Put carpet over that, and no one would ever know it. Paint over it, and everyone would think you had a blister...... So ~ I have been sanding and resanding like a mad man; building up low spots, and sanding down high spots ~~~ then you invariably have to sand again.... Best, iplan |
||
|
85 Ski Nautique 2001.
Stringer replacement job completed July 3 2014. Exterior painted June 2015. The Trailer is next. |
||
|
||
|
iplan
Senior Member
Joined: April-19-2010 Location: Lake Murry SC Status: Offline Points: 201 |
Post Options
Thanks(0)
Quote Reply
Posted: May-29-2014 at 2:32am |
|
|
Well ~~~ it's been 5 hours, and I've been thinking about the single layer of fiberglass cloth laid on top of the mat fillet which holds the floor to the hull wall, and the Primary then Secondary stringers.
I'm thinking the single layer of fiberglass cloth is not going to be strong enough.... Now I'm thinking I'm going to run a layer of 12" Biax to strengthen the bond between the floor and hull. My original plan was to add another layer of Fiberglass cloth ~~~ but that just adds strength in 2 directions. Either way, this is going to set me back some time ~ but it should result in a stronger boat. The question I have (from someone who has done this before) is "What would you do?" The floor separated from the hull wall ~ causing me to have to do the stringer replacement in the first place..... I don't want to have to do it again (at least not on this boat). Can I get some kind of feedback from someone? |
||
|
85 Ski Nautique 2001.
Stringer replacement job completed July 3 2014. Exterior painted June 2015. The Trailer is next. |
||
|
||
|
iplan
Senior Member
Joined: April-19-2010 Location: Lake Murry SC Status: Offline Points: 201 |
Post Options
Thanks(0)
Quote Reply
Posted: May-28-2014 at 7:56pm |
|
|
Completed Floor!
 
|
||
|
85 Ski Nautique 2001.
Stringer replacement job completed July 3 2014. Exterior painted June 2015. The Trailer is next. |
||
|
||
|
iplan
Senior Member
Joined: April-19-2010 Location: Lake Murry SC Status: Offline Points: 201 |
Post Options
Thanks(0)
Quote Reply
Posted: May-26-2014 at 7:14pm |
|
 Hey! Can you believe it? I actually figured this one out ~~~~ I made some chopped strand out of some extra mat I have. I pulled it apart by hand and then just cut it into tiny pieces with my scissors. I was surprised how well it laid down. Really made for some smooth transitions. Now: my layup plan for the floor is as follows: 1. Chopped Strand Fillet connecting hull to floor edge. 2. Chopped Strand Fillet to address any issues regarding a "level" transition between plywood pieces 3. Two layers of 2" tape on the seams. 4. A single layer of fiberglass cloth that covers the top of the floor, and rises up about 12 inches onto the hull. I'm thinking I probably need another layer of cloth over the top of the floor ~ but concerns about running out of epoxy have caused me to skimp here for now. If I have any epoxy left over, I'm going to go back with another layer of cloth. I've covered everything up to the battery box ~~~~~ once it cures, I'll finish up underneath the bow, and go back with another layer of cloth if I have any left over epoxy. |
||
|
85 Ski Nautique 2001.
Stringer replacement job completed July 3 2014. Exterior painted June 2015. The Trailer is next. |
||
|
||
|
iplan
Senior Member
Joined: April-19-2010 Location: Lake Murry SC Status: Offline Points: 201 |
Post Options
Thanks(0)
Quote Reply
Posted: May-26-2014 at 2:28pm |
|
|
I'm out of fiberglass thickener!
Anybody know of something I could use as a filler ~ mostly for fairing applications ~ that would be available locally? I've got some mat that I can chop up ~~~~~ but I'm not sure that would be ideal for fairing...... Was thinking talc, but I'm not sure where I'd go to get it (Lowe's, Home Depot have no idea what I'm talking about). |
||
|
85 Ski Nautique 2001.
Stringer replacement job completed July 3 2014. Exterior painted June 2015. The Trailer is next. |
||
|
||
|
SNobsessed
Grand Poobah 
Joined: October-21-2007 Location: IA Status: Offline Points: 7102 |
Post Options
Thanks(0)
Quote Reply
Posted: May-25-2014 at 12:06am |
|
|
Good deal.
Use brake caliper grease, it is synthetic. Regular grease softens the nylon liner. |
||
|
“Beer is proof that God loves us and wants us to be happy.”
Ben Franklin |
||
|
||
|
iplan
Senior Member
Joined: April-19-2010 Location: Lake Murry SC Status: Offline Points: 201 |
Post Options
Thanks(0)
Quote Reply
Posted: May-24-2014 at 3:00pm |
|
|
VICTORY!
Got the cable off at the steering wheel, and threaded through the bulkhead. I intend to change the steering wheel also. Any tips on how to do that? Also, what kind of grease do you use on the steering cable? I wiped it all off when I disassembled it. Thanks ~~~ |
||
|
85 Ski Nautique 2001.
Stringer replacement job completed July 3 2014. Exterior painted June 2015. The Trailer is next. |
||
|
||
|
gun-driver
Grand Poobah
Joined: July-18-2008 Location: Pittsburgh, Pa Status: Offline Points: 4112 |
Post Options
Thanks(0)
Quote Reply
Posted: May-24-2014 at 11:07am |
|
|
Disassemble as Chris said but since it's already out of the conduit your going to have to use a wire fish of some sort to pull it through.
If you don't have a wire fish some stiff Romex or a stiff wire will work to pull it through. |
||
|
||
|
SNobsessed
Grand Poobah
Joined: October-21-2007 Location: IA Status: Offline Points: 7102 |
Post Options
Thanks(0)
Quote Reply
Posted: May-24-2014 at 12:02am |
|
|
Unscrew that plastic nut holding the cable to the helm. Then spin the steering wheel. The cable's spiral core meshes with the pulleys inside the helm. Have a rag ready 'cause it's greasy. Fix a rope onto this end of the cable & pull the cable out towards the stern. Tie your new cable onto the rope & then pull it back through. When you re-thread the cable into the helm, you have the opportunity to get the steering wheel centered when rudder is centered.
|
||
|
“Beer is proof that God loves us and wants us to be happy.”
Ben Franklin |
||
|
||
|
iplan
Senior Member
Joined: April-19-2010 Location: Lake Murry SC Status: Offline Points: 201 |
Post Options
Thanks(0)
Quote Reply
Posted: May-23-2014 at 6:29pm |
|
|
Perhaps it would be even easier if I could get the metal rod part of the rudder end of the steering cable off ~~~~ this unflexible end is why it will not thread through the bulkhead tube now.
There's a bolt there, but is it possible to remove the metal rod? 
|
||
|
85 Ski Nautique 2001.
Stringer replacement job completed July 3 2014. Exterior painted June 2015. The Trailer is next. |
||
|
||
|
iplan
Senior Member
Joined: April-19-2010 Location: Lake Murry SC Status: Offline Points: 201 |
Post Options
Thanks(0)
Quote Reply
Posted: May-23-2014 at 4:35pm |
|
|
Well I waited too long to run my cables back through, but I'm not sure I could have done it any other way.
I will say, it was not fun threading the the oil sensor cable, throttle cable, bilge pump hose, and electrical harness through the bulkhead, but I got it done. The only cable left to run is the Steering Cable. It is/ was impossible. So, rather than run the "rudder end" of the cable through, I'm going to go in reverse and disconnect the cable from the steering wheel. The cable at the steering wheel is more flexible and should be able to get through. My question is, "How do I get the steering cable off?" I've attached a pictures...... really getting down to the nitty gritty..... 
|
||
|
85 Ski Nautique 2001.
Stringer replacement job completed July 3 2014. Exterior painted June 2015. The Trailer is next. |
||
|
||
|
iplan
Senior Member
Joined: April-19-2010 Location: Lake Murry SC Status: Offline Points: 201 |
Post Options
Thanks(0)
Quote Reply
Posted: May-21-2014 at 7:58pm |
|
|
520 lbs of solid iron > a couple of cases of beer ~~~~~
 |
||
|
85 Ski Nautique 2001.
Stringer replacement job completed July 3 2014. Exterior painted June 2015. The Trailer is next. |
||
|
||
|
iplan
Senior Member
Joined: April-19-2010 Location: Lake Murry SC Status: Offline Points: 201 |
Post Options
Thanks(0)
Quote Reply
Posted: May-19-2014 at 11:33pm |
|
Agreed! I have often thought about "what I'll do next" ~ now that I know what I'm doing..... That said, I recommend you come down here this weekend, and help me finish mine up! |
||
|
85 Ski Nautique 2001.
Stringer replacement job completed July 3 2014. Exterior painted June 2015. The Trailer is next. |
||
|
||
|
TX Foilhead
Grand Poobah

Joined: February-01-2009 Location: Kingsland TX Status: Offline Points: 2076 |
Post Options
Thanks(0)
Quote Reply
Posted: May-18-2014 at 10:02am |
|
|
Since you have have the fiberglass thing down now and probably have some leftover supplies build a custom fiberglass plate to hold it. The car stereo guys build this stuff all the time. I believe Kristof has some pics of a speaker box he made using the same process. You make a plate to hold the head unit and a another to fill the hole and attach them together so everything sits the way you want. Then connect the 2 surfaces together by stapling a piece of fabric to get the smooth shape your looking for and coat that with resin. When it dries you have a solid piece to lay some fiberglass cloth on for strength. Lay some cloth on that, sand it smooth a give it some nice paint and it's ready to go.
|
||
|
||
|
iplan
Senior Member
Joined: April-19-2010 Location: Lake Murry SC Status: Offline Points: 201 |
Post Options
Thanks(0)
Quote Reply
Posted: May-18-2014 at 1:54am |
|
|
Anybody got an idea as to how to mount a stereo here? The one thing my CC needs is a stereo, but there is just no really good place to mount it.....

|
||
|
85 Ski Nautique 2001.
Stringer replacement job completed July 3 2014. Exterior painted June 2015. The Trailer is next. |
||
|
||
|
Keeganino
Grand Poobah

Joined: October-27-2009 Location: North Carolina Status: Offline Points: 2063 |
Post Options
Thanks(0)
Quote Reply
Posted: May-15-2014 at 5:38pm |
|
|
Oh the memories! Looks good. I scanned through the pages of your thread and it kind of makes me want to do another one. One day...
|
||
|
"working on these old boats may not be cost effective but as it shows its what it brings into your life that matters" -Roger
1973 Skier |
||
|
||
|
iplan
Senior Member
Joined: April-19-2010 Location: Lake Murry SC Status: Offline Points: 201 |
Post Options
Thanks(0)
Quote Reply
Posted: May-13-2014 at 6:07pm |
|
|
The hold up:
1. The Bulkhead (I'm waiting on two 3" through hull fittings ~ to give air access to the engine compartment without letting water past the bulkhead) before I can install the bulkhead and the portion of the floor between the ski pole and the link underneath the dash. The fittings should be here Thursday afternoon. Today's Projects: 1. Install Blower Fan & Blower Air Hoses 2. Change out bow light 3. Fiberglass Topside of the Removable Center piece of the floor that sits aft of the engine compartment. I did 2 layers of cloth on the bottom. I think I'm going to do the same on the top. The factory just had a plywood or particle board wrapped in carpet.... The Concerns: 1. I'm not sure I've got enough Epoxy resin to complete the job 2. I'm out of CPES |
||
|
85 Ski Nautique 2001.
Stringer replacement job completed July 3 2014. Exterior painted June 2015. The Trailer is next. |
||
|
||
|
iplan
Senior Member
Joined: April-19-2010 Location: Lake Murry SC Status: Offline Points: 201 |
Post Options
Thanks(0)
Quote Reply
Posted: May-12-2014 at 9:36am |
|
Why Not? (Hopefully this is not a bad thing) ~ because I already did it, and it looks gorgeous! 
|
||
|
85 Ski Nautique 2001.
Stringer replacement job completed July 3 2014. Exterior painted June 2015. The Trailer is next. |
||
|
||
|
ny_nautique
Platinum Member 
Joined: June-01-2011 Location: Albany NY Status: Offline Points: 1215 |
Post Options
Thanks(0)
Quote Reply
Posted: May-12-2014 at 9:30am |
|
|
Don't paint the ski pylon!
|
||
|
- Jeff
1999 Ski Nautique |
||
|
||
|
Orlando76
Grand Poobah

Joined: May-21-2013 Location: Mount Dora, FL Status: Offline Points: 3108 |
Post Options
Thanks(0)
Quote Reply
Posted: May-12-2014 at 9:14am |
|
 Ummm, Home Depot? Home Depot sells the same type, brand, and style of all the conduit I buy at all my suppliers and often, at just as competitive price. It's ok to buy somethings at Home Depot as I'm sure it's ok to buy somethings at Autozone. Ummm, Home Depot? Home Depot sells the same type, brand, and style of all the conduit I buy at all my suppliers and often, at just as competitive price. It's ok to buy somethings at Home Depot as I'm sure it's ok to buy somethings at Autozone. Iplan, Try bending the conduit with a paint stripping heat gun. If the conduit is too big, the heat gun just "can't do it" (lol, sounds better with a British accent). Big pipe takes a heat box. Keep in mind plumbing pipe is more bendable without heat. |
||
|
||
|
iplan
Senior Member
Joined: April-19-2010 Location: Lake Murry SC Status: Offline Points: 201 |
Post Options
Thanks(0)
Quote Reply
Posted: May-12-2014 at 1:40am |
|
|
So... A list of accomplishments:
1. Bulkhead fabrication complete 2. Sewer pipe (air box vent hose)connected. One of the lengths of sewer pipe is cut about 6" too short to connect all the way to the outlet in the bulkhead, but I've got extra, and will complete that tomorrow. 3. Center flooring is cut, CPS'd and now has has 2 layers of fiberglass on the bottom side. 4. Checked fit for the ski pole..... Man it was close. Initially it was about 1/8 of an inch off ~ and I was HORRIFIED!!!! lol Then I remembered the tilt in the pole towards the bottom so I straightened it up, and it was really close ~~~~ so I got out a my sledge, and tapped on the top of the pole and it seated all the way in. Then I pulled it back out because I'm painting the pole garnet to match the trim in the boat (applied 3coats of etching primer, and will come back with 4 - 5 coats of garnet, and a couple coats of clear to seal everything. Questions: 1. Does anyone have a picture of what they "found" behind the gas tank? The only one I have is "before" the gas tank was removed and I wanted to go ahead and get cracking on installing a new blower, but wasn't sure what it was supposed to look like when it was done. 2. There is a hole in the female mount that the ski pole sits in ~~~~ and a hole in the male part of the ski pole. I can not find a bolt that would have gone through there in my "paper sack of bolts" ~~~~ Was it a through bolt, or maybe a pin? My goal is to be on the water this Sunday ~ after church.... the final push is NOW! |
||
|
85 Ski Nautique 2001.
Stringer replacement job completed July 3 2014. Exterior painted June 2015. The Trailer is next. |
||
|
||
|
8122pbrainard
Grand Poobah

Joined: September-14-2006 Location: Three Lakes Wi. Status: Offline Points: 41040 |
Post Options
Thanks(0)
Quote Reply
Posted: May-06-2014 at 9:34pm |
|
Home Depot! That's as bad as shopping as Autozone!   Bend the PVC. It's done every day most commonly by the electrical trade. I've done some very nice bends with simply a heat gun. |
||
|
||
|
iplan
Senior Member
Joined: April-19-2010 Location: Lake Murry SC Status: Offline Points: 201 |
Post Options
Thanks(0)
Quote Reply
Posted: May-06-2014 at 3:11pm |
|
Awesome! There is an RV dealership near my home ~~~ went there and got everything I needed. Thanks! |
||
|
85 Ski Nautique 2001.
Stringer replacement job completed July 3 2014. Exterior painted June 2015. The Trailer is next. |
||
|
||
|
dangerwil
Senior Member

Joined: June-20-2013 Location: Orange Park, FL Status: Offline Points: 319 |
Post Options
Thanks(0)
Quote Reply
Posted: May-06-2014 at 12:01pm |
|
|
||
|
iplan
Senior Member
Joined: April-19-2010 Location: Lake Murry SC Status: Offline Points: 201 |
Post Options
Thanks(0)
Quote Reply
Posted: May-06-2014 at 11:44am |
|
|
Well conduit pipe isn't going to work. I was thinking about this all last night, and my suspicions were confirmed this morning in Home Depot.... I think it is too stiff and rigid to get it to line up and conform to the limited space around the battery box.
Does anyone have another air vent piping solution/ recommendation? |
||
|
85 Ski Nautique 2001.
Stringer replacement job completed July 3 2014. Exterior painted June 2015. The Trailer is next. |
||
|
||
|
iplan
Senior Member
Joined: April-19-2010 Location: Lake Murry SC Status: Offline Points: 201 |
Post Options
Thanks(0)
Quote Reply
Posted: May-06-2014 at 2:55am |
|
|
Test fitting the engine Wednesday morning. Pray for me! Specifically that "everything" is where it is supposed to be (or at least not too far off) with regard to the engine mount location.
I hope to have the bow => battery boxed area all fiberglassed in, and locked down by Tuesday night. Drilling the 3 holes for the air vent pipes is harder than I thought it would be, and I need to make up my mind about what material I'm going to use (drier vent hose ~ original specs ~ is out of the question). I was thinking PVC pipe, conduit, or some flexible rubber hose. Anyone care to weigh in on their preference for the air vent pipe? Test fit looks solid to me. I appreciate all the encouragement. I really could not have done this with all your expertise (but most importantly your encouragement to stick with it. 
|
||
|
85 Ski Nautique 2001.
Stringer replacement job completed July 3 2014. Exterior painted June 2015. The Trailer is next. |
||
|
||
|
8122pbrainard
Grand Poobah
Joined: September-14-2006 Location: Three Lakes Wi. Status: Offline Points: 41040 |
Post Options
Thanks(0)
Quote Reply
Posted: May-05-2014 at 8:20pm |
|
Yes, screwing the sole to the stringers is not needed nor recommended. It's been mentioned in several threads. Besides a potential water ingress point, the screws also set up a high stress area. Get your stringers done, glass the sole and bed it to the stringer tops with thickened epoxy. Weigh the sole down and let it cure. Most here use 30 packs of their favorite brand of brew for weights. Then of course when the epoxy cures, you can crack open one of the "weights"!!
|
||
|
||
|
iplan
Senior Member
Joined: April-19-2010 Location: Lake Murry SC Status: Offline Points: 201 |
Post Options
Thanks(0)
Quote Reply
Posted: May-05-2014 at 9:32am |
|
|
Alright... well, I've cut templates for the stern starboard and port sides, and they're glassed down. I'm going to glass them to the wall and secondary stringers, and skip the screws.....
Seems like driving screws into the decking above the secondary stringers is not worth the inherent water leaks..... so the plan is to biax the top of the floor, and attach to the hull and secondary stringers with mat. Also the 1x6s that went across the front of the doghouse ~ (where the rot was in my boat). I'm fitting that part out right now, and was wondering the best way to lock those down. I was going to use mat to tie it to the hull on the sides, and mat underneath the contact points on the primary & secondary stringers (so no screws here either). Does this sound like a plan, or would anyone suggest any mods? ? |
||
|
85 Ski Nautique 2001.
Stringer replacement job completed July 3 2014. Exterior painted June 2015. The Trailer is next. |
||
|
||
|
TX Foilhead
Grand Poobah
Joined: February-01-2009 Location: Kingsland TX Status: Offline Points: 2076 |
Post Options
Thanks(0)
Quote Reply
Posted: April-24-2014 at 9:18pm |
|
|
It's carpet glue and yes it needs to come off.
|
||
|
||
|
Post Reply
|
Page 123 10> |
 Tweet
Tweet
|
| Forum Jump | Forum Permissions You cannot post new topics in this forum You cannot reply to topics in this forum You cannot delete your posts in this forum You cannot edit your posts in this forum You cannot create polls in this forum You cannot vote in polls in this forum |


 Topic Options
 Keeganino wrote: