 Boats For Sale:


23' Fish Nautique Restoration Project |
Post Reply 
|
Page <1 1314151617> |
| Author | ||||
Luchog 
Grand Poobah 

Joined: April-17-2007 Location: Argentina Status: Offline Points: 2135 |
 Post Options Post Options
") Thanks(0) Thanks(0)
 Quote Reply Quote Reply
 Posted: May-23-2011 at 11:29pm Posted: May-23-2011 at 11:29pm |
|||
It must be centered in the log, first you check side to side clearance, then up and down, if it's not properly centered then you most likely have a bent strut or it needs to be shimmed on the base. Keep in mind that while not attached, the weight on the coupler end will make it sit lower on the log.
you will know when you have the boat in the water, it not properly adjusted you'll have water coming by the packing, you want a few drops per minute. By the way, going with a dripless seal is a good idea.
I think you want a 0,005 feeler gauge at max all the way around between the couplers facing each other. You should measure at 90ºs and then correct with the engine mounts if you have differences.
When using the feeler blades you want to have the couplers against each other. Remember the couplers need to effortlesly fit, if you need to force the shaft coupler in, you most likely need to move the engine. The engines goes to the shaft coupler, not viceversa. hope this helped. |
||||
 |
||||
|
tuna_tugger
Senior Member 
Joined: February-28-2010 Location: Los Cabos, MX Status: Offline Points: 105 |
Post Options
Thanks(0)
Quote Reply
Posted: May-24-2011 at 1:32am |
|||
Hi John, Been folowing the build and you doing a great job. Think of the shaft log as a packing nut on a faucet. You should inspect the hose and clamps. when you back the nut all the way off the shaft you will see the packing. You can take a sharp pich and remove the packing and replace it. It just wraps around the shaft and rests against a stop in the shaft log. You tighten the nut just until the dripping stops. If you tighten it to much the packing will get to hot and not last as long. Some people let the logs drip just a little and it helps keep the packing wet and cool. If the shaft doesn't wobble in the strut the cutless bearing is OK. You can pull or push on the shaft. Hope this helps. |
||||
|
Don Liberman
|
||||
|
||||
|
8122pbrainard
Grand Poobah

Joined: September-14-2006 Location: Three Lakes Wi. Status: Offline Points: 41040 |
Post Options
Thanks(0)
Quote Reply
Posted: May-24-2011 at 8:45am |
|||
|
John,
While I was off, Luc and Don did a great job of trying to clear up you questions but there are a couple things I'd like to add. The max difference between the couplng faces per the specs is .003" most will get it better and down to .000 is possible. The closer to zero tells you the closer the prop shaft centerline is to the engine/trans centerline. All shaft packing must drip since it is water lubricated. The type of packing used determines how much. I suggest regular - about 5 to 6 and Teflon (Gortex) about 1 to 2 drips per minute. Hang in there and just keep up the good work. |
||||
|
||||
|
TRBenj
Grand Poobah

Joined: June-29-2005 Location: NWCT Status: Offline Points: 21135 |
Post Options
Thanks(0)
Quote Reply
Posted: May-25-2011 at 7:26pm |
|||
Pete, just because I like to give you a hard time every chance I can, you may want to take a look at the rear cap on the later Fish Nautiques! 
Intentional or not, its not a totally "unoriginal" modification after all! 
|
||||
|
||||
|
jzarski
Senior Member
Joined: August-12-2010 Status: Offline Points: 180 |
Post Options
Thanks(0)
Quote Reply
Posted: May-27-2011 at 12:56am |
|||
|
Few things done...
Sorry for the slow work. I am working on it just not big things that photo graph well or are even worth photo graphing. I replaced all the hoses on the motor. I glassed in the vent covers. Finishes all the fuel line hookups and also installed the live well pump. Here are a few pics... 


|
||||
|
||||
|
Mark Mel
Gold Member 

Joined: September-16-2005 Location: United States Status: Offline Points: 583 |
Post Options
Thanks(0)
Quote Reply
Posted: May-27-2011 at 1:08pm |
|||
|
What's the plan to finish the deck? Gel? Texture? Rubber?
|
||||
|
||||
|
cputampa
Newbie 

Joined: September-12-2010 Location: Tampa Status: Offline Points: 4 |
Post Options
Thanks(0)
Quote Reply
Posted: May-27-2011 at 8:40pm |
|||
|
WOW! Just went through this whole post and congratulations on the job so far. Excellent. Did this boat go on ship-shape for the stringer job? I think I saw it some time ago.
|
||||
|
||||
|
jzarski
Senior Member
Joined: August-12-2010 Status: Offline Points: 180 |
Post Options
Thanks(0)
Quote Reply
Posted: May-27-2011 at 11:55pm |
|||
|
Center console Frame....
Today I started the center console frame. This will allow me to mount the console to the boat. It will also act as a stop for water. I am making it out of half inch NIDA-CORE. I cut it on the table saw at 3 inches. I used a router to cut the deck where I will be mounting it. The NIDA will get glassed to the deck making it a permeant mounting spot. I left myself about a 1/4 of an inch for the console to slide over. If you don't understand what I am taking about check back in a few days and you will understand then. Once I get the console in the boat again it will all make sense. Enjoy the pics and have a safe Holiday weekend...... 


|
||||
|
||||
|
jzarski
Senior Member
Joined: August-12-2010 Status: Offline Points: 180 |
Post Options
Thanks(0)
Quote Reply
Posted: June-06-2011 at 10:42pm |
|||
|
Few pics of progress.......


|
||||
|
||||
|
Kristof
Grand Poobah
Joined: October-08-2007 Location: Bree, Belgium Status: Offline Points: 3391 |
Post Options
Thanks(0)
Quote Reply
Posted: June-07-2011 at 8:40am |
|||
|
Cool job John!
What type of fastening are you gonna use to keep the center console down? |
||||
|
- Gun control means: using BOTH hands!
- Money doesn't make one happy, but when it rains cats and dogs, it's still better to cry in a Porsche than on a bicycle... |
||||
|
||||
|
jzarski
Senior Member
Joined: August-12-2010 Status: Offline Points: 180 |
Post Options
Thanks(0)
Quote Reply
Posted: June-11-2011 at 1:08am |
|||
|
Attached deck to the walls....
I have been working on tying the new deck to the walls. Well today we laid the last few pieces of glass. I am about ready for paint on the inside. Thinking I will start Tuesday or Wednesday of next week. It amazing how much stiffer the deck got by tying it in. Here is a few pics... 


|
||||
|
||||
|
tuna_tugger
Senior Member
Joined: February-28-2010 Location: Los Cabos, MX Status: Offline Points: 105 |
Post Options
Thanks(0)
Quote Reply
Posted: June-11-2011 at 2:20am |
|||
|
It's a first class job you are doing. After following you through this project I sold my Fish realizing at my age and down here in Mexico it would be a major undertaking. Do you have any idea what she will weight when you are finished. Think about spray rails while your in the construction mode. Even though it took the seas just fine it tended to be a wet ride. I look forward to seeing the final product.
|
||||
|
Don Liberman
|
||||
|
||||
|
jzarski
Senior Member
Joined: August-12-2010 Status: Offline Points: 180 |
Post Options
Thanks(0)
Quote Reply
Posted: June-14-2011 at 6:53pm |
|||
|
Gunnel is primed.....
I spent the day sanding, filling and priming the gunnels of the boat. I unsed a product called Slick Sand for the primer. It is a high build polly primer. Enjoy the pics. 


|
||||
|
||||
|
kapla
Grand Poobah

Joined: March-27-2008 Location: BA, Argentina Status: Offline Points: 6148 |
Post Options
Thanks(0)
Quote Reply
Posted: June-14-2011 at 6:59pm |
|||
|
looking good!!!!
can´t wait to see it finished!!1 
|
||||
|
<a href="">1992 ski nautique
|
||||
|
||||
|
jzarski
Senior Member
Joined: August-12-2010 Status: Offline Points: 180 |
Post Options
Thanks(0)
Quote Reply
Posted: June-16-2011 at 12:12am |
|||
|
Inside is progressing....
Today I got strated on the inside walls of the boat. I used a light weight body filler to skim coat the chop. Then I hit it with a "Mud Hog" it's a name for a big DA sander. I knocked it down with 40 grit then went to 80 grit. Tomorrow I will spray it all with slick sand. Sand the slick sand with 400 grit and she will be reay for paint. Enjoy the pics..... 


|
||||
|
||||
|
jzarski
Senior Member
Joined: August-12-2010 Status: Offline Points: 180 |
Post Options
Thanks(0)
Quote Reply
Posted: June-16-2011 at 6:21pm |
|||
|
First coat of primer done....
Spent the first few hours of the morning sanding the edges of all the corners and blocking the areas that the DA didn't reach. After a quick blow out with the air and a last minute vacuum it was time for spraying. I am using Slick Sand as my primer. It applied about 3/4 of a gallon for the first coat. I am thinking I will need 2 more gallons. Here are a few photos.... 


|
||||
|
||||
|
jzarski
Senior Member
Joined: August-12-2010 Status: Offline Points: 180 |
Post Options
Thanks(0)
Quote Reply
Posted: July-05-2011 at 5:55pm |
|||
|
Floor work in progressing. Hope to be in paint by the weekend. I have been out of town for a week then had to work 6 14 hour days while my Dad was gone so 2 weeks got thrown out. I am back at it.


|
||||
|
||||
|
jzarski
Senior Member
Joined: August-12-2010 Status: Offline Points: 180 |
Post Options
Thanks(0)
Quote Reply
Posted: July-21-2011 at 11:31pm |
|||
|
Well after working crazy hours and going out of town a few times. I am back at it in force. I have completed the paint on the Gunels and side walls. Tonight I will be putting the nonskid on the floor. The console it painted and ready to be installed. Looking like two more weeks of work before I can splash her. Enjoy the Pics......


|
||||
|
||||
|
Keeganino
Grand Poobah

Joined: October-27-2009 Location: North Carolina Status: Offline Points: 2063 |
Post Options
Thanks(0)
Quote Reply
Posted: July-22-2011 at 2:21am |
|||
|
Whew! You are a maniac! Working all those hours and getting this beauty done. Compared to restoring the Skier this thing is a Goliath. Truly an amazing undertaking, I am in awe.
|
||||
|
"working on these old boats may not be cost effective but as it shows its what it brings into your life that matters" -Roger
1973 Skier |
||||
|
||||
|
jzarski
Senior Member
Joined: August-12-2010 Status: Offline Points: 180 |
Post Options
Thanks(0)
Quote Reply
Posted: July-25-2011 at 11:47pm |
|||
|
Inside Paint is done!!!!!! WOOOOO HOOOOOO!!!!
Well it is offical. The boat construction and paint is done. Now it's time to put it all back together. Just ordered all the wire, connectors, switches and terminals for the console. Still need to get the hydro hose for the steering and a few other odds and ends. Here are a few pics of the Nonskid deck all done. 


|
||||
|
||||
|
Gary S
Grand Poobah

Joined: November-30-2006 Location: Illinois Status: Offline Points: 14096 |
Post Options
Thanks(0)
Quote Reply
Posted: July-26-2011 at 2:16am |
|||
|
Wow what else can you say
|
||||
|
||||
|
Kristof
Grand Poobah
Joined: October-08-2007 Location: Bree, Belgium Status: Offline Points: 3391 |
Post Options
Thanks(0)
Quote Reply
Posted: July-26-2011 at 5:22am |
|||
|
Fantastic!!
Can't wait to see this beauty in all of her glory when you finish her... |
||||
|
- Gun control means: using BOTH hands!
- Money doesn't make one happy, but when it rains cats and dogs, it's still better to cry in a Porsche than on a bicycle... |
||||
|
||||
|
Polar Express
Newbie
Joined: June-14-2011 Location: Marysville, WA Status: Offline Points: 38 |
Post Options
Thanks(0)
Quote Reply
Posted: July-26-2011 at 7:39am |
|||
|
I just saw this thread (I'm new here) and this is a cool thread. Thank you for taking the time to document what you have done.
PE |
||||
|
1996 Sport Nautique
This is America, if you don't like it, go conquer another country, and start your own. I'll keep my God, my guns and my freedom, Barry can keep his 'change' |
||||
|
||||
|
jzarski
Senior Member
Joined: August-12-2010 Status: Offline Points: 180 |
Post Options
Thanks(0)
Quote Reply
Posted: August-04-2011 at 10:56am |
|||


|
||||
|
||||
|
8122pbrainard
Grand Poobah
Joined: September-14-2006 Location: Three Lakes Wi. Status: Offline Points: 41040 |
Post Options
Thanks(0)
Quote Reply
Posted: August-04-2011 at 12:32pm |
|||
|
John,
Once again it was a pleasure seeing your fantastic work!! |
||||
|
||||
|
jzarski
Senior Member
Joined: August-12-2010 Status: Offline Points: 180 |
Post Options
Thanks(0)
Quote Reply
Posted: August-22-2011 at 1:44am |
|||
|
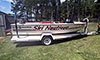
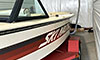
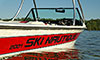
Done
Well I know I haven't been posting any progress and thats because I haven't had time. I have been working hard on the boat to finish, I have also been working full time. Besides all the real work I have been able to finish the boat. Yeah you heard it right the 23' Fish Nautique Restoration is complete. It has been a year and a week since my fist post and a long road. These postings will continue until the boat is 100% perfect. I plan on splashing her this week, I will make a video of the first run. I will be taking finish pictures this week also and will post them when I have them. For now enjoy the few pics I have been taking... 


|
||||
|
||||
|
Keeganino
Grand Poobah
Joined: October-27-2009 Location: North Carolina Status: Offline Points: 2063 |
Post Options
Thanks(0)
Quote Reply
Posted: August-22-2011 at 1:57am |
|||
 Truly amazing adventure! I have enjoyed following it. You will be in the Bahamas in no time! Truly amazing adventure! I have enjoyed following it. You will be in the Bahamas in no time!
|
||||
|
"working on these old boats may not be cost effective but as it shows its what it brings into your life that matters" -Roger
1973 Skier |
||||
|
||||
|
Green Durant
Newbie
Joined: August-22-2011 Location: it Status: Offline Points: 3 |
Post Options
Thanks(0)
Quote Reply
Posted: August-23-2011 at 12:51am |
|||
|
air-conditioned baiter! I attending advanced to seeing the advance.
|
||||
|
||||
|
kapla
Grand Poobah
Joined: March-27-2008 Location: BA, Argentina Status: Offline Points: 6148 |
Post Options
Thanks(0)
Quote Reply
Posted: August-23-2011 at 2:42pm |
|||
|
at least the spammer read the thread! LOL!
nice work John
|
||||
|
<a href="">1992 ski nautique
|
||||
|
||||
|
nautique frk
Platinum Member

Joined: February-16-2004 Location: United States Status: Offline Points: 1784 |
Post Options
Thanks(0)
Quote Reply
Posted: August-23-2011 at 7:02pm |
|||
|
Awesome !!
|
||||
|
||||
|
Post Reply
|
Page <1 1314151617> |
 Tweet
Tweet
|
| Forum Jump | Forum Permissions You cannot post new topics in this forum You cannot reply to topics in this forum You cannot delete your posts in this forum You cannot edit your posts in this forum You cannot create polls in this forum You cannot vote in polls in this forum |


 Topic Options
 jzarski wrote:
