 Boats For Sale:


1991 Sport Nautique Open Bow Stringer |
Post Reply 
|
Page 123 4> |
| Author | |
samudj01 
Gold Member 

Joined: March-10-2009 Location: NC Status: Online Points: 934 |
 Post Options Post Options
") Thanks(0) Thanks(0)
 Quote Reply Quote Reply
 Topic: 1991 Sport Nautique Open Bow Stringer Topic: 1991 Sport Nautique Open Bow StringerPosted: June-20-2021 at 9:31am |
|
Awesome job in tough conditions!!
|
|
|
78 Ski Tique, 72 Skier w/302's, 93 SN w/351 & 17 GS22 w/zr409
Previous - 99 Sport Nautique w/GT40 and 87 Martinique w/351 |
|
 |
|
|
rebel skier
Gold Member

Joined: October-17-2014 Location: Middle Tenn Status: Offline Points: 771 |
Post Options
Thanks(0)
Quote Reply
Posted: June-20-2021 at 9:04am |
|
Bravo!
|
|
|
Hotty Toddy lets go skiing!
|
|
|
|
|
Mpost
Senior Member 
Joined: July-05-2018 Location: Monticello, MN Status: Offline Points: 324 |
Post Options
Thanks(0)
Quote Reply
Posted: June-19-2021 at 8:43am |
 Nice Job! Nice Job!
|
|
|
84 SN Sold 98 SN Lund Pro V 1975 Alumacraft
|
|
|
|
|
Faceplant
Senior Member

Joined: July-27-2013 Location: Otter Lake , Mi Status: Offline Points: 405 |
Post Options
Thanks(0)
Quote Reply
Posted: June-18-2021 at 8:46pm |
|
Plus another another. 5 months ? WOW !!
|
|
|
Feels like I am hanging 10 but in reality - probably hanging 6.
|
|
|
|
|
8122pbrainard
Grand Poobah 

Joined: September-14-2006 Location: Three Lakes Wi. Status: Offline Points: 41040 |
Post Options
Thanks(0)
Quote Reply
Posted: June-18-2021 at 4:55pm |
Plus another!
 |
|
|
|
|
fanofccfan
Platinum Member

Joined: December-13-2009 Location: North Bend NE Status: Offline Points: 1722 |
Post Options
Thanks(0)
Quote Reply
Posted: June-18-2021 at 4:48pm |
|
Bravo! it looks awesome!
|
|
|
2004 196 LE Ski 1969 Marauder 19 1978 Ski
|
|
|
|
|
Gary S
Grand Poobah

Joined: November-30-2006 Location: Illinois Status: Offline Points: 14096 |
Post Options
Thanks(0)
Quote Reply
Posted: June-18-2021 at 1:43pm |
|
Agreed, and it seems like in a relatively short time as well. Great Job Ian!
|
|
|
|
|
ultrarunner
Platinum Member

Joined: October-02-2005 Location: Ridgefield, Ct. Status: Offline Points: 1809 |
Post Options
Thanks(0)
Quote Reply
Posted: June-18-2021 at 12:00pm |
|
Wow!
Ian wins the prize for the best recovery and restoration, done under the most difficult conditions most of us can only imagine. Way to go. |
|
|
|
|
Ian H
Groupie 
Joined: September-24-2020 Location: Hong Kong Status: Offline Points: 69 |
Post Options
Thanks(0)
Quote Reply
Posted: June-18-2021 at 10:44am |
|
Thanks for the help Gary went through systematically and found that I had a air leak on an elbow going into the water strainer, This fixed it and for good measure the pump arrived from SKIDIM in an incredible three days so i fitted this too and the temperature is a solid 160 degrees and my blood pressure reduced
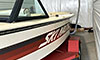
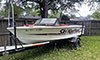
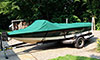
 Thanks again for spending the time to help me out after complete rebuild my mid was racing about all the possibilities I now have my first 5 hours on the engine. Last snag is burning hot alternator. The new alternator I fitted on rebuild needs a 5 mm spacer to align the belt which I had missed , I hope this will solve this. If not I will be back.  So final result looks like this, many thanks to all who posted info help and encouragement to keep going and finish turned out to be a 5 month job the last month outside in 32 degrees C 90% humidity was very very tough. Its not the prettiest but it turned out the way I was hoping, where I have confidence that everything is fixed properly and reliable. Here is how it finally turned out. Cannot imagine how many times I climbed that shaky ladder          |
|
|
|
|
Gary S
Grand Poobah
Joined: November-30-2006 Location: Illinois Status: Offline Points: 14096 |
Post Options
Thanks(0)
Quote Reply
Posted: June-01-2021 at 8:55pm |
|
Fantastic job Ian ! Don't go diving just yet. You might simply just have an air leak in an intake hose connection or the old pump it self. Much like trying to drink your favorite beverage through a straw with a pin hole in the side of it. Running on a hose masks that since it's under pressure rather than relying on the vacuum the pump creates. Is the pump mounted right? If it's a normal left hand rotation the pump will be mounted to it's bracket with the screw that holds it's internal cam in place toward the block. Did you replace any of those intake hoses? Do you have a strainer plumed in- is it sealed and not sucking air? Did you use a nut driver or socket to tighten all those clamps rather than a screwdriver? Check those easy things first and get the new pump on and see how it goes.
This screw facing block -  |
|
|
|
|
Ian H
Groupie
Joined: September-24-2020 Location: Hong Kong Status: Offline Points: 69 |
Post Options
Thanks(0)
Quote Reply
Posted: June-01-2021 at 8:01pm |
|
I hav
 e had my head down to get to the finish but fell at the last hurdle e had my head down to get to the finish but fell at the last hurdle I have an overheating problem looks like the pump cannot prime from the water inlet in the hull. works fine on a hose , and sits at 160 degrees just like the rating of the thermostat but I made the mistake of not doing the bucket test and in the blur of pushing to get finished I did not look at the water inlet in the hull before i got it on the water. I am kicking myself as the trialer i used died at launch so no easy way to get it out, everything needs to be on the water for a few weeks at least. I have a new pump complete G21 on its way from SkiDim will arrive in a week or so. I will do the bucket test with a clear hose connected direct to the current pump and see if the problem is on the hull to pump side or confirm the pump is sick, But I need to check the inlet is clear. I have been down with a mask to have a feel around with a thin screwdriver but i really need to know what I am pocking to be sure what I am doing. Does anyone have a picture of the hull water inlet to guide me in my clean out dive. Its the one photo I do not have  I can blow bubbles from the raw water pump inlet pipe to the hull inlet and suck water the other way (yes i did put my mouth round the pipe) so it is not completely blocked but i want to be sure there is no obstruction. Gutted sea trial lasted 3 mins before i saw the temp rise to 200 . It was a fantastic 3 mins before the slap round the face I hope it will just be the pump and inlet side as the hose cooling worked, I am trying to bock more complicated problems.
|
|
|
|
|
Ian H
Groupie
Joined: September-24-2020 Location: Hong Kong Status: Offline Points: 69 |
Post Options
Thanks(0)
Quote Reply
Posted: April-20-2021 at 5:28am |
|
I'm British but work for a Chinese company making electric motors, our factory of around 26,000 people is just over the boarder from HK. I would normally commute into China a few times a week but not for the last 16 months! I am Head of Business Development, I have been here for about 8 years, I spent most of my career working for Honda Power Equipment and Engine division in Europe and Japan. Now I am busy replacing all those engines with motors and batteries!
Thanks for the encouragement I beginning to believe I can finish. It wont be the best looking but I hope it will be tough and reliable. It has kept me sane though over a year of lock down...... next time I find a way to work inside with floor and a bench with a vice !
|
|
|
|
|
Jonny Quest
Grand Poobah

Joined: August-20-2013 Location: Utah--via Texas Status: Offline Points: 2843 |
Post Options
Thanks(0)
Quote Reply
Posted: April-19-2021 at 8:49pm |
|
|
|
Current
2003 Ski Nautique 206 Limited Previous 2001 Ski Nautique Open Bow 1994 Ski Nautique Open Bow Aqua skiing, ergo sum |
|
|
|
|
Gary S
Grand Poobah
Joined: November-30-2006 Location: Illinois Status: Offline Points: 14096 |
Post Options
Thanks(0)
Quote Reply
Posted: April-19-2021 at 6:29pm |
|
Chief translator/proof reader for Ding Bang Ow fortune cookie company
|
|
|
|
|
8122pbrainard
Grand Poobah
Joined: September-14-2006 Location: Three Lakes Wi. Status: Offline Points: 41040 |
Post Options
Thanks(0)
Quote Reply
Posted: April-19-2021 at 11:01am |
|
Ian,
 It looks like it's getting very close to seeing some water. Considering the fantastic job you are doing, I don'tfeel you will have any problems. It looks like it's getting very close to seeing some water. Considering the fantastic job you are doing, I don'tfeel you will have any problems. BTW, I'm curiouse as to what you are doing and do in Hong Kong?
|
|
|
|
|
Ian H
Groupie
Joined: September-24-2020 Location: Hong Kong Status: Offline Points: 69 |
Post Options
Thanks(0)
Quote Reply
Posted: April-19-2021 at 10:38am |
|
Oh and carpet is ordered......... finishing line is still always just over the horizon.
|
|
|
|
|
Ian H
Groupie
Joined: September-24-2020 Location: Hong Kong Status: Offline Points: 69 |
Post Options
Thanks(0)
Quote Reply
Posted: April-19-2021 at 10:32am |
|
Easter I had 5 days of dinghy instructor training and exams I passed!
I had to move my boat on its Ferrous Oxide trainer front wheel axles disintegrated and I had to haul it sideways with a chain hoist sideways to its new home in the corner. Two new axles from Taubau and I pray the trailer can make its last 30M trip into the drink  As all the engine mounts were completely refurbished and greased adjusting the engine to align the shaft went smoothly I think with the coupling collar just partially engaged in the transmission output flange the gap measured with feelers was a consistent fit all the way round and the shaft was centered in the stuff box tube and felt in a happy rotation position. Getting the drive coupling on the shaft was touch and go. first time i dis not use enough heat on the coupling and it jammed 50% on not going on and not coming off and getting cooler... but hot enough to burn  big plastic mallet and wild beating got it off ...... next time much hotter it just fell on big plastic mallet and wild beating got it off ...... next time much hotter it just fell onExhaust is now on but adjustment was too low so gearbox direction lever fouled sorted with a lot of restricted spanner movement . Fuel lines and filter with water separator in  Green tinge is because I am working under a Tarp in the rain or trying to avoid the killer sun. All electrical is now in and working and the engine turns over and starts for just a second. I should finish the water inlet pipes including the filter and fresh water salt water divert valve. Then I can run the engine on the hose and I can tune the timing. Amazingly the original tower turned up in the back of a car, I think it was a greenhouse frame for the last few years and when the guy saw me working on the boat he kindly brought it back for me unbelievable! This is double good news as my Chinese source had just broken the news that they could not supply me until July...   the foot spacing is perfect match with the holes already in the boat so I am sure it is the right one . My only problem is I have no deck mounting brackets I cannot see a brand on the frame ... is it a US frame anyone knows I am trying to get and idea of what brackets to make. Anyone have an idea?  I am now hunting down a powder coat company to make a happy tower I had time for a quick buff looks like oxidation is going to come off ok with a good cutting compound  Driver seat spacing off the floor and angle I have worked out but the base is going to be a real workup The standard Nautique one will not work with the seats I could get my hands on and price with shipping is out of the question..... So I will spend the time to make some bases with ply and a thick layer of glass.  |
|
|
|
|
Ian H
Groupie
Joined: September-24-2020 Location: Hong Kong Status: Offline Points: 69 |
Post Options
Thanks(0)
Quote Reply
Posted: April-01-2021 at 5:12am |
|
Thanks very much, that is really helpful.
|
|
|
|
|
MechGaT
Senior Member

Joined: March-09-2015 Location: Chattanooga Status: Offline Points: 271 |
Post Options
Thanks(0)
Quote Reply
Posted: March-31-2021 at 8:42pm |
|
Here are some pictures of the interior of my boat.
The font:  Looking back:  Seat base and seat, pay no attention to the messy room:  The rear area before the interior was put in. You can see the board that goes over the rudder on the left before I put carpet on it. On the right is the board that has the pins to hold the engine cover. This board goes just under the rear seat.  The rear seat is a plastic molded base. I don't have any pictures showing how it is made, but if you don't have one, that could be tough to recreate.
|
|
|
'92 Sport Nautique
|
|
|
|
|
ultrarunner
Platinum Member
Joined: October-02-2005 Location: Ridgefield, Ct. Status: Offline Points: 1809 |
Post Options
Thanks(0)
Quote Reply
Posted: March-29-2021 at 10:30pm |
|
A quick look in the ref section shows the flip-up bench in '94. Interestingly, in earlier years of other OB models...Excel, SNOB, there was a bench, but not on walk-thru's.
|
|
|
|
|
MechGaT
Senior Member
Joined: March-09-2015 Location: Chattanooga Status: Offline Points: 271 |
Post Options
Thanks(0)
Quote Reply
Posted: March-29-2021 at 10:10pm |
|
I have been in a 1990 Sport and my ‘92 has the passenger seat that can face forward or backwards. As far as I know a bench was not offered, but I think it would be an upgrade if you could work one out. The storage behind it would be better, especially if it swung up like later models.
I am on my phone so I can’t post pictures, but I will try to get on the computer tomorrow evening and post a few of the interior. |
|
|
'92 Sport Nautique
|
|
|
|
|
ultrarunner
Platinum Member
Joined: October-02-2005 Location: Ridgefield, Ct. Status: Offline Points: 1809 |
Post Options
Thanks(0)
Quote Reply
Posted: March-29-2021 at 5:39pm |
|
Great work so far Ian....
So, you're correct. The drivers seat is mounted on a plastic wedge which is lagged into the floor. On top of that mounting "wedge" contains the rails that the seat slides onto, and can subsequently adjust with the side lever, fore and aft, along those rails. See attached picture. And yes, you could also have angles fabricated to accomplish the same. Here is also a pic of a 91 Sport with the single observer seat. I can't remember if the observer bench was offered that year. Someone will chime in with more info. Keep us posted, Mark Drivers seat mount.  Front Dash Area.  |
|
|
|
|
8122pbrainard
Grand Poobah
Joined: September-14-2006 Location: Three Lakes Wi. Status: Offline Points: 41040 |
Post Options
Thanks(0)
Quote Reply
Posted: March-29-2021 at 4:35pm |
|
Ian,
I admire the progress you are making plus the resourcefulness you have shown in getting the materials for the project. Again, it's looking great. Be patient as I know someone will come through with some pictures to help you with the interior.
|
|
|
|
|
Ian H
Groupie
Joined: September-24-2020 Location: Hong Kong Status: Offline Points: 69 |
Post Options
Thanks(0)
Quote Reply
Posted: March-29-2021 at 9:56am |
|
Rear vent system in and tank and pipework went in OK shortly after. mow I am just working through assembly of all the bits.
I am pleased with the sealed drainage pipes under the floor it worked out well and the floppy air duct was quick held in with cable ties and fixed in the corners with spray expanding foam. 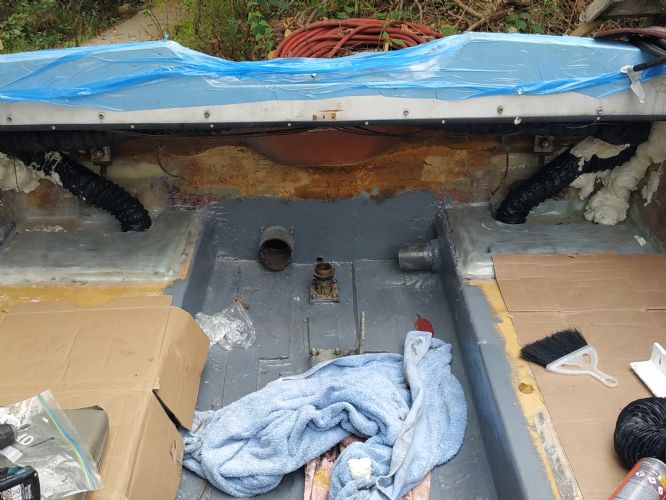 Now I need to ask for some help. I have the remnants of the interior for the rear bench seat the and the bow but the diver seat observers bench and the dash for the observer side and side panels along the inside of the boat are a mystery as they we missing already. I cannot find good pictures or don not know quite what to do on the following Drivers seat looks like the seat is pretty much on the floor on a kind of wedge platform ? I can get a stainless plate mount folded up but a picture of what is there already would be very useful, also what kind of aftermarket seat would be a typical replacement? I found these bits (see below) of wood which I guess were the bench observers seat ? a picture would be much appreciated and I can try to recreate a new one. The observers dash panel I guess impossible to find a replacement I have nothing but a good photo might help me get creative the same for the kind of glove box thing. Side panels I guess were covered ply ? a picture of the back side of the engine cover would also be helpful I have the hinges and aluminium mounts but not sure how to mount them I also need to know how to build the bilge cover with access panel as mine was just a soggy carpet around an access hatch so I am not sure if this panel should go under the bench seat at the back and if the engine cover is screwed to it. If you could snap these for me I would be very grateful. ; 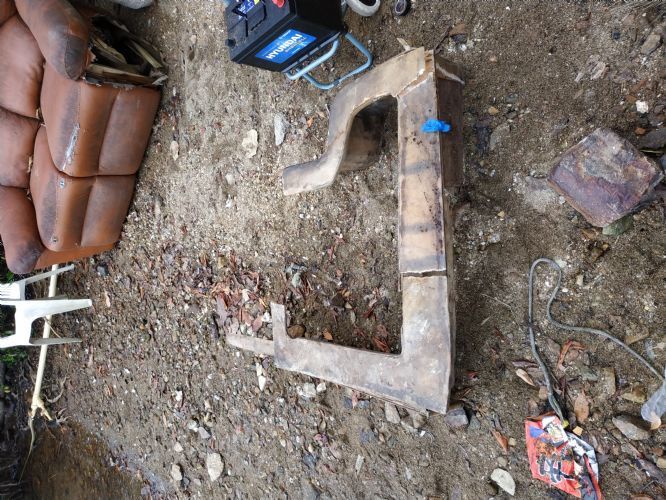 YES THAT IS A DOUBLE LAZYBOY ON MY BEACH FORGET THE PLASTIC BOTTLE PROBLEM IN ASIA FIRST WE NEED TO SOLVE THE LOUNGE FURNITURE ISSUE. New prop  |
|
|
|
|
MechGaT
Senior Member
Joined: March-09-2015 Location: Chattanooga Status: Offline Points: 271 |
Post Options
Thanks(0)
Quote Reply
Posted: March-25-2021 at 1:11pm |
|
I would start with the same spacers. There is a good bit of adjustment in the mounts. You might have a hard time moving them. Should have told you to give them a shot of penetrating oil and exercise them before dropping the engine in. Might have to work up a temporary support if they don’t move so you can take them out and get them free.
|
|
|
'92 Sport Nautique
|
|
|
|
|
ultrarunner
Platinum Member
Joined: October-02-2005 Location: Ridgefield, Ct. Status: Offline Points: 1809 |
Post Options
Thanks(0)
Quote Reply
Posted: March-25-2021 at 8:13am |
|
WOW!! Quite the resourcefulness!
|
|
|
|
|
Ian H
Groupie
Joined: September-24-2020 Location: Hong Kong Status: Offline Points: 69 |
Post Options
Thanks(0)
Quote Reply
Posted: March-25-2021 at 7:10am |
|
Opportunistic lunch break engine lift with the grab garbage guy. Hong Kong Style !!
Terrifying
Bolt holes not limed up yet but its in!!!!!!    |
|
|
|
|
Ian H
Groupie
Joined: September-24-2020 Location: Hong Kong Status: Offline Points: 69 |
Post Options
Thanks(0)
Quote Reply
Posted: March-24-2021 at 8:56pm |
|
As I am a novice I think I will start with the same prop thanks for letting me know you have the same
I I got my top layer of glass on the floor. I ended up with a 100m roll of biaxial so I used it for my final layer. I was very close to running our of resin so it seems the 8 gallon total estimate was pretty good. Two coats of bilge coat have gone on after a small amount of faring as I am under time pressure. I am stunned that the engine frame went in as a slightly squeeky fit and when i put my gauges in and measured I am within a millimetre off the position of the frame original position compared to the prop exit and the floor. I put the screws in with lashings of silicone in the holes and between the frame and stringer. How to get the engine in. Hiab crane on the back of a truck is possible but scary as someone else will be on the controls..... and translation problems..... getting a a frame etc to hoist would be under my control but difficult to get together. I still have serious amount of stuff to do before I must do the engine so I have some time to consider. What I must study is how to do the alignment of the engine to the prop shaft. all my mountings are new so I guess i need to start from scratch. Is there a procedure to do it ? the old set up had two 10mm thick spacer plates on the engine side mounts only and the gearbox had none. Should I put the same spacer set up back in or start from scratch? You can see them in the pic below but nothing on the gearbox mounts  progress 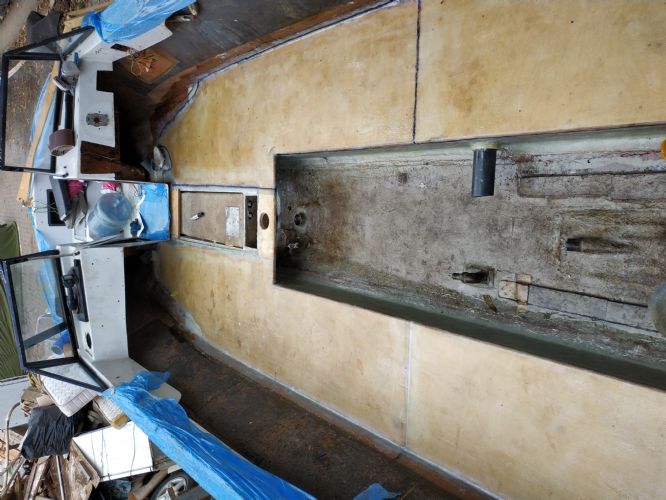    If anyone sees something i have missed or something i have done thats stupid please let me know!! |
|
|
|
|
MechGaT
Senior Member
Joined: March-09-2015 Location: Chattanooga Status: Offline Points: 271 |
Post Options
Thanks(0)
Quote Reply
Posted: March-20-2021 at 6:27pm |
|
You are making a lot of progress. Like you said, hopefully you never need the flotation foam. That is an interesting idea for installation.
I don’t know much about prop selection, especially for wake surfing. I do know that you don’t want to run one you have hammered out. The balance required to prevent vibration is very precise. The one you have is the same one I have and it works. That’s all I could say on selection. |
|
|
'92 Sport Nautique
|
|
|
|
|
Ian H
Groupie
Joined: September-24-2020 Location: Hong Kong Status: Offline Points: 69 |
Post Options
Thanks(0)
Quote Reply
Posted: March-20-2021 at 1:50pm |
|
The back floor sections also with layer of fiberglass tissue pre applied to the underside then peanut buttered in, all vent [i[es are now in under the floor
    I hope to get the cloth on the top tomorrow. I would like the time to be a bit more pretty but Engine lift in opportunity with a Hiab is next week so I need to keep moving. I am now optimistic enough to think of propellers. This in the one I have, two blades were bent and I beat them back into shape forged in fire style. looks like a prop but i guess i had better change it. I want to do wake surfing with this boat, I have zero experience, Which prop should i get? I have no idea of the history of this one so no idea if it is good or bad selection.  |
|
|
|
|
Post Reply
|
Page 123 4> |
 Tweet
Tweet
|
| Forum Jump | Forum Permissions You cannot post new topics in this forum You cannot reply to topics in this forum You cannot delete your posts in this forum You cannot edit your posts in this forum You cannot create polls in this forum You cannot vote in polls in this forum |


 Topic Options
 ultrarunner wrote: