 Boats For Sale:


Acceleration issues. |
Post Reply 
|
Page <1234 7> |
| Author | ||
AZ86SKI 
Senior Member 
Joined: July-05-2022 Location: Phoenix, AZ Status: Offline Points: 115 |
 Post Options Post Options
") Thanks(0) Thanks(0)
 Quote Reply Quote Reply
 Posted: July-17-2022 at 12:53pm Posted: July-17-2022 at 12:53pm |
|
|
Keno,
Your constipation hypothesis carries a lot of weight.  All kidding aside, it does make a lot of sense with the known history of this boat. I know the previous owner did replace one of the exhaust tubes from the manifold back to the transom due to failure. I would suspect an overheating issue at some point as you described. I know the previous owner also experienced an impeller that came apart as well and was replaced. All kidding aside, it does make a lot of sense with the known history of this boat. I know the previous owner did replace one of the exhaust tubes from the manifold back to the transom due to failure. I would suspect an overheating issue at some point as you described. I know the previous owner also experienced an impeller that came apart as well and was replaced. After I took on the boat years later and got it running, I took it out for a test on the water and made it about 50 yards out from the no wake zone and the engine began to run hot quickly and I shut it down. Which takes us back to me and my GF pushing it back to the dock. Still haven't lived that one down. In any event, it was another impeller that came apart. I then proceeded to remove all of the impeller pieces I could find from the inlet on the raw water pump (where a lot were smashed into), the thermostat housing and the hoses from the thermostat housing to the exhaust manifolds. This is where I stopped. I recall looking into the manifolds from the inlet side (which was pretty small) and really couldn't see much. So I am assuming I need to remove the exhaust tubes from the ends of the manifolds and check the exhaust tubes for any obstructions and see what I find inside the manifolds from the exhaust end? I can only image how fun removing the exhaust tubes from the manifolds will be, but I will be careful with the manifolds. This may take a bit for me to get done but I will update as I move along. If this is the solution, I might have a new name for this boat.  |
||
 |
||
|
MrMcD
Grand Poobah 

Joined: January-28-2014 Location: Folsom, CA Status: Offline Points: 3592 |
Post Options
Thanks(0)
Quote Reply
Posted: July-17-2022 at 4:52pm |
|
|
If you have the collapsible exhaust tubes they are designed to close off the exhaust when the engine is run with no water to cool them. An inner liner collapses, the outer can look just fine. At some point the boat manufacturers quit using that type hose but I don’t remember what year that was. I have been in two boats when the impeller failed and the boat got hot, in both cases the engine was running great and then suddenly started to feel like it was running on 4 cylinders, really rough and no power. They did not run smooth. In both boats I thought for sure it got hot enough to blow the head gaskets but both of those ran perfectly once the impeller was fixed and the exhaust tubes replaced. Those safety exhaust tubes were designed to let you know you have a problem before the exhaust hose burns through and allows water to enter your boat.
|
||
|
||
|
AZ86SKI
Senior Member
Joined: July-05-2022 Location: Phoenix, AZ Status: Offline Points: 115 |
Post Options
Thanks(0)
Quote Reply
Posted: July-17-2022 at 7:05pm |
|
|
The collapsible exhaust tube explanation makes a lot of sense, especially with the known issues of the two failed impellers and one failed exhaust tube. Pretty ingenious safety feature for an exhaust hose and great information to know and share. I told myself I wasn't going to work on the boat today but I couldn't resist inspecting the exhaust tubes from the exhaust flap forward. Both exhaust tubes are clear all the way up to the point where they bend up to connect to the manifolds. After the bend to the connection at the manifold is not visible. Also, when the impeller came apart on me and I spent the time to try and find all the pieces I was concerned that perhaps some of it made it to the manifolds. After reconnecting everything, I recall using an infrared temp gauge to check both manifolds to see if either one was running hotter than the other. Both were running at equal temps +/- a few degrees, so I assumed they were good. However, the flip side is they could be equally clogged. I'm not looking forward to removing the exhaust tubes and inspecting the manifolds but that will be next unless this information is helpful enough.
|
||
|
||
|
KENO
Grand Poobah
Joined: June-06-2004 Location: United States Status: Offline Points: 10652 |
Post Options
Thanks(0)
Quote Reply
Posted: July-17-2022 at 8:52pm |
|
|
So do you have mufflers on that thing or hose all the way back to the transom fittings or some other arrangement. A 78 had mufflers originally.
I'd be checking everything after the manifold outlets to be clear and unrestricted especially the parts where there' are sharp bends in the rubber that you haven't looked at yet. If you have mufflers you'll see some restriction baffles but it sounds like maybe they were removed at some time. Here's an old thread about "collapsible hose" in the link |
||
|
||
|
AZ86SKI
Senior Member
Joined: July-05-2022 Location: Phoenix, AZ Status: Offline Points: 115 |
Post Options
Thanks(0)
Quote Reply
Posted: July-18-2022 at 10:10pm |
|
|
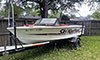
After closer inspection, it does look like it has mufflers (still learning what I am looking at here). The mufflers also appear to have possibly fiberglass baffles (looks like 2 per side) that then attach to the exhaust tube that leads to the manifold exhaust. I will need to remove the engine cover and some of the floor panels to access everything for a closer look. I did take a photo of the exhaust from the exhaust flap for clarity and reference. Its not the greatest photo, but it's the best I could get to explain what I am looking at. Both exhaust ports looked identical with no blockage at least at these points.
 You can see the one baffle and there is another one further in that is not visible in the photo. Next step is to remove the engine cover and some of the floor panels for access. Then start working on removing the exhaust hoses from the manifolds for inspection from the other end. I am hoping to get it done this week and I will update as soon I as I can confirm something one way or the other on a possible blockage. Hey KENO, you mentioned a 1978 in your last post which I think is what MrMcD said he had. I just wanted to clarify that mine is a 1986 so there is no confusion moving forward for everybody since this post is getting a little lengthy. You may have been addressing MrMcD and I am confused, but I just wanted to clarify. Also, thank you for the link regarding collapsible exhaust hoses, it was very educational. |
||
|
||
|
KENO
Grand Poobah
Joined: June-06-2004 Location: United States Status: Offline Points: 10652 |
Post Options
Thanks(0)
Quote Reply
Posted: July-18-2022 at 10:51pm |
|
|
I just screwed up ,I should have said 86
2 baffles per muffler is normal and what you have in the picture looks normal for the rear baffle. Good luck with the hoses.
|
||
|
||
|
AZ86SKI
Senior Member
Joined: July-05-2022 Location: Phoenix, AZ Status: Offline Points: 115 |
Post Options
Thanks(0)
Quote Reply
Posted: July-27-2022 at 1:13pm |
|
|
My apologies for the short delay in my update. The heat here in Phoenix the last week or so diminished my willingness to wrestle with exhaust hoses. However, I have completed the latest assignment of inspecting the exhaust for any possible restrictions and neither were restricted on either side. Both exhaust manifolds looked clear. Both exhaust hoses were clear as well, other than a bit of water standing in the bottom of the hose which is hard to see in the photo. I found placing a bright light at the exhaust flap and inspecting the hose from the inlet side provided the best visual inspection opportunity. I provided a photo from the inlet side of the exhaust hose for reference and both exhaust hoses appeared the same.
My novice experience leads me to suspect that is time to return to the carburetor again after two previous shop rebuilds. The good news is we have checked a lot off the list (at least in my opinion) and I have learned a ton. We have to be getting close to a solution. Any other suggestions, advice or homework assignments? Thanks again for all the help, I really appreciate it.  |
||
|
||
|
AZ86SKI
Senior Member
Joined: July-05-2022 Location: Phoenix, AZ Status: Offline Points: 115 |
Post Options
Thanks(0)
Quote Reply
Posted: July-27-2022 at 3:41pm |
|
|
I should also mention that if we have narrowed down the likely issue to the carburetor, I would be more inclined to replace the 36 year old carburetor than attempt anymore shop rebuilds at least for now. I have read a number of threads (thank you Johnny Quest and others) regarding the Quality Fuel Technologies (QFT) M-600 replacement for my Holley 4160. It seemed to have some great reviews as well as additional features/adjustments options that my 4160 does not have. Although I wish they were the same price when the earlier threads were posted.
Just wanted to mention since a deep dive into the current carburetor by myself would likely cause more issues than I already have.
|
||
|
||
|
MrMcD
Grand Poobah
Joined: January-28-2014 Location: Folsom, CA Status: Offline Points: 3592 |
Post Options
Thanks(0)
Quote Reply
Posted: July-27-2022 at 5:25pm |
|
|
If the hoses melt from heat it is within about 15” of the exhaust manifold where the heat is the most. Do you have any friends with an extra carb you can test with just to rule it out or confirm? It is quick to swap carbs for a test.
|
||
|
||
|
AZ86SKI
Senior Member
Joined: July-05-2022 Location: Phoenix, AZ Status: Offline Points: 115 |
Post Options
Thanks(0)
Quote Reply
Posted: July-28-2022 at 2:08pm |
|
|
The exhaust hoses showed zero failure all the way through on both sides, I know it's a little difficult to see in the photos, but there were no signs of failure at all. I was expecting to see some restriction as KENO initially suggested based on the symptoms and the boats history. It was definitely something that needed to be checked and confirmed one way or the other before moving forward. Now that it is done, I'm glad I did it to confirm.
I can't think of anyone locally who would have a spare and trustworthy 4160 carburetor, and after a couple shop rebuilds now, I'm thinking a new replacement is my best long term solution at this point. It will at least give me a spare that perhaps I can become more familiar with the internal workings at some point and have my own trustworthy replacement. It should also be noted that in my previous post regarding a possible carburetor replacement that it is NOT "Quality Fuel Technologies", it is "Quick Fuel Technology." That was my error and I just wanted to clarify for anyone lacking carburetor knowledge like myself who made read this in the future. Any other suggestions before I pull the trigger on the QFT M-600 would be greatly appreciated, to include support for the swap if you believe this is correct path as well. Thanks |
||
|
||
|
NCH20SKIER
Grand Poobah

Joined: December-16-2004 Location: United States Status: Offline Points: 2205 |
Post Options
Thanks(1)
Quote Reply
Posted: July-29-2022 at 6:49am |
|
|
If you are going the new carb route check around. Sometimes places like Jegs will offer $75 -$100 off for orders over $500 if you open an account. Summit may also offer this type of deal but unlikely.
I have had 2 quick fuels (2 different boats) and they have be hassle free. |
||
|
'05 206 Limited
'88 BFN |
||
|
||
|
KENO
Grand Poobah
Joined: June-06-2004 Location: United States Status: Offline Points: 10652 |
Post Options
Thanks(1)
Quote Reply
Posted: July-29-2022 at 7:42am |
|
|
Along with a QF carburetor you'll be needing a new fuel line due to the bowl inlet configuration.
You could use rubber or metal. Rubber should be USCG approved line You can get a Sierra 18-8115 USCG rubber line that'll fit from a variety of places or make your own with USCG A-15 or A-10 approved hose and the right barbed fittings or bend your own metal line. Your present line looks like somebody took a length of pre flared brake line and bent it to fit maybe. it has a little extra length to it. Nothing wrong with what's there but it probably won't reach the bowl mounting location on the QF if you start bending it to fit. And you may need a new flame arrestor or some dainty hammer work to let the one you have clear the external float adjusters that stick up to far to allow your arrestor to seat properly on the carburetor. The dainty hammer work would be indenting the bottom enough to clear the adjusters .............or finding a short spacer to go between the carburetor and the arrestor.Yours looks like it might be small enough in diameter that it'll fit without interference.
|
||
|
||
|
AZ86SKI
Senior Member
Joined: July-05-2022 Location: Phoenix, AZ Status: Offline Points: 115 |
Post Options
Thanks(0)
Quote Reply
Posted: July-29-2022 at 1:23pm |
|
|
Time to do some online shopping and spend some money on a new QF! Thanks for the advice on possible discounts.
Thank you as well KENO for pointing me in the right direction regarding the fuel line and providing the part number. A new carburetor without a fuel line that fits wouldn't do me much good. Ha. I will get that Sierra fuel line ordered as well. I also thought I read an earlier post about a spacer that was available for the QF conversion. If I find it I will post that part number again here as well. Hopefully I wont need it if my arrestor is small enough, but inevitably I'm sure I will. Thanks again for all the guidance in getting this far!  I will get the orders in this weekend and update soon with the new QF installed. For those of you with smooth running boats, enjoy the weekend! I will get the orders in this weekend and update soon with the new QF installed. For those of you with smooth running boats, enjoy the weekend! |
||
|
||
|
MourningWood
Gold Member 
Joined: June-13-2014 Location: NorCal Status: Offline Points: 886 |
Post Options
Thanks(0)
Quote Reply
Posted: July-29-2022 at 5:46pm |
|
|
Wait up...is there a chance that the hand-made hardline from the fuel pump to carb is 'kinked'? Or otherwise restricted?
|
||
|
1994 Ski Nautique "Riot"
1964 Dunphy X-55 "One 'N Dun" 'I measured twice, cut three times, and it's still too short!" |
||
|
||
|
uncle-buck
Senior Member
Joined: June-14-2004 Location: United States Status: Offline Points: 318 |
Post Options
Thanks(0)
Quote Reply
Posted: July-30-2022 at 11:17pm |
|
|
Chiming in here with one more idea. Check the rotor in the D.U.I. and make sure the nylon rotor hold-down screws haven't been over tightened. Refer to the instructions that came with the D.U.I.
I installed a D.U.I. in my boat last year and made the mistake of over tightening those screws. Boat exhibited nearly identical symptoms. Jonny Quest figured it out, fixed it, and all is well. |
||
|
||
|
AZ86SKI
Senior Member
Joined: July-05-2022 Location: Phoenix, AZ Status: Offline Points: 115 |
Post Options
Thanks(0)
Quote Reply
Posted: July-31-2022 at 2:09pm |
|
|
Thank you for the latest possible ideas. I checked the fuel line again and there are no kinks and there does not appear to be any restrictions. The previous fuel pressure and fuel flow tests checked out as well.
The distributor was installed by the mechanic so that is something I can check. I read through the instructions from Performance Distributors and it clearly states "do not over tighten" the 2 nylon rotor hold down screws. In determining if they were over tightened, should the rotor (or something else) do or not do something if they are in fact over tightened? Also the initial timing was set and confirmed at 12* and the total timing was confirmed at about 35*. Not sure if those timing numbers would exclude a possible over tightening problem but I just thought I would mention in case it did. Thanks
|
||
|
||
|
KENO
Grand Poobah
Joined: June-06-2004 Location: United States Status: Offline Points: 10652 |
Post Options
Thanks(1)
Quote Reply
Posted: July-31-2022 at 3:51pm |
|
|
Your timing numbers tell you that everything is OK
|
||
|
||
|
Jonny Quest
Grand Poobah

Joined: August-20-2013 Location: Utah--via Texas Status: Offline Points: 2843 |
Post Options
Thanks(1)
Quote Reply
Posted: July-31-2022 at 5:04pm |
|
Yup. If the timing advance curve is working as it should, then the timing advance mechanism in the DUI was not over-tightened. Uncle Buck referred to this situation when he originally installed the DUI on his engine. The timing advance was inoperable. The timing stayed at 10 degrees BTDC. As soon as I loosened the nylon bolts inside the DUI so that the advance mechanism moved freely, the timing advance mechanism worked as advertised. JQ
|
||
|
Current
2003 Ski Nautique 206 Limited Previous 2001 Ski Nautique Open Bow 1994 Ski Nautique Open Bow Aqua skiing, ergo sum |
||
|
||
|
AZ86SKI
Senior Member
Joined: July-05-2022 Location: Phoenix, AZ Status: Offline Points: 115 |
Post Options
Thanks(0)
Quote Reply
Posted: July-31-2022 at 6:44pm |
|
|
Thank you KENO and JQ. That makes a lot of sense and I was hoping that was the case. The new QF and the new fuel line are en route. I will update when I get them installed. Thanks again.
|
||
|
||
|
KENO
Grand Poobah
Joined: June-06-2004 Location: United States Status: Offline Points: 10652 |
Post Options
Thanks(0)
Quote Reply
Posted: August-01-2022 at 12:06pm |
|
There's gotta be some more to the story of what Buck did and you fixed to make his advance work. I decided I'd pull out a parts DUI distributor yesterday and duplicate this overtightening feat to bind up the advance mechanism. I tried everything I could considering my general wimpiness, and all that happened was nothing,............the advance worked fine, but I was strong enough to break a screw .So.............I fire off an e mail to the DUI guys, get an answer this morning and the precaution about overtightening is to keep from breaking the nylon screws and nothing to do with binding up the advance mechanism. They use nylon to prevent arcing. Looking at where the screws go in relation to the advance mechanism, it's just not possible
|
||
|
||
|
Jonny Quest
Grand Poobah
Joined: August-20-2013 Location: Utah--via Texas Status: Offline Points: 2843 |
Post Options
Thanks(1)
Quote Reply
Posted: August-01-2022 at 1:08pm |
|
|
Uncle Buck is in the Houston area, and I was headed to Houston for work, so I offered to stop by and see if I could help out with his D.U.I. installation. Buck had installed the dizzy but for some reason, the advance wasn't working and the timing was more-or-less stuck at 10 degrees BTDC. We used a timing light and were getting NO advance. When I pulled the distributor cap off, I attempted to manipulate the advance mechanism, but it was stuck. I didn't use too much force, but it was clearly not moving. Buck mentioned that he had tightened down the nylon screws on the advance mechanism.
Something on the advance mechanism didn't look quite right, so I removed the nylon screws and did a quick inspection of the dizzy. After poking around a bit, I was able to get the advance mechanism to freely rotate without issues. Then I re-installed the nylon screws...not too tight. Everything worked as it should. Cap back on and the engine fired up and the advance curve was spot on. At the time, my assumption was that the nylon screws had somehow impeded the advance mechanism from rotating. Perhaps my poking around a bit somehow freed-up whatever was binding-up the advance mechanism. As the dizzy worked as advertised, we buttoned-up everything up and I didn't give much more thought to the nylon screws. Go figure... JQ |
||
|
Current
2003 Ski Nautique 206 Limited Previous 2001 Ski Nautique Open Bow 1994 Ski Nautique Open Bow Aqua skiing, ergo sum |
||
|
||
|
Tomrupp
Groupie 
Joined: October-14-2021 Location: MI Status: Offline Points: 73 |
Post Options
Thanks(0)
Quote Reply
Posted: August-01-2022 at 1:46pm |
|
|
We had similar issues with our 94 SNOB. We had rebuilt the carb, swapped out multiple accelerator pump nozzles, replaced fuel pump, learned that there should not be a fuel filter beyond the water fuel separator, replaced distributor (made sure to not be 1 tooth off). It still ran horribly. What finally worked for us was to adjust timing while in gear at idle to find where the old Ford liked it best. For us, this has finally made the difference. It’s never ran better from idle to 40+mph. It’s an easy try. Half inch socket with extension and a boating partner. Mark your timing first. If it doesn’t work, reset where you are now. I do not disagree with Keno’s timing numbers, but if your timing is off the mark, it could cause performance issues.
|
||
|
Tom
94 Ski Nautique Open Bow 351 with Carb 95 Double Decker Aqua Patio with 50hp Honda (3 carbs). |
||
|
||
|
AZ86SKI
Senior Member
Joined: July-05-2022 Location: Phoenix, AZ Status: Offline Points: 115 |
Post Options
Thanks(0)
Quote Reply
Posted: August-09-2022 at 4:58pm |
|
|
I apologize for the brief delay in posting an update. I got the new QF and new fuel line installed last night and ran it on the trailer. It sounds better than it ever has (looks great with new QF as well). Something is definitely different in a good way. The idle was a lot smoother. Previously, anything under about 750 RPM it felt like it wanted to stall. That is not the case now, it can now idle much lower. I also ran the RPMs up to 3000 and it was extremely smooth as well, no pops or hesitations. Additionally, when I shut it down for a few and tried a hot start. It started right up and idled great. Previously, I would have had to pump the throttle at least once before any hot start. I still have to take it out on the water and run it under load, but I am extremely confident that we may have found the solution in a new carburetor.
I did want to share a few things in getting it installed that may help others in the future who decide to go the QF route. If you are using the Holley 12 degree wedge under your QF, the 3.50" carburetor studs in the rear worked perfect for me. The mechanic had used bolts (not sure why) in the rear with the 4160 which will not work with the QF as there is not enough clearance to insert a bolt on one side. The spark arrestor just barely hit the float adjustment hardware on the top of the QF so I decided to go the spacer route. JQ has a previous post with a B&B Air Cleaner Sure Seal 1.50" spacer and another one from K&N which got me looking and I found a few others. Sorry, I need to review how to post a link or quote some ones previous post. In any event, I also found a Stef's Fabrication 72255 B&B Performance Air Cleaner Sure Seal 1" spacer that should be here today. I know its only a 1/2" shorter but it looked like the clearance was going to be close. After I ordered it I also found a 1/2" spacer on the Holley/QF site made by Mr. Gasket. So just a few options if clearance may be a concern. I just want to thank everyone again for all the help. I hope to get the boat on the lake in the next week or so and give it run under load and see how it does. I am very optimistic and I will update as soon as I do. Thanks again. |
||
|
||
|
AZ86SKI
Senior Member
Joined: July-05-2022 Location: Phoenix, AZ Status: Offline Points: 115 |
Post Options
Thanks(0)
Quote Reply
Posted: August-09-2022 at 5:06pm |
|
|
I forgot to mention that the only adjustment I made to the QF was increasing the curb idle just a bit. There is a lot of good advice on here about not needing to make a bunch of adjustments to the QF, especially by novices like myself, and I followed that advice.
|
||
|
||
|
AZ86SKI
Senior Member
Joined: July-05-2022 Location: Phoenix, AZ Status: Offline Points: 115 |
Post Options
Thanks(0)
Quote Reply
Posted: August-14-2022 at 2:37pm |
|
|
Well...here is the update after installing the new QF carburetor and fuel line. It was a long, interesting and frustrating day on the lake, but I will try to stay on point. So here is the good, the bad and the ugly.
New carb ran great on the trailer. Easy starts and restarts so I was hoping for the same at the lake. Backed the boat down the ramp into the water and it would not start. The look from the GF was not one of confidence. It acted like it was starving for fuel. After about ten minutes of breaks and multiple attempts with multiple throttle pumps each time it finally started and idled great. The Good: Once launched, it shifted into gear with no hesitation or stumble at all which was one of the previous issues. It was extremely smooth and it was great! Throttled up past the no wake zone which was smooth all the way to WOT. The Ahhhh sound on the high end had disappeared. However, when I looked down, the RPMs still remained at 2700 and the speedometer showed about 30. The Ahhhh was gone but the top end speed remained about the same. So we were content with that for the day. Cruised around awhile and the low end issues were gone and found a spot to anchor for a bit. Started back up after awhile and low end issues were ok but not as quite as good as it was before shutting down for a bit. The Bad: After starting back up and idling out we cruised for a bit at maybe half throttle and then I opened it up to WOT, there was a pop which sounded like it came from the carb and it died. GF look number 2. After multiple attempts to restart, it sounded like it wasn't getting any fuel. A passing boat was nice enough to tow us to a cove away from the rocks so we could anchor up and call in for a tow. Which of course took two hours to arrive. GF long two hour look number 3. While waiting I could see that there was no fuel in the primary float window. The Ugly: The long tow back to the dock. I told her it runs great as long as we are being towed. Yup, you guessed it...GF look number 4. After contemplating this from yesterday until now my thoughts are it has to be the fuel pump. The pump is definitely older if not original. It is also about the only thing that hasn't been replaced in the fuel system. So I decided to go out this am and turn the engine over a few times and see if I could get/see fuel in the primary window. There was none. I adjusted the float level on the primary float to raise the float and no change so I returned it to the original position. I disconnect the fuel line from the carb and turned the engine over a few times to see if fuel was being delivered and fuel pumped out into the can at the same rate when the fuel pressure and fuel flow was tested earlier in this post. I am so confused. I am going to order a new fuel pump no matter what based on its age but I am confused.  Why is there no fuel in the primary bowl on a brand new carburetor that was running fine (other than full top end), then dies, and the fuel pump seems to be delivering fuel? Am I lucky enough to get the one QF carb with issues? I also don't want to be tinkering around inside a brand new carb with no experience of rebuilding carburetors especially with what the new QF cost. Thoughts? Why is there no fuel in the primary bowl on a brand new carburetor that was running fine (other than full top end), then dies, and the fuel pump seems to be delivering fuel? Am I lucky enough to get the one QF carb with issues? I also don't want to be tinkering around inside a brand new carb with no experience of rebuilding carburetors especially with what the new QF cost. Thoughts?Additionally, any recommendations on a new fuel pump for this 351W. The one that is on it is a Carter with the internal filter. The new Carter pumps didn't have the best reviews. Is a pump with the internal filter necessary since it also has the fuel/water separator filter as well? Thanks |
||
|
||
|
Jonny Quest
Grand Poobah
Joined: August-20-2013 Location: Utah--via Texas Status: Offline Points: 2843 |
Post Options
Thanks(1)
Quote Reply
Posted: August-14-2022 at 7:26pm |
|
|
No fuel in the sight window provides a significant clue. You can determine if the fuel pump is bad by checking the fuel pressure. You should see between 5.5 to 6.5 pounds of pressure from your pump. If not, then you may have found your problem. Free-flowing from the fuel pump with no resistance may lead you to a false assumption. It is possible that there is a needle/seat problem in the primary fuel bowl. In my first M-600 QF carb, a stray bit of brass shaving got caught in the the needle/seat. QF sent me a new needle/seat and the carby ran perfectly. I strongly suspect that the fuel pump is the issue and not the carby.
JQ
|
||
|
Current
2003 Ski Nautique 206 Limited Previous 2001 Ski Nautique Open Bow 1994 Ski Nautique Open Bow Aqua skiing, ergo sum |
||
|
||
|
AZ86SKI
Senior Member
Joined: July-05-2022 Location: Phoenix, AZ Status: Offline Points: 115 |
Post Options
Thanks(0)
Quote Reply
Posted: August-14-2022 at 7:38pm |
|
|
Thank you JQ. I will check the fuel pressure again in the am. Please let there be none! I am really hoping that is the case. I will update tomorrow as to what I find.
|
||
|
||
|
KENO
Grand Poobah
Joined: June-06-2004 Location: United States Status: Offline Points: 10652 |
Post Options
Thanks(0)
Quote Reply
Posted: August-15-2022 at 7:37am |
|
|
If you're buying a fuel pump, I stumbled into one of these recently on a friends boat
link EBAY The ruptured diaphragm connection is on the rear of the pump instead of the front and on your Commander that's a good thing because the front connection can need modification to clear the back of the raw water pump, depending on the pump. It probably looks pretty much just like a copy of your present pump. It's from "the Far East", he's put maybe 50 hours on it and so far so good
|
||
|
||
|
AZ86SKI
Senior Member
Joined: July-05-2022 Location: Phoenix, AZ Status: Offline Points: 115 |
Post Options
Thanks(0)
Quote Reply
Posted: August-15-2022 at 11:31am |
|
|
Thank you KENO. The pump you linked has been ordered. It may be from the Far East but its currently in Idaho now which is much closer and free shipping as well. Many reviews on quick shipping too so hopefully I can get that replaced soon.
I was able to get the fuel pressure check done this am as well. Initially there was none while cranking and then it jumped to 6 psi. I tried it again and about the same. So I re-attached the fuel line and cranked it (I didn't crank it last time I raised and returned the float after I got home) a bit and it looked like some fuel in the primary bowl. I adjusted the float bowl up a bit and fuel level is back right in the middle of the window. When I tried this exact same thing at the lake after it died it did not produce the same result as it did today. In my novice opinion, it has to be a failing fuel pump. If we are correct it may also explain the hard start at the dock and loss of power at the top end (the only issue left after the fuel pump). Keeping in mind that I was the one stranded on the water for two hours so my opinion doesn't carry a lot of weight. This seems like really good news to me since I was really hoping to rule out the new carb. Any thoughts while I wait for the new fuel pump? |
||
|
||
|
AZ86SKI
Senior Member
Joined: July-05-2022 Location: Phoenix, AZ Status: Offline Points: 115 |
Post Options
Thanks(0)
Quote Reply
Posted: August-15-2022 at 11:41am |
|
|
I forgot to ask where I might find new fittings (inlet/outlet) for the new fuel pump that the fuel lines thread into? I'm sure I can use the fitting in the old pump, but I thought I would try and find new if I could. Thanks.
|
||
|
||
|
Post Reply
|
Page <1234 7> |
 Tweet
Tweet
|
| Forum Jump | Forum Permissions You cannot post new topics in this forum You cannot reply to topics in this forum You cannot delete your posts in this forum You cannot edit your posts in this forum You cannot create polls in this forum You cannot vote in polls in this forum |


 Topic Options
 KENO wrote: