 Boats For Sale:


79 ski nautique stringer replacement |
Post Reply 
|
Page 12> |
| Author | |
john_sn 
Newbie 
Joined: August-02-2021 Location: Meridian, MS Status: Offline Points: 27 |
 Post Options Post Options
") Thanks(0) Thanks(0)
 Quote Reply Quote Reply
 Topic: 79 ski nautique stringer replacement Topic: 79 ski nautique stringer replacementPosted: March-01-2022 at 4:27pm |
|
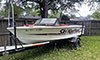
Hello all, It's John here with the 79 Ski Nautique back for some more advice. I had a scare last summer when my driveshaft detached from my coupler, and after some digging we found my engine was out of alignment. Here is a link to that post. I checked my alignment regularly for the rest of the season, and no matter what I did, I could not keep the engine in alignment. Near the end of the season I finally realized my problem:  The stringers have started to rot where the engine mount bolts are, and the engine doesn't stay put anymore. If I try to tighten these bolts they just spin in place. I pulled the boat out, winterized it, and put it away for the season, knowing I would need to replace the stringers before I can keep using it. That's my task this spring. I removed the seats, seat mounts, fuel tank, rear floorboard. Then I pulled out the engine using an automotive engine hoist. I took out the carpets, then removed all the items that I could from the engine bay (fuel filter, trans oil cooler, bilge pump, etc). Here is a before and after:     Here's where I'm a little stuck. I would like to remove the floor but leave the old stringers intact so that I can take precise measurements of them, but there's no way to remove the floor without grinding it out, and that will destroy the old stringers. How would you all proceed from here? My best plan right now is to measure the exact location of the engine mount points and ski pole relative to the hull and the transom, then just cut everything out and rebuild it following wayoutthere's excellent walk through, with some adjustments. Some info on the boat - I bought it last year from the original owner who owned it since it was new in 1980. Somewhere in the boat's lifetime it had the stringers replaced and got a new (same model) engine. So I'm trying to figure out what is original CC design and what is the original owner's rebuild. I'll post an album with some more photos here shortly. Thanks in advance, John
|
|
 |
|
|
KENO
Grand Poobah 
Joined: June-06-2004 Location: United States Status: Offline Points: 10669 |
Post Options
Thanks(0)
Quote Reply
Posted: March-01-2022 at 6:27pm |
|
Based on the engine mounts, transmission mounts and transmission oil cooler location in your pictures, it looks like your boat had a commander 351 engine originally and it was replaced by a 351 with PCM exhaust and,cooling system etc. and the above mentioned parts were transferred over. (That stud on the front mount should be straight up and down and not angled way forward like it is in the picture.
Also the floor and the finish on the stringers look like they're original and maybe somebody did some kind of "stringer repairs" but not a replacement. Your floor is probably just a thin layer of fiberglass over foam, with wood embedded under the driver's and passenger seats and across the stringers where the pylon mounts thru the hole in the floor(and the wooden removable center section above the shaft) You would cut through the glass, peel it up and then get to digging the foam and rotten wood out, then be able to try saving the stringers in one piece for a pattern Also this quote is from your linked thread about the ARE shaft
I hope that retaining nut wasn't just hand tight otherwise the tapered coupling and the tapered shaft aren't exactly mated together correctly.  You'll probably get some other opinions on whether the floor and the stringer glasswork look original and how to handle your stringer job. |
|
|
|
|
MechGaT
Senior Member 

Joined: March-09-2015 Location: Chattanooga Status: Offline Points: 271 |
Post Options
Thanks(0)
Quote Reply
Posted: March-01-2022 at 6:28pm |
|
There are several good threads on rebuilding stringers on here. One that comes to mind is weeding the pumpkin patch, but most lost there pictures when the site was hacked a couple of years ago. I would recommend taking measurements of the location of everything now. There are many ways to put it back together, but if you get the sole or floor or anyone else’s preferred term back to the right level with the pylon and engine mounted in the same place or very close then you will be happy with the results.
|
|
|
'92 Sport Nautique
|
|
|
|
|
wayoutthere
Senior Member
Joined: February-28-2020 Location: Florida Status: Offline Points: 391 |
Post Options
Thanks(0)
Quote Reply
Posted: March-01-2022 at 10:24pm |
     Heres your stringer locations, if you get a multi tool or are gentle with a sawzall you can filet the floor off of the top of the stringers using the blade horizontally between the stringer top and the couple layers of chopped strand mat used as the floor. From that point trim the floor away from the hullside (flush or leave as much as you'd like) The fiberglass just outside of the engine mount lag holes out to the outboard stringers are foam filled. Shovel out your foam and lay a 2 foot level across the main engine stringers and every foot from the transom all the way forward measure down along the stringer to the hull and from the boat centerline down to the hull. A bit over kill but having 3 elevation dimensioms every foot and noting the steering knuckle, dog box hinge screws, engine lag holes etc etc along the way will pay big dividends in the end when your putting her back together. I use a harbor freight warrior sander polisher (non orbiting) as my go to grinder cutter and polisher. It's variable speed from 650 to 3500 rpm, lean on it hard the motor torques like crazy to maintain the rpm setting so it cuts and grinds very well, and believe me you'll cut out the stringers and grind down the remaining tabbing faster and safer than you ever will with a 4 inch 12 thousand rpm angle grinder. Save big money using hook and loop over flappy discs too. Hopefully these pictures help you out Edit in; i'll try and pull a measurement from the rudder post or transom to a front and rear engine lag so you can relocate your engine and plumb up your mounts (good spot keno). Also in that picture with the crooked engine mount save those blocks of wood for when you measure your stringer elevations.
|
|
|
|
|
john_sn
Newbie
Joined: August-02-2021 Location: Meridian, MS Status: Offline Points: 27 |
Post Options
Thanks(0)
Quote Reply
Posted: March-02-2022 at 4:23pm |
|
Thank you all so much for the replies! Keno, do you really think it is a PCM? The original owner said that the second engine was the exact same model as the first (although the more I learn about this boat the less I trust the original owner  ). It has Commander casted into all the mounts (if you look closely at the first picture Commander is casted into the mounts that support the engine body), although I can't find anything specific casted into the engine body itself. The exhaust risers are definitely PCM. Is there someone on the engine body that I should expect to find an identifier? ). It has Commander casted into all the mounts (if you look closely at the first picture Commander is casted into the mounts that support the engine body), although I can't find anything specific casted into the engine body itself. The exhaust risers are definitely PCM. Is there someone on the engine body that I should expect to find an identifier?   Wayoutthere, These photos are an excellent resource, thank you! I took as many measurements as I could above the carpet as well as below it. Now I'll try to carefully remove the floor so I can get some good measurements of the outboard stringers as well. Everything mounted above the carpet:  Everything below the carpet:  |
|
|
|
|
KENO
Grand Poobah
Joined: June-06-2004 Location: United States Status: Offline Points: 10669 |
Post Options
Thanks(0)
Quote Reply
Posted: March-02-2022 at 6:03pm |
|
I'd call it a MBPP. That's short for mixed breed pound puppy
Earlier I said it was a 351 engine with PCM manifolds and cooling system. I'd still say that. Not necessarily a PCM, just a 351 Ford. It could very well be a Commander replacement engine that the guy put in it and at the same time or at a later time he put on the PCM stuff due to manifold issues The PCM stuff is the exhaust manifolds, the complete thermostat housing assembly, the raw water pump and it's mounting bracket and the alternator and mounting bracket You see a fair number of Commanders with cast iron pyramid manifolds like yours, it probably says something about the durability of the originals Like mentioned and your pictures show, the mounts, bellhousing, transmission oil cooler mounting position and the big bracket that holds the slave relay for the starter, the main breaker and at one time the external voltage regulator, and also is a mounting bracket for the throttle cable are Commander parts. It looks like you have a later internally regulated alternator since the external one doesn't show in your pictures. There's no real difference in the basic engine blocks, they both bought the engines from Ford and put on their own "bolt ons" The block, heads, intake will just have Ford numbers, no PCM or Commanders numbers. PCM ID tags were on a metal plate bolted to the back of the intake behind the carburetor. Commander ID tags were.............well I don't remember Maybe somebody with an original Commander will tell you where his is.Edit...........Sometimes the tag is riveted/glued to the back of the left cylinder heag, but not on yours according to your pictures If the engine runs good, I wouldn't be too concerned about the mix of parts. It's a good mix.
|
|
|
|
|
KENO
Grand Poobah
Joined: June-06-2004 Location: United States Status: Offline Points: 10669 |
Post Options
Thanks(0)
Quote Reply
Posted: March-02-2022 at 6:12pm |
|
One other thing..............looking at your drawings, I think you and wayoutthere will get along just fine
|
|
|
|
|
john_sn
Newbie
Joined: August-02-2021 Location: Meridian, MS Status: Offline Points: 27 |
Post Options
Thanks(0)
Quote Reply
Posted: March-02-2022 at 9:10pm |
|
Okay, interesting, I have a buddy with a 90's SN 2001 with a 351 Ford Commander. I'll try to get a picture of the engine just for the record!
|
|
|
|
|
KENO
Grand Poobah
Joined: June-06-2004 Location: United States Status: Offline Points: 10669 |
Post Options
Thanks(0)
Quote Reply
Posted: March-03-2022 at 6:33am |
  Here are a couple of Commander 351's for comparison. The locations of the water pump and alternator are original and you can see the original thermostat housing too. The second picture has a missing belt, a missing hose and a disconnected hose Also your buddy has an 80's 2001 (82 through 89 were the 2001 years)
|
|
|
|
|
john_sn
Newbie
Joined: August-02-2021 Location: Meridian, MS Status: Offline Points: 27 |
Post Options
Thanks(0)
Quote Reply
Posted: March-05-2022 at 1:06pm |
|
You beat me to it! Here's a photo of my buddy's commander.  His has the same engine body, mounts, intake manifold, and transmission as mine, but with Commander thermostat housing, alternator, exhaust risers, and raw water impeller. I'm wondering why the previous owner of my boat would have swapped those for PCM parts... Further progress on the task at hand: The 'fillet' method described by wayoutthere works quite well. The top glass mesh layer comes right off to reveal what's underneath.    There isnt a dry piece of wood anywhere in the boat! The foam that fills the void space is quite a pain to remove. My current method is using a gardening spade to scoop it out one spoonful at a time but it's taking a while. Is there a purpose to this foam, or was it just to fill the space? I'm thinking for the rebuild the space between the outboard stringers and the gunwale would make excellent ski storage space.
|
|
|
|
|
KENO
Grand Poobah
Joined: June-06-2004 Location: United States Status: Offline Points: 10669 |
Post Options
Thanks(0)
Quote Reply
Posted: March-05-2022 at 5:04pm |
|
The primary reason for the foam was so that if your boat fills up with water, it will float somewhere near the surface instead of somewhere near the bottom
It also adds maybe a little sound deadening It also kept the USCG happy A small spade type shovel works good for getting it out Like mentioned earlier the PCM stuff may have been due to manifold issues and/or parts availability of the Commander stuff. It's been out of production for a long time and the Commander specific parts have been hard to find for a long time. PCM 351w things like thermostat housings and covers and timing covers are hard to find these days even with PCM still being alive and well.
|
|
|
|
|
ultrarunner
Platinum Member 

Joined: October-02-2005 Location: Ridgefield, Ct. Status: Offline Points: 1809 |
Post Options
Thanks(0)
Quote Reply
Posted: March-06-2022 at 10:54am |
|
When I got my '80 AM Skier, second motor pictured above in KENO's post, it came with the original Commander manual, which I scanned and this site uploaded to the reference section Contained in that manual was the name and number of a guy in the Miami area that still had a bunch of NOS Commander goodies. Check the reference section to see if that number made it into the scan of the manual. I distictly recall calling him shortly after getting that boat, and was able to source a NOS T-stat housing and a few other Commander goodies.
Mark
|
|
|
|
|
john_sn
Newbie
Joined: August-02-2021 Location: Meridian, MS Status: Offline Points: 27 |
Post Options
Thanks(0)
Quote Reply
Posted: March-06-2022 at 12:06pm |
|
The only number in my manual is for a Power House Marine located at 4760 NW 128th Street Miami, FL. Looks like it has since moved or gone out of business though.  |
|
|
|
|
ultrarunner
Platinum Member
Joined: October-02-2005 Location: Ridgefield, Ct. Status: Offline Points: 1809 |
Post Options
Thanks(0)
Quote Reply
Posted: March-06-2022 at 12:55pm |
|
Hi John, now that I think about it, my reference was hand written on an inside cover or something, with an Opa Lock address and number. I can remember calling the guy and sourced a NOS T-stat housing and some other Commander goodies. I think the guy was old then, might be long-gone now, but I distinctly remember him telling me he had a ton of stuff, at that time. I seem to remember my housing came in the original unopened package. I might be able to scare up that source if I can track down the guy I sold to, if anyone has an interest. And there might be enough folks on here in south Florida that remember who he is...
Mark
|
|
|
|
|
john_sn
Newbie
Joined: August-02-2021 Location: Meridian, MS Status: Offline Points: 27 |
Post Options
Thanks(0)
Quote Reply
Posted: March-06-2022 at 3:15pm |
|
Mark, I would absolutely have an interest! Let me know what you can find
|
|
|
|
|
67 ski nat
Platinum Member
Joined: July-19-2018 Location: Santa rosa Status: Offline Points: 1181 |
Post Options
Thanks(0)
Quote Reply
Posted: March-06-2022 at 9:15pm |
|
I used a flat bar and machete, cut edges and pop out like a lasagne casserole
Or cake in a pan |
|
|
|
|
uk1979
Platinum Member
Joined: June-13-2007 Location: United Kingdom Status: Offline Points: 1411 |
Post Options
Thanks(1)
Quote Reply
Posted: March-07-2022 at 10:52am |
|
May help with your build sizes are mm taken from the wide side or facing the centre of the hull, for Mk2 SN Thanks for saving the boat.   
|
|
|
Lets have a go
56 Starflite 77 SN 78 SN 80 BFN |
|
|
|
|
john_sn
Newbie
Joined: August-02-2021 Location: Meridian, MS Status: Offline Points: 27 |
Post Options
Thanks(0)
Quote Reply
Posted: March-07-2022 at 12:33pm |
|
This is an invaluable resource for the rebuild. Thank you very much! John
|
|
|
|
|
john_sn
Newbie
Joined: August-02-2021 Location: Meridian, MS Status: Offline Points: 27 |
Post Options
Thanks(0)
Quote Reply
Posted: March-17-2022 at 3:24pm |
|
Making progress, slow but steady. You all weren't kidding about how time consuming this job is. I found the previous owner's "stringer repair", which looks like they just poured epoxy into an already half rotten board.   That was a pain to remove. I cut out the first stringer with a reciprocating saw, which was a mistake. The better way to do it is to use an angle grinder with a cutting wheel, and just cut through the fiberglass as close to the base of the hull as possible. With a clean cut through the fiberglass all the way down on both sides, I could pry the old stringer out with a crow bar. It helped that my stringer was completely rotten. With the wood from the stringer out of the way, a grinding wheel on the angle grinder can remove the stubs that remain.   I'm starting to think about the rebuild now and have a few questions. I read on this forum that Douglas Fir is the lumber I want for the stringers, but I called around to the local lumber supply stores here and no one seems to carry it. They said they carry 'SPF'. Is 'SPF' close enough for this job? Would it be a bad idea to skip the foam on the rebuild? I'm thinking the space in the bow that used to be all foam could instead be the battery compartment, a storage for a ski, a watertight glove compartment. and a spot for a cooler.
|
|
|
|
|
67 ski nat
Platinum Member
Joined: July-19-2018 Location: Santa rosa Status: Offline Points: 1181 |
Post Options
Thanks(0)
Quote Reply
Posted: March-17-2022 at 4:01pm |
|
Hi john. I repaired/reglassed my stringers (good wood) and removed all foam. I did put foam back, but only in the places I did not want to get trapped water or not able to get water out by bilge
So all foamed forward of bulkhead wall (no bilge pump area). There is no foam on sides of stringers or secondary I also put foam back in rear corners adjacent fuel tank That’s it, seems you have time and can foam anytime |
|
|
|
|
john_sn
Newbie
Joined: August-02-2021 Location: Meridian, MS Status: Offline Points: 27 |
Post Options
Thanks(0)
Quote Reply
Posted: May-07-2022 at 9:28am |
|
Hello all, It has been a slow month but im finally starting to make progress again. Everywhere that is going to get glass or gel coat has been grinded and sanded, and now I'm making the new stringers.   Unfortunately I could not find anyone within 500 miles who could supply fir boards, and I had no luck finding cypress either. After weeks of searching I decided to go with cedar. Not ideal but I thought it was better than southern yellow pine or SPF. I have the bottoms of the boards cut nicely to fit the hull, and now I have to shape the tops. This leads to my question: In this diagram, the tops of the stringers are cut down 46cm from the top where the engine mounts will sit.  My old stringers also had this indentation. Why then do the engine mounts sit on these wooden blocks? Would it be better to leave out the wooden blocks, and just shape the tops of the stringers so that they are correct height off the hull where the engine mounts will be? Or is there a purpose for the wooden blocks? Thanks in advance, -John |
|
|
|
|
ultrarunner
Platinum Member
Joined: October-02-2005 Location: Ridgefield, Ct. Status: Offline Points: 1809 |
Post Options
Thanks(0)
Quote Reply
Posted: May-07-2022 at 9:37am |
|
I’ve not done this job, but I think it was easier for the factory to use the blocks to get the correct engine height/angle given the number of different engines. Someone will likely have a better explanation.
|
|
|
|
|
gun-driver
Grand Poobah
Joined: July-18-2008 Location: Pittsburgh, Pa Status: Offline Points: 4112 |
Post Options
Thanks(0)
Quote Reply
Posted: May-07-2022 at 7:18pm |
|
Don't be afraid to use Southern Yellow Pine here's a Quote from the link given. Don't use SPF !!
IS DOUGLAS FIR STRONGER THAN SOUTHERN YELLOW PINE? While Douglas fir and Southern yellow pine are both softwoods, SYP wood is the stronger of the two. That’s one reason why SYP wood tends to be used for structural components like trusses and building framings. |
|
|
|
|
wayoutthere
Senior Member
Joined: February-28-2020 Location: Florida Status: Offline Points: 391 |
Post Options
Thanks(0)
Quote Reply
Posted: May-08-2022 at 2:47pm |
Looks like your doing a very good job grinding the hull and fitting your stringers. On that indentation, i would shape the stringer to fit the engine and omit the wooden blocks. What material and resin choices are you going with ?
|
|
|
|
|
TRBenj
Grand Poobah

Joined: June-29-2005 Location: NWCT Status: Offline Points: 21113 |
Post Options
Thanks(0)
Quote Reply
Posted: May-08-2022 at 8:31pm |
|
The above makes sense… unless you’ve actually gone through the process.
Consider that the OMC mounts you have are not only inferior to the PCM’s, but parts for them (namely rubber isolators, etc) are NLA. If you tune your stringer height to accomodate the shorter mounts and someday have to swap them out, the taller PCM’s won’t fit unless you have the extra height to give. The factory configuration that accommodated both may be the wiser choice. |
|
|
|
|
john_sn
Newbie
Joined: August-02-2021 Location: Meridian, MS Status: Offline Points: 27 |
Post Options
Thanks(0)
Quote Reply
Posted: May-08-2022 at 10:11pm |
|
wayoutthere, For fiberglass on the stringers I plan to use two layers of 1708. For the floor I plan to use 1/2" plywood with a layer of csm on each side, then glass the floor to the hull and stringers with a layer of 1708. I plan to just use polyester resin for the stringers and the floor with a layer of gel coat in the bilge. TRBenj, That's a good point. I would not have thought about that. That's a good idea to keep it open to easy repair further down the line
|
|
|
|
|
wayoutthere
Senior Member
Joined: February-28-2020 Location: Florida Status: Offline Points: 391 |
Post Options
Thanks(0)
Quote Reply
Posted: May-09-2022 at 8:14am |
|
There may be some polyester resin that is thin enough and has a good pot life and working time but all the poly ive seen has been thick and hot.
1708 is great stuff, it needs thin resin for fast and thorough wet out, it also needs approx 32 ounces of resin per 1296 sq inches of material. You'll need fast wet, good pot life and working time. Vynil-ester or epoxy and a solid plan will give you the results your after. Post your stringer dimensions length and height and how much tab you plan to have from stringer onto the hull i'll work a mock up of how i was told to install stringers and take a pic.
|
|
|
|
|
wayoutthere
Senior Member
Joined: February-28-2020 Location: Florida Status: Offline Points: 391 |
Post Options
Thanks(0)
Quote Reply
Posted: May-09-2022 at 9:30am |

This is how i was told to bed and tab in stringers with some adjustments that i'll list. Let's say the cardboard is the hull, wet out and unroll a piece of 1708 right down the hull were the stringer will be placed to bed it down and encapsulate it. (I overkill and draw a line on the hull and glass to locate both and have even bed off both sides).    With a tongue depressor put in a nice radius of cabosil thickened resin.  Cut a handfull of 18 inch long and a bunch of 36 inch long pieces, mix your resin in 16 or 32 ounces for ease of measuring activator and only mix 1 batch at a time wetting out only as much glass as you can place inside the resins working time.  Place an 18 inch then place a 36 inch directly over it, keep placing 36 inch pieces overlapping 1/2 the length right down the stringer, you end up with 2 layers in one shot with staggered/overlapping seams.   You probably already know all this and/or have a plan, this is an option and the way i was told, just passing it along. Also my opinion is 3 layers minimum. Some guys have no problem turning an outside corner with 1708, i'm in the can't do it club unless there is a lot of flap. (On my boat, the stringer tops were left bare until all sides were glassed in and the stringer heights were matched and shaped, then covered/capped after the fact.) This method may work for you since you can set in and verify the engine mount locations and height, cut shape as needed and then cap. I'm an amatuer so there tends to be overthinking, overkilling which makes more steps and more work, therefore i expect your job to turn out better than mine.
|
|
|
|
|
john_sn
Newbie
Joined: August-02-2021 Location: Meridian, MS Status: Offline Points: 27 |
Post Options
Thanks(0)
Quote Reply
Posted: May-09-2022 at 10:27am |
|
wayoutthere, Thanks for your post. This is great information, and is pretty much how I was planning it in my head but its good to see some pictures. I was planning to use a router to put 1/8" or 1/4" rounded edges on all the stringer tops and try to go up over and back down with a single piece. I'll have to report back whether that's feasible or not. Unfortunately I already ordered all the fiberglass a couple of weeks ago, so I already have the poly resin. The folks at fiberglass supply depot said they'd done this job a few times and that epoxy was overkill, so I took their advice. I suppose I'll find out for myself whether they're right.
|
|
|
|
|
wayoutthere
Senior Member
Joined: February-28-2020 Location: Florida Status: Offline Points: 391 |
Post Options
Thanks(0)
Quote Reply
Posted: May-09-2022 at 11:09am |
|
Don't forget to put resin on your stringers and let it soak in 15-20 minutes before putting glass on so the dry wood doesn't suck resin out of your glass.
Up and over, Lets say 3 inches of tabbing on the hull, 6 inches stringer height 1 1/2 wide, that's 19 1/2 inches wide by 18 and 36 long. 351 & 702 sq inches respectively, 1053 inches plus what the roller needs plus the extra to keep it wet and sloppy until you bubble roll and sqeegee it out to balance the resin/material ratio. That's a 1 quart mix at a time, make sure you have spare rollers, bubble rollers, sqeegees and acetone on hand, you'll be very busy bubble rolling and balancing it out. A test to check pot life, wet out and working time may be in order, again i'm slow you may very well have no issues, just relaying how it went for me. What did you start your order with 16-20 yards of 38 inch 1708 and a five gallon bucket. It adds up doesn't. Looking forward to but not really another ski boat project. Keep posting pics and keep us up to date.
|
|
|
|
|
Post Reply
|
Page 12> |
 Tweet
Tweet
|
| Forum Jump | Forum Permissions You cannot post new topics in this forum You cannot reply to topics in this forum You cannot delete your posts in this forum You cannot edit your posts in this forum You cannot create polls in this forum You cannot vote in polls in this forum |


 Topic Options
 john_sn wrote: