 Boats For Sale:


1991 Sport Nautique Open Bow Stringer |
Post Reply 
|
Page <1234> |
| Author | |
Ian H 
Groupie 
Joined: September-24-2020 Location: Hong Kong Status: Offline Points: 69 |
 Post Options Post Options
") Thanks(0) Thanks(0)
 Quote Reply Quote Reply
 Posted: January-31-2021 at 7:05pm Posted: January-31-2021 at 7:05pm |
|
Thanks for the picture I was wondering what those two blocks were in the bilge.
I have now filled them with resin and chop to put them to use. going to be tight with the rudder cable clamp....  New lifting mounts are made ready to glass in and floor is cut to first rough fit.  |
|
 |
|
|
8122pbrainard
Grand Poobah 

Joined: September-14-2006 Location: Three Lakes Wi. Status: Offline Points: 41040 |
Post Options
Thanks(0)
Quote Reply
Posted: January-31-2021 at 7:19pm |
|
Ian,
Good work with the adhesive lined heat shrink crimp on connectors. It's an item I always recommend. Yes, the old wire can be a real PITA. Thanks for the tip. It's too bad there aren't many boat builders that go for the extra cost of using tinned marine grade wire.
|
|
|
|
|
Ian H
Groupie
Joined: September-24-2020 Location: Hong Kong Status: Offline Points: 69 |
Post Options
Thanks(0)
Quote Reply
Posted: February-06-2021 at 7:38am |
|
Finally rebuild time. Peanut buttered the new lifting points into place ready for glassing in tomorrow. managed to squeeze them in good and tight and hold them with a cam effect lever pivoted far away on the stringer. the excess squeezing out of the sides gives me confidence there should be no voids.
Floor is now dry fitted on top of the dry fitted stingers spaced with packing to allow for the Fiberglas layup thicknesses. levels came up pretty good so I could route out the thickness of the old floor to join the ski box to the new floor. Ugly now but should be strong I hope All my materials have just arrived from China just before the big slow down for Chinese new year. Epoxy is not the low viscosity I was looking for but is great for peanut butter. Lamination is not possible with this treacle so managed to find a source in Hong Kong for West System which works fine but not sure its going to be enough, ??? Is there a problem to use the thick epoxy for the peanut butter and put the low viscosity laminating epoxy on top?
    |
|
|
|
|
C_Heath
Senior Member 

Joined: January-21-2020 Location: NC Status: Offline Points: 207 |
Post Options
Thanks(0)
Quote Reply
Posted: February-09-2021 at 2:14pm |
|
awesome thread IAN! keep it current and dont make us come to hong kong for updates!
|
|
|
1979 Calipso Runabout (the boat that got it all started)
1988 Mastercraft ProStar 190 (sold) 2000 Pro Air Nautique/GT40 |
|
|
|
|
Ian H
Groupie
Joined: September-24-2020 Location: Hong Kong Status: Offline Points: 69 |
Post Options
Thanks(0)
Quote Reply
Posted: March-02-2021 at 9:51am |
|
I am still batting on, after convincing myself epoxy is the way to go, I ordered out of China it only to get the wrong thing with a consistency of very stiff treacle even when heated in a bath of boiling water. Penetrating epoxy also was not what I was looking for. The failed attempt took some weeks but i found a source for West system in China and a method of shipping it out but Chinese new year then fell and everything ground to a halt. My estimate is I need about 30ltrs all in all to the job done I now have the first 3.7 in hand (US Gal) I am crossing the rest will turn up this week.
In the meantime I have had time to plan better. I decided the air vents are one of the best paths for water into the under floor space so I have used 3 1/4 drain pipe which should let me seal the water upstairs. I dont have a photo but the back two vents are the same plastic drain pipe and 90 degree bends.   The pylon foot used the last epoxy I had. Then I had to start on other stuff.  I managed to get the new cutlass bearing in with the technique recip saw and threaded bar learned on CCF   I could get 2 4 6 and 8 inch fiberglass tape to layup the stringers but bilabial came in a 1.5 m roll so I have cut the forms to drape over and get the constant overlap at the hull without too much excess at the top when the stringer high gets short. ( Three pallet table on top of a dead fridge works    Now just need resin... Then on to engine. not perfect engine building conditions outside under a tarpaulin but it rained to damp down all dust just at the right time. Big relief when I got it all closed up from the elements. Not pretty but I hope should be reliable. Sierra Distributor and coil, new alternator, starter oil pump, raw water impeller pulleys ...... valve covers are too tall and just hit the exhaust manifold but I have another set of Edelbrocks on the way that should fix this. The PCM alloy ones were corroded too badly to save.  Bounce on the engine support started to freak me out so the tripod came out early as additional support .  I had most of the cast iron parts sand blasted and I then repainted. Engine mounts with new rubber worked out well  Oh and in my spare time I completed the full electrical rebuild on a board ready to hook up with the engine for an out of boat start up.  I hope my next news will be to show the stringers and floor going in..... I hope my layup thicknesses work out to the floor height comes good.
|
|
|
|
|
Ian H
Groupie
Joined: September-24-2020 Location: Hong Kong Status: Offline Points: 69 |
Post Options
Thanks(0)
Quote Reply
Posted: March-02-2021 at 10:01am |
|
Dry floor fit up looks like this, not sure yet how to join the two butt ends of plywood floor together..Peanut butter on top of the foam??
  |
|
|
|
|
MechGaT
Senior Member

Joined: March-09-2015 Location: Chattanooga Status: Offline Points: 271 |
Post Options
Thanks(0)
Quote Reply
Posted: March-02-2021 at 10:16am |
|
Looking good on the progress! For the ends that butt up, once they are glued down with the epoxy peanut butter, take a little more and smooth out the transition. Then fiberglass over them and if still not as smooth as you want, use some fairing compound. If you are putting in carpet it doesn’t have to be perfect, just smooth enough it won’t be noticeable.
|
|
|
'92 Sport Nautique
|
|
|
|
|
uk1979
Platinum Member 
Joined: June-13-2007 Location: United Kingdom Status: Offline Points: 1410 |
Post Options
Thanks(0)
Quote Reply
Posted: March-02-2021 at 11:19am |
|
Look at this thread it has Tim's link on home brew CPES,
https://www.correctcraftfan.com/forum/forum_posts.asp?TID=20669&title=home-brew
You may be able to thin the treacle after you have added the hardener first... best run some tests, I found my Epoxy worked best as a CPES @ 80% Xylene to 20% Epoxy... Do all your mixing/working outside this is not good stuff to breath.. some use other types of thinners too. Good luck with it. |
|
|
Lets have a go
56 Starflite 77 SN 78 SN 80 BFN |
|
|
|
|
Timr71
Groupie
Joined: March-28-2016 Location: Alabama Status: Offline Points: 80 |
Post Options
Thanks(0)
Quote Reply
Posted: March-16-2021 at 9:49am |
|
Hi Ian - any updates. You seem to be making such good progress on this one.
|
|
|
|
|
Ian H
Groupie
Joined: September-24-2020 Location: Hong Kong Status: Offline Points: 69 |
Post Options
Thanks(0)
Quote Reply
Posted: March-18-2021 at 10:35am |
|
Yes I am still pushing on. The sticking it all together bit is quite stressful and after all the effort to get the bits to fit together I was a bit nervous on my limited glassing skills. Resin finally turned up I manged to gather together 32 liters of 105 West system Epoxy close to the 8 gallon estimate from MechGa T Lets see If it can do the job! Epoxy was a very good decision, working outside were ambient goes from 17 deC up to close to 28 in one day with direct sun I could tweek the mix enough to give enough time to work and go off in an hour.
My prep on the position of the stringers worked perfectly and with the stainless screws adjusting the gap for the peanut butter I could get the stringers bedded in exactly on the planned position just screwing down on two screws in 30 seconds leaving enough time to smooth the fillet and get the first 2 inch tape on before the butter started stiffening and avoided any rework.  Everything ready on the start line mixing table on the stern of the boat to minimize time climbing in and out  Peanut Butter and 2" tape in on secondary and primary cut outs on the holding jigs allow the 2" tape to be threaded in to give a good robust bond before knocking out the position jigs. Then marathon of laminating I followed the plan courtesy of MechGa T + as I could not source 1708 an additional layer of bi axial. Pre cutting the shapes to fit the stringers with tabs was a good prep as no time to um and urr or think about cutting shapes. 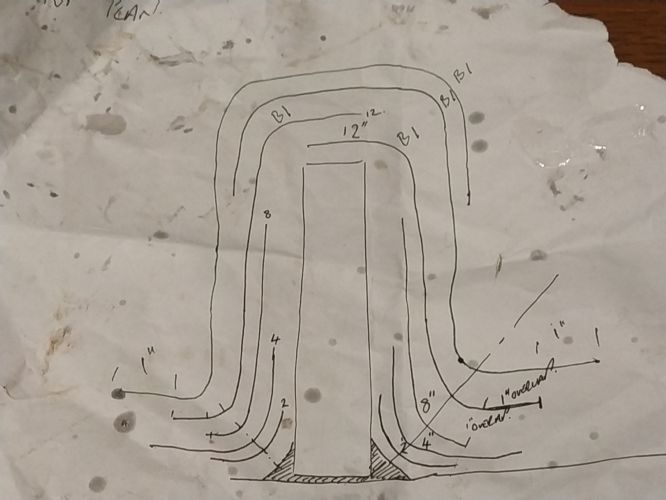  Here is the result 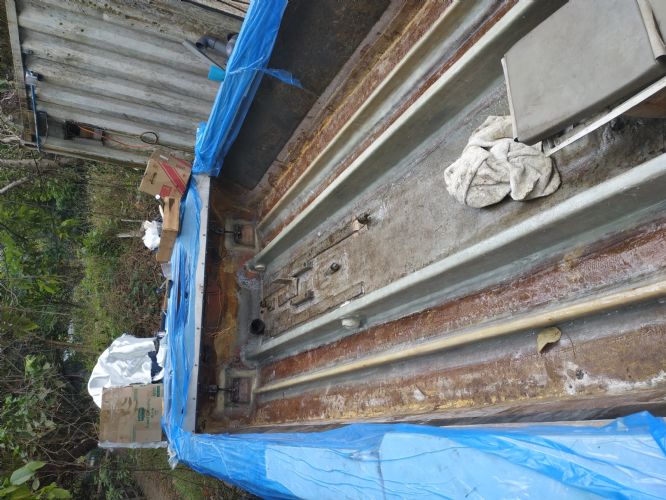 My stack calculation worked out good I was aiming to have the same 6mm wall thickness on the top of the stringers as the originals and I was pretty dead on so the floor still fitted and the engine frame mounting points look good and space between the stringers is dead on. I made a jig to calm my nerves so i could check as i went along . 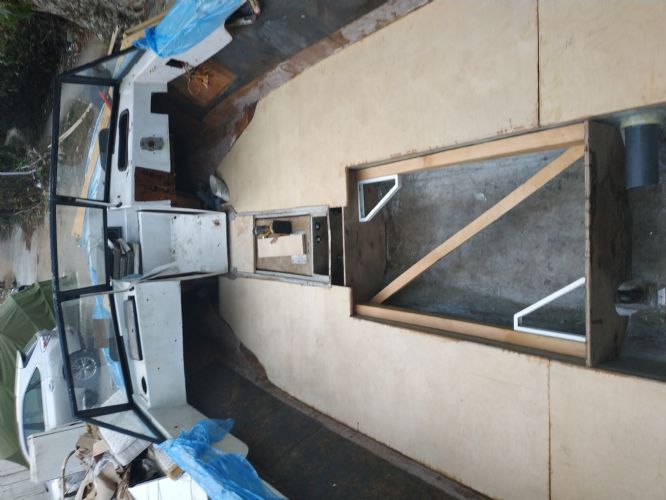 I used hard drainage pipe for the ventilation which I then glued up ready for the floor to go in I used hard drainage pipe for the ventilation which I then glued up ready for the floor to go in  I bought enough polyurethane expanding foam to fill the voids but High ambient caused overheating and my tests expanded ridiculously quickly which could deal with but the foam over expanded not leaving closed cells so the foam deflated a short while after. I managed to do the essential bow end filling around the vent pipes in the bow. the other areas i fitted pre expanded foal board into the voids before putting the floor on top. I do not need the structure as I have 15mm birch board with a layer of glass on the underside too so I only need the emergency flotation properties of the foam. This allowed me to keep moving and get both sides of front floor down on peanut butter held down with cast iron drain grates dark air full of mosquitos I will get a better photo later. I am so happy the levels look good and boat feels very rigid. Just got to find the energy to finish in the next window of dry weather. BTW my stingers were 8% moisture level after living in our bedroom with a dehumidifier so I think the bond will be good with the wood. 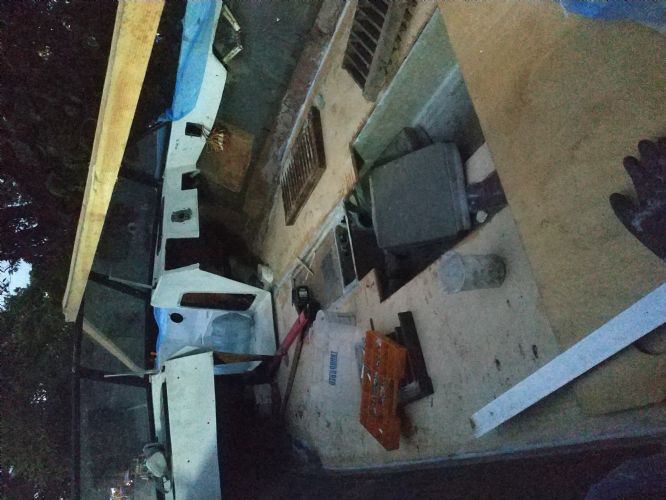 On the engine front the gearbox is now on the engine and off the stand. Compression Wow Yes Fuel yes but no spark.... Can you believe the cruel trick that those nice guys at Sierra distributor paid on me... Yes the connector is correctly inserted But it took a bit of finding to see that green and red wires are swapped on the connector.  Electrical system on a board let me check that I had oil pressure and all the sensors on the engine work while manually priming the oil pump and cranking to try and start. . Good weather then switched all effort to hull I will start the engine on the next wet day. I hope.... I am now thinking of the next challenges..... How to get the engine into the boat and how to align the prop shaft with the engine.  I dream of doing this in a garage with a bench a vice .... Many thanks for the encouragement and in particular for the layup plan from MechGa T it worked a treat even if i did laminate a lot of it with my bare hands (glove-less) to squish out the bubbles Desperate laminating techniques!Its warming up here so I need to finish the big stuff soon!
|
|
|
|
|
samudj01
Gold Member

Joined: March-10-2009 Location: NC Status: Offline Points: 931 |
Post Options
Thanks(0)
Quote Reply
Posted: March-18-2021 at 7:54pm |
|
Great progress. Enjoy following this. Keep up the good work!
|
|
|
78 Ski Tique, 72 Skier w/302's, 93 SN w/351 & 17 GS22 w/zr409
Previous - 99 Sport Nautique w/GT40 and 87 Martinique w/351 |
|
|
|
|
NCH20SKIER
Grand Poobah

Joined: December-16-2004 Location: United States Status: Offline Points: 2204 |
Post Options
Thanks(0)
Quote Reply
Posted: March-19-2021 at 5:59am |
|
moving forward. keep pushing or pulling whatever the case may be
|
|
|
'05 206 Limited
'88 BFN |
|
|
|
|
MechGaT
Senior Member
Joined: March-09-2015 Location: Chattanooga Status: Offline Points: 271 |
Post Options
Thanks(0)
Quote Reply
Posted: March-19-2021 at 7:09am |
|
Looks like great progress. I noticed you are missing a strip of wood behind the ski locker. Do you have a plan to install some there? It gives the back of the locker support, and I think you will probably step in that area more than you think you would. Edit: I see now in an earlier post that you do have something to go in that area and have a plan, just haven’t installed it.
|
|
|
'92 Sport Nautique
|
|
|
|
|
Ian H
Groupie
Joined: September-24-2020 Location: Hong Kong Status: Offline Points: 69 |
Post Options
Thanks(0)
Quote Reply
Posted: March-19-2021 at 12:00pm |
|
Well spotted , the top of the ski locker was originally plywood with fiberglass on top to make the bow floor. The wood was rotten , so I extracted it all and cut out a part of the floor over the locker by mistake when I took out the ballast tank. I cut a piece of ply to slot in about 90% in I put it in temporarily to get the space right when I reconnected the ski locker to the floor and fitted the front floor panelp ,but you have reminded me I still need to remove it and saturate it with epoxy. I plan to rebuild the step floor bit when I do the top fiberglass floor layer .
I stood on the floor with just the hardened peanut butter today and it feels good . should be even better after the top cover of fiberglass goes in. |
|
|
|
|
Ian H
Groupie
Joined: September-24-2020 Location: Hong Kong Status: Offline Points: 69 |
Post Options
Thanks(0)
Quote Reply
Posted: March-20-2021 at 1:23pm |
|
Floor is in, buoyancy using foam board cut with a sawsall and fixed with aerosol expanding foam where needed was quick and accurate and got over the variability problem using polyurethane in high temperatures. it was 28 in the shade today.
  bridge with pylon hole is successful with three layers of bi axial layed up on cling film on a board and squeezed in with clamps from below. very stiff and thin enough to fit over the engine frame . |
|
|
|
|
Ian H
Groupie
Joined: September-24-2020 Location: Hong Kong Status: Offline Points: 69 |
Post Options
Thanks(0)
Quote Reply
Posted: March-20-2021 at 1:50pm |
|
The back floor sections also with layer of fiberglass tissue pre applied to the underside then peanut buttered in, all vent [i[es are now in under the floor
    I hope to get the cloth on the top tomorrow. I would like the time to be a bit more pretty but Engine lift in opportunity with a Hiab is next week so I need to keep moving. I am now optimistic enough to think of propellers. This in the one I have, two blades were bent and I beat them back into shape forged in fire style. looks like a prop but i guess i had better change it. I want to do wake surfing with this boat, I have zero experience, Which prop should i get? I have no idea of the history of this one so no idea if it is good or bad selection.  |
|
|
|
|
MechGaT
Senior Member
Joined: March-09-2015 Location: Chattanooga Status: Offline Points: 271 |
Post Options
Thanks(0)
Quote Reply
Posted: March-20-2021 at 6:27pm |
|
You are making a lot of progress. Like you said, hopefully you never need the flotation foam. That is an interesting idea for installation.
I don’t know much about prop selection, especially for wake surfing. I do know that you don’t want to run one you have hammered out. The balance required to prevent vibration is very precise. The one you have is the same one I have and it works. That’s all I could say on selection. |
|
|
'92 Sport Nautique
|
|
|
|
|
Ian H
Groupie
Joined: September-24-2020 Location: Hong Kong Status: Offline Points: 69 |
Post Options
Thanks(0)
Quote Reply
Posted: March-24-2021 at 8:56pm |
|
As I am a novice I think I will start with the same prop thanks for letting me know you have the same
I I got my top layer of glass on the floor. I ended up with a 100m roll of biaxial so I used it for my final layer. I was very close to running our of resin so it seems the 8 gallon total estimate was pretty good. Two coats of bilge coat have gone on after a small amount of faring as I am under time pressure. I am stunned that the engine frame went in as a slightly squeeky fit and when i put my gauges in and measured I am within a millimetre off the position of the frame original position compared to the prop exit and the floor. I put the screws in with lashings of silicone in the holes and between the frame and stringer. How to get the engine in. Hiab crane on the back of a truck is possible but scary as someone else will be on the controls..... and translation problems..... getting a a frame etc to hoist would be under my control but difficult to get together. I still have serious amount of stuff to do before I must do the engine so I have some time to consider. What I must study is how to do the alignment of the engine to the prop shaft. all my mountings are new so I guess i need to start from scratch. Is there a procedure to do it ? the old set up had two 10mm thick spacer plates on the engine side mounts only and the gearbox had none. Should I put the same spacer set up back in or start from scratch? You can see them in the pic below but nothing on the gearbox mounts  progress 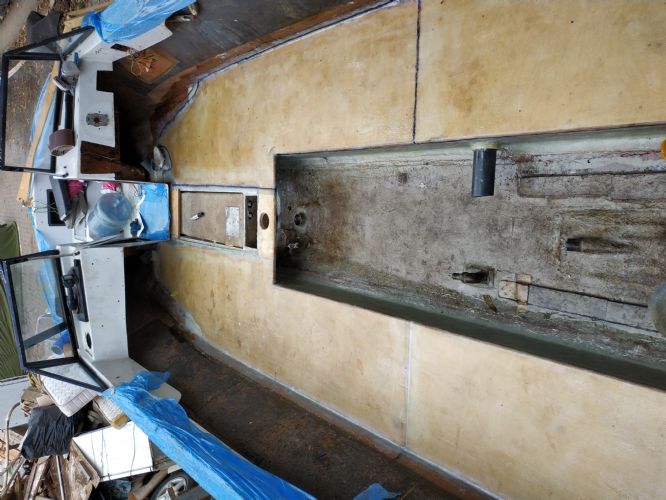    If anyone sees something i have missed or something i have done thats stupid please let me know!! |
|
|
|
|
Ian H
Groupie
Joined: September-24-2020 Location: Hong Kong Status: Offline Points: 69 |
Post Options
Thanks(0)
Quote Reply
Posted: March-25-2021 at 7:10am |
|
Opportunistic lunch break engine lift with the grab garbage guy. Hong Kong Style !!
Terrifying
Bolt holes not limed up yet but its in!!!!!!    |
|
|
|
|
ultrarunner
Platinum Member

Joined: October-02-2005 Location: Ridgefield, Ct. Status: Offline Points: 1809 |
Post Options
Thanks(0)
Quote Reply
Posted: March-25-2021 at 8:13am |
|
WOW!! Quite the resourcefulness!
|
|
|
|
|
MechGaT
Senior Member
Joined: March-09-2015 Location: Chattanooga Status: Offline Points: 271 |
Post Options
Thanks(0)
Quote Reply
Posted: March-25-2021 at 1:11pm |
|
I would start with the same spacers. There is a good bit of adjustment in the mounts. You might have a hard time moving them. Should have told you to give them a shot of penetrating oil and exercise them before dropping the engine in. Might have to work up a temporary support if they don’t move so you can take them out and get them free.
|
|
|
'92 Sport Nautique
|
|
|
|
|
Ian H
Groupie
Joined: September-24-2020 Location: Hong Kong Status: Offline Points: 69 |
Post Options
Thanks(0)
Quote Reply
Posted: March-29-2021 at 9:56am |
|
Rear vent system in and tank and pipework went in OK shortly after. mow I am just working through assembly of all the bits.
I am pleased with the sealed drainage pipes under the floor it worked out well and the floppy air duct was quick held in with cable ties and fixed in the corners with spray expanding foam. 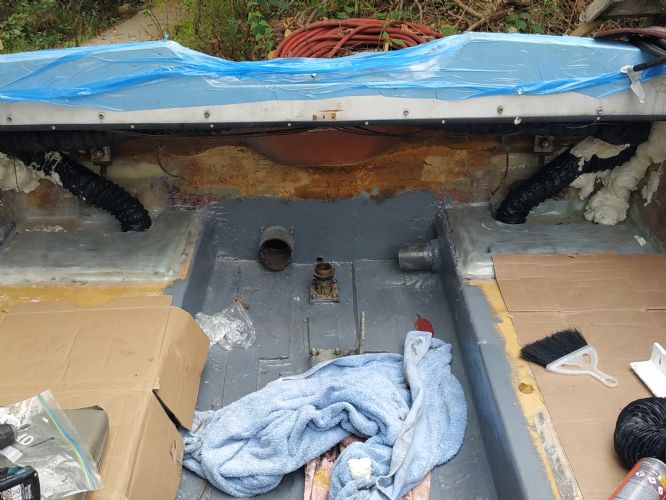 Now I need to ask for some help. I have the remnants of the interior for the rear bench seat the and the bow but the diver seat observers bench and the dash for the observer side and side panels along the inside of the boat are a mystery as they we missing already. I cannot find good pictures or don not know quite what to do on the following Drivers seat looks like the seat is pretty much on the floor on a kind of wedge platform ? I can get a stainless plate mount folded up but a picture of what is there already would be very useful, also what kind of aftermarket seat would be a typical replacement? I found these bits (see below) of wood which I guess were the bench observers seat ? a picture would be much appreciated and I can try to recreate a new one. The observers dash panel I guess impossible to find a replacement I have nothing but a good photo might help me get creative the same for the kind of glove box thing. Side panels I guess were covered ply ? a picture of the back side of the engine cover would also be helpful I have the hinges and aluminium mounts but not sure how to mount them I also need to know how to build the bilge cover with access panel as mine was just a soggy carpet around an access hatch so I am not sure if this panel should go under the bench seat at the back and if the engine cover is screwed to it. If you could snap these for me I would be very grateful. ; 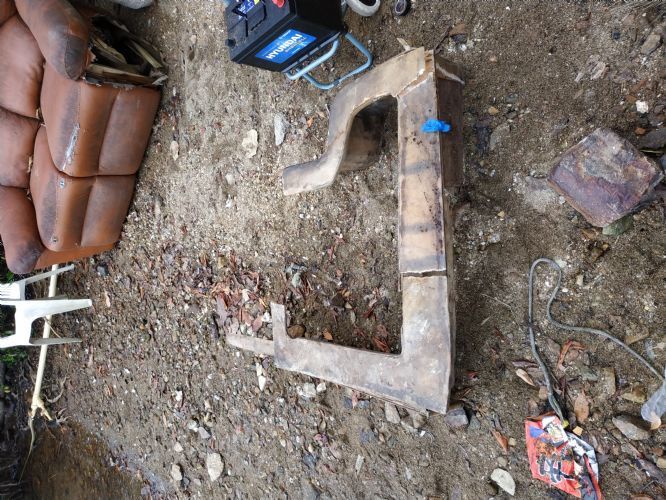 YES THAT IS A DOUBLE LAZYBOY ON MY BEACH FORGET THE PLASTIC BOTTLE PROBLEM IN ASIA FIRST WE NEED TO SOLVE THE LOUNGE FURNITURE ISSUE. New prop   |
|
|
|
|
8122pbrainard
Grand Poobah
Joined: September-14-2006 Location: Three Lakes Wi. Status: Offline Points: 41040 |
Post Options
Thanks(0)
Quote Reply
Posted: March-29-2021 at 4:35pm |
|
Ian,
I admire the progress you are making plus the resourcefulness you have shown in getting the materials for the project. Again, it's looking great. Be patient as I know someone will come through with some pictures to help you with the interior.
|
|
|
|
|
ultrarunner
Platinum Member
Joined: October-02-2005 Location: Ridgefield, Ct. Status: Offline Points: 1809 |
Post Options
Thanks(0)
Quote Reply
Posted: March-29-2021 at 5:39pm |
|
Great work so far Ian....
So, you're correct. The drivers seat is mounted on a plastic wedge which is lagged into the floor. On top of that mounting "wedge" contains the rails that the seat slides onto, and can subsequently adjust with the side lever, fore and aft, along those rails. See attached picture. And yes, you could also have angles fabricated to accomplish the same. Here is also a pic of a 91 Sport with the single observer seat. I can't remember if the observer bench was offered that year. Someone will chime in with more info. Keep us posted, Mark Drivers seat mount.  Front Dash Area.  |
|
|
|
|
MechGaT
Senior Member
Joined: March-09-2015 Location: Chattanooga Status: Offline Points: 271 |
Post Options
Thanks(0)
Quote Reply
Posted: March-29-2021 at 10:10pm |
|
I have been in a 1990 Sport and my ‘92 has the passenger seat that can face forward or backwards. As far as I know a bench was not offered, but I think it would be an upgrade if you could work one out. The storage behind it would be better, especially if it swung up like later models.
I am on my phone so I can’t post pictures, but I will try to get on the computer tomorrow evening and post a few of the interior. |
|
|
'92 Sport Nautique
|
|
|
|
|
ultrarunner
Platinum Member
Joined: October-02-2005 Location: Ridgefield, Ct. Status: Offline Points: 1809 |
Post Options
Thanks(0)
Quote Reply
Posted: March-29-2021 at 10:30pm |
|
A quick look in the ref section shows the flip-up bench in '94. Interestingly, in earlier years of other OB models...Excel, SNOB, there was a bench, but not on walk-thru's.
|
|
|
|
|
MechGaT
Senior Member
Joined: March-09-2015 Location: Chattanooga Status: Offline Points: 271 |
Post Options
Thanks(0)
Quote Reply
Posted: March-31-2021 at 8:42pm |
|
Here are some pictures of the interior of my boat.
The font:  Looking back:  Seat base and seat, pay no attention to the messy room:  The rear area before the interior was put in. You can see the board that goes over the rudder on the left before I put carpet on it. On the right is the board that has the pins to hold the engine cover. This board goes just under the rear seat.  The rear seat is a plastic molded base. I don't have any pictures showing how it is made, but if you don't have one, that could be tough to recreate.
|
|
|
'92 Sport Nautique
|
|
|
|
|
Ian H
Groupie
Joined: September-24-2020 Location: Hong Kong Status: Offline Points: 69 |
Post Options
Thanks(0)
Quote Reply
Posted: April-01-2021 at 5:12am |
|
Thanks very much, that is really helpful.
|
|
|
|
|
Ian H
Groupie
Joined: September-24-2020 Location: Hong Kong Status: Offline Points: 69 |
Post Options
Thanks(0)
Quote Reply
Posted: April-19-2021 at 10:32am |
|
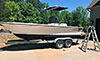
Easter I had 5 days of dinghy instructor training and exams I passed!
I had to move my boat on its Ferrous Oxide trainer front wheel axles disintegrated and I had to haul it sideways with a chain hoist sideways to its new home in the corner. Two new axles from Taubau and I pray the trailer can make its last 30M trip into the drink  As all the engine mounts were completely refurbished and greased adjusting the engine to align the shaft went smoothly I think with the coupling collar just partially engaged in the transmission output flange the gap measured with feelers was a consistent fit all the way round and the shaft was centered in the stuff box tube and felt in a happy rotation position. Getting the drive coupling on the shaft was touch and go. first time i dis not use enough heat on the coupling and it jammed 50% on not going on and not coming off and getting cooler... but hot enough to burn  big plastic mallet and wild beating got it off ...... next time much hotter it just fell on big plastic mallet and wild beating got it off ...... next time much hotter it just fell on Exhaust is now on but adjustment was too low so gearbox direction lever fouled sorted with a lot of restricted spanner movement . Fuel lines and filter with water separator in  Green tinge is because I am working under a Tarp in the rain or trying to avoid the killer sun. All electrical is now in and working and the engine turns over and starts for just a second. I should finish the water inlet pipes including the filter and fresh water salt water divert valve. Then I can run the engine on the hose and I can tune the timing. Amazingly the original tower turned up in the back of a car, I think it was a greenhouse frame for the last few years and when the guy saw me working on the boat he kindly brought it back for me unbelievable! This is double good news as my Chinese source had just broken the news that they could not supply me until July...   the foot spacing is perfect match with the holes already in the boat so I am sure it is the right one . My only problem is I have no deck mounting brackets I cannot see a brand on the frame ... is it a US frame anyone knows I am trying to get and idea of what brackets to make. Anyone have an idea?  I am now hunting down a powder coat company to make a happy tower I had time for a quick buff looks like oxidation is going to come off ok with a good cutting compound  Driver seat spacing off the floor and angle I have worked out but the base is going to be a real workup The standard Nautique one will not work with the seats I could get my hands on and price with shipping is out of the question..... So I will spend the time to make some bases with ply and a thick layer of glass.  |
|
|
|
|
Ian H
Groupie
Joined: September-24-2020 Location: Hong Kong Status: Offline Points: 69 |
Post Options
Thanks(0)
Quote Reply
Posted: April-19-2021 at 10:38am |
|
Oh and carpet is ordered......... finishing line is still always just over the horizon.
|
|
|
|
|
Post Reply
|
Page <1234> |
 Tweet
Tweet
|
| Forum Jump | Forum Permissions You cannot post new topics in this forum You cannot reply to topics in this forum You cannot delete your posts in this forum You cannot edit your posts in this forum You cannot create polls in this forum You cannot vote in polls in this forum |


 Topic Options