 Boats For Sale:


79 nautique rebuild |
Post Reply 
|
Page <1 7891011 12> |
| Author | |
wayoutthere 
Senior Member 
Joined: February-28-2020 Location: Florida Status: Offline Points: 391 |
 Post Options Post Options
") Thanks(0) Thanks(0)
 Quote Reply Quote Reply
 Posted: September-15-2021 at 1:51pm Posted: September-15-2021 at 1:51pm |
|
Thank you,
I'll order the floats and appropriate gasket(s) Is there a method to remove the old plugs scratch chip pry drill and so on ? What's underneath ? Anything i should include in the parts order ? Again thank you for going the extra mile and doing the research. I'll give it my best effort and pay special attention to the insructions and set up.
|
|
 |
|
|
wayoutthere
Senior Member
Joined: February-28-2020 Location: Florida Status: Offline Points: 391 |
Post Options
Thanks(0)
Quote Reply
Posted: September-15-2021 at 2:35pm |
|
On the way, 2 floats, choke cap w/ coily spring and the secondary metering body plate,
(solid plate, no holes, original was iffy looking) goes beteen gaskets behind secondary metering circuit thing.
|
|
|
|
|
KENO
Grand Poobah 
Joined: June-06-2004 Location: United States Status: Offline Points: 10644 |
Post Options
Thanks(0)
Quote Reply
Posted: September-15-2021 at 4:50pm |
There's no way I know of to get the plugs out without doing some form of destruction. You could drill a hole and pry and twist them out, but that kinda defeats the purpose of the plug when it has a hole in it, that you then have to plug one way or another.  That's why people epoxy them or replace the complete bowl.
|
|
|
|
|
wayoutthere
Senior Member
Joined: February-28-2020 Location: Florida Status: Offline Points: 391 |
Post Options
Thanks(0)
Quote Reply
Posted: September-19-2021 at 5:33pm |
|
There will be at least 1 more double check of alignment, and theres a short list of button up items i have to get info/specs on,
Tightening the cutlass set screws coupler to coupler torque and the nut torque inside the coupler. That dual taper shaft is awesome, i had it in an out 8-9 times getting everything set. All things being equal,the shaft alignment is within a 1/16 inline with the center of the boat measuring from the corners to the shaft @ stern tube, and from prop shaft to corners, and coupler alignment is almost .0025 I used the fiberglass shim on the strut and think there is acceptable tolerances between prop strut and hull. 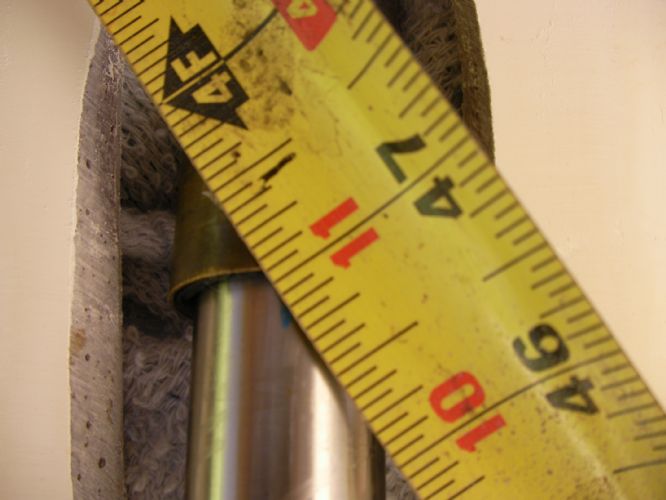 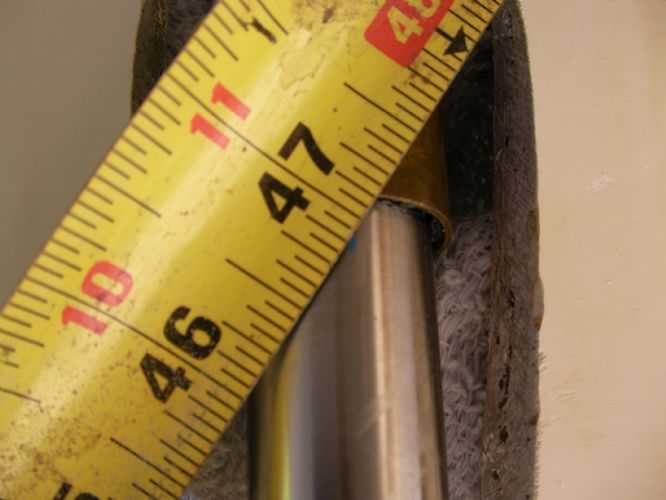 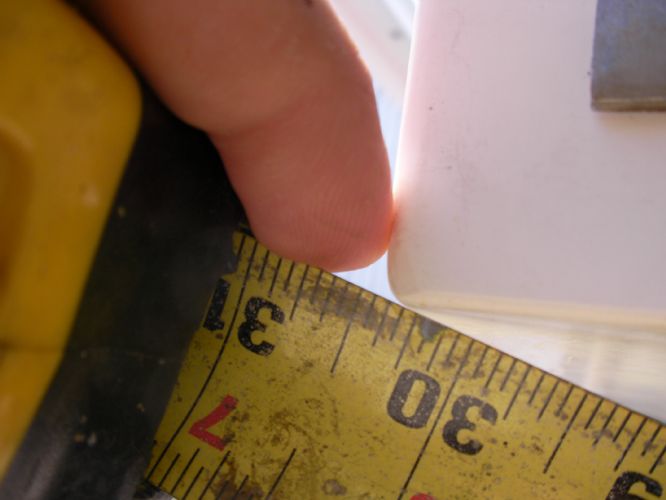 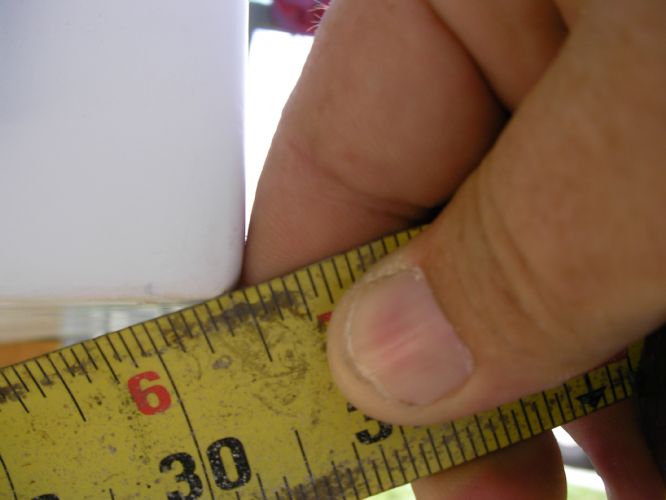 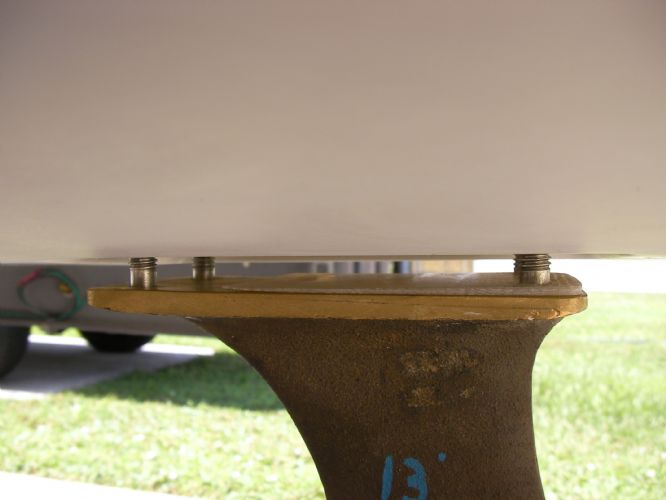 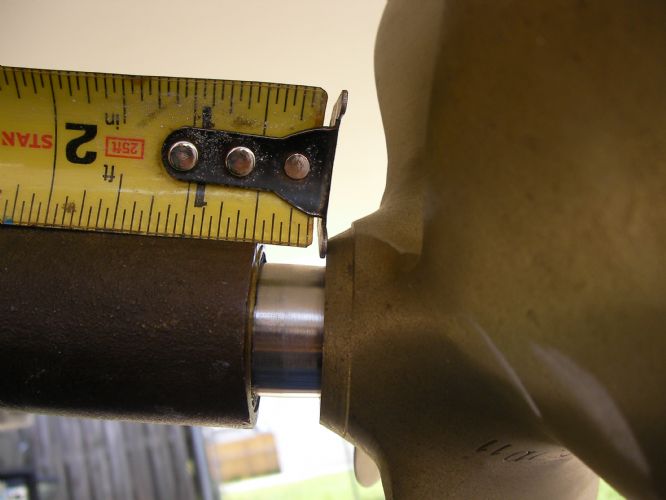 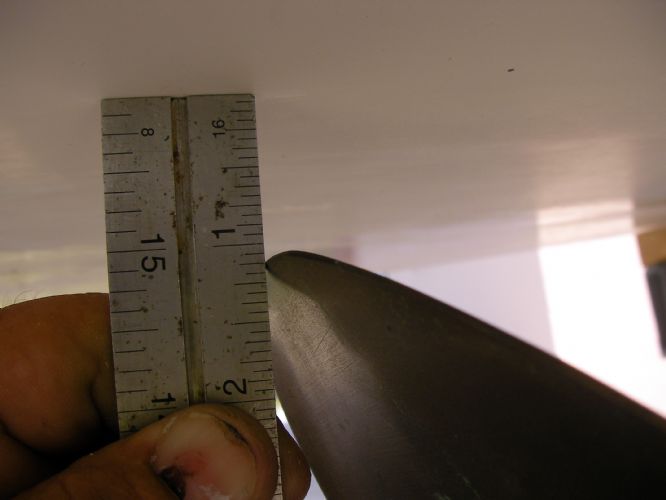 https://youtu.be/UXE-yF_hwU0
|
|
|
|
|
8122pbrainard
Grand Poobah

Joined: September-14-2006 Location: Three Lakes Wi. Status: Offline Points: 41040 |
Post Options
Thanks(1)
Quote Reply
Posted: September-19-2021 at 5:41pm |
|
Dan,
The alignment is looking great.
 |
|
|
|
|
wayoutthere
Senior Member
Joined: February-28-2020 Location: Florida Status: Offline Points: 391 |
Post Options
Thanks(0)
Quote Reply
Posted: September-19-2021 at 5:43pm |
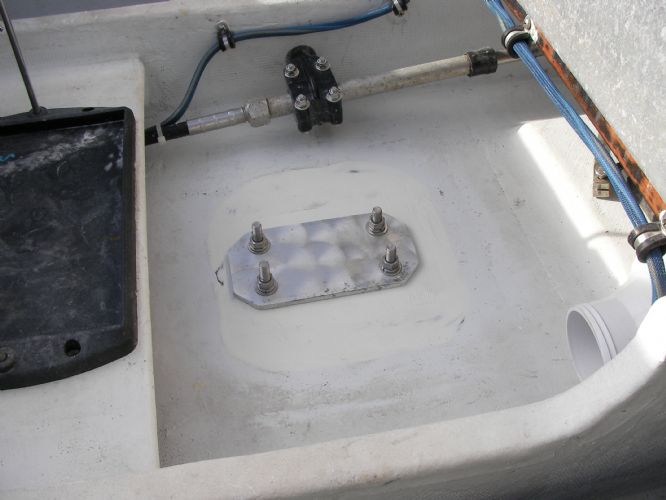
I had to grind flat the hull over the strut to keep the bolts plumb, the plate i hope adds clamping force because i could only get 120 inch pounds on the nuts before the bolts would start to turn.
|
|
|
|
|
8122pbrainard
Grand Poobah
Joined: September-14-2006 Location: Three Lakes Wi. Status: Offline Points: 41040 |
Post Options
Thanks(0)
Quote Reply
Posted: September-19-2021 at 5:51pm |
|
Dan,
Are you using 4200 for bedding?
|
|
|
|
|
wayoutthere
Senior Member
Joined: February-28-2020 Location: Florida Status: Offline Points: 391 |
Post Options
Thanks(0)
Quote Reply
Posted: September-19-2021 at 6:41pm |
Yes, 4200. I hung the strut with the nuts at the top of the bolts for as much room as i could get (see picture) and sqeezed 4200 into the holes while turning the bolts, then oringed the bolts with 4200 on the strut with a grand finale of a bead troweled on with a tongue depressor all around and in about a 1/2 inch, it's squeezed out nice, it's all over my hands arms and hair from oozing on the driveway.
|
|
|
|
|
wayoutthere
Senior Member
Joined: February-28-2020 Location: Florida Status: Offline Points: 391 |
Post Options
Thanks(0)
Quote Reply
Posted: September-20-2021 at 7:21pm |
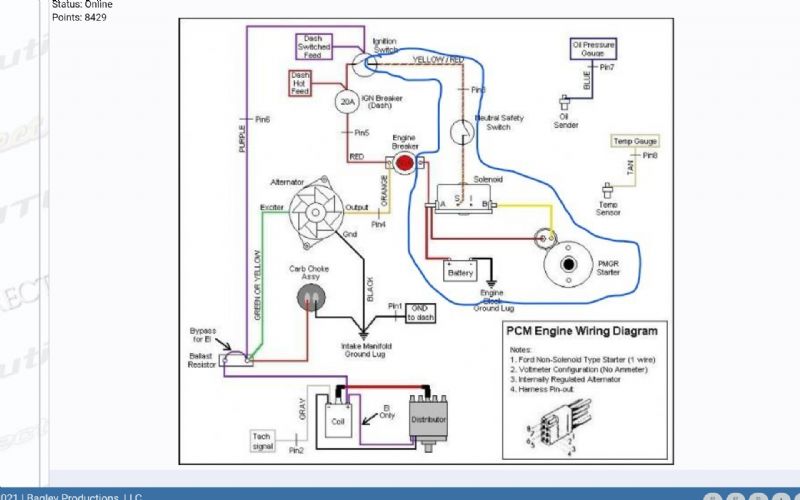
Hopefully the last stupid electrical question. I have to rebuild this carburetor, one of the new parts is the choke cap, when i was trying to get the engine running and during the electrical checks the choke was disconnected and the engine seemed better. Thinking it was bad is why the new one was ordered, now i'm wondering if it's wired wrong, (already had 1 wire goofed up) my buddy asked if it was hot all the time or only once per key cycle. I have no idea how it works. Looking at the trb diagram the choke gets hot from the ballast, but the purple ignition wire is on the ballast as well. since the ballast is gone i ran the purple wire and wired everything (that i think gets the purple wire in a line as the wire got to it. The purple wire starts at the key ign screw then goes to the choke, then to the coil, the purple wires from the distributor and alternator run to the coil. Should the choke get it's hot from another source, i don't want to burn up the ignition module, coil or new choke for that matter. Or is it o.k. how i have it. The choke is grounded to the block. Thanks
|
|
|
|
|
KENO
Grand Poobah
Joined: June-06-2004 Location: United States Status: Offline Points: 10644 |
Post Options
Thanks(0)
Quote Reply
Posted: September-20-2021 at 7:44pm |
|
That gives the same end result as the way the TRB diagram shows the wiring.
The choke, coil, distributor power lead, and alternator excitation are all in parallel your way and the diagram way. They are all hot whenever the key is in Run or Start
|
|
|
|
|
wayoutthere
Senior Member
Joined: February-28-2020 Location: Florida Status: Offline Points: 391 |
Post Options
Thanks(0)
Quote Reply
Posted: September-20-2021 at 10:19pm |
|
Thanks keno,
That's good news, like to hear it run by next weekend.
|
|
|
|
|
wayoutthere
Senior Member
Joined: February-28-2020 Location: Florida Status: Offline Points: 391 |
Post Options
Thanks(0)
Quote Reply
Posted: September-25-2021 at 4:21pm |
     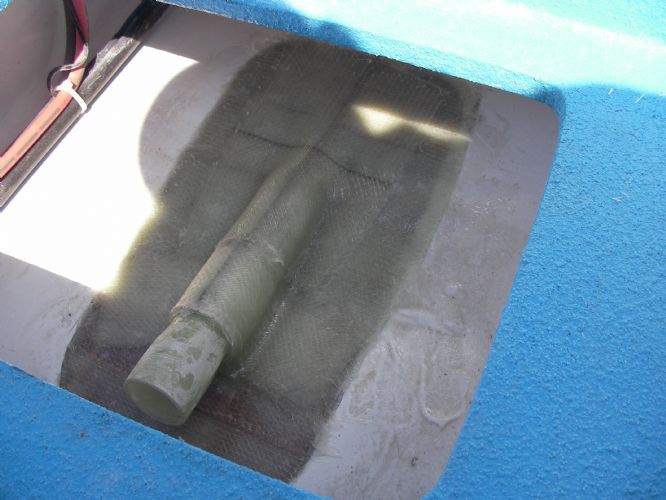
4 layers on the front, 2 vertical, 2 horizontal that overlap and a cap, first time i wrapped 1708 like that without difficulty, i think the epoxy made a difference. 2 layers laid like shingles front to back, 2 layers the same way back to front with a cap mostly over the rear. Something like 640 sq inches total for 5 layers. Tomorrow i'll cut and oval out the tube underneath. Float test the boat tuesday/wednesday if it goes alright. Still waiting on floats from holley, they shipped everything individually.
|
|
|
|
|
wayoutthere
Senior Member
Joined: February-28-2020 Location: Florida Status: Offline Points: 391 |
Post Options
Thanks(0)
Quote Reply
Posted: September-26-2021 at 10:53am |
More work to leave the tube and glass it in underneath, questions are will the shaft seal get lubricated and would it cause more/less disturbance to water for the prop (it could be streamlined somewhat)
|
|
|
|
|
ultrarunner
Platinum Member 

Joined: October-02-2005 Location: Ridgefield, Ct. Status: Offline Points: 1809 |
Post Options
Thanks(0)
Quote Reply
Posted: September-26-2021 at 10:59am |
|
What's the tube for? Should be just shaft exiting the boat, or were the older boats setup differently. Are you installing a traditional log in the boat?
|
|
|
|
|
8122pbrainard
Grand Poobah
Joined: September-14-2006 Location: Three Lakes Wi. Status: Offline Points: 41040 |
Post Options
Thanks(0)
Quote Reply
Posted: September-26-2021 at 11:41am |
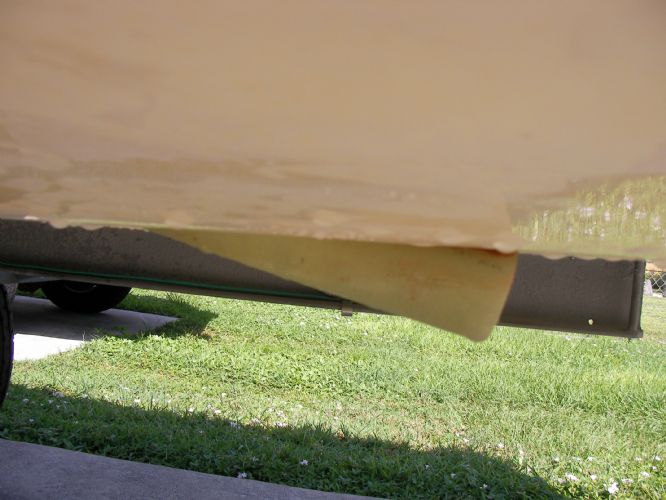
It's a fiberglass log. No bronze one here.
|
|
|
|
|
8122pbrainard
Grand Poobah
Joined: September-14-2006 Location: Three Lakes Wi. Status: Offline Points: 41040 |
Post Options
Thanks(0)
Quote Reply
Posted: September-26-2021 at 11:44am |
I'd cut it off flush with the hull.
|
|
|
|
|
wayoutthere
Senior Member
Joined: February-28-2020 Location: Florida Status: Offline Points: 391 |
Post Options
Thanks(0)
Quote Reply
Posted: September-26-2021 at 11:52am |
|
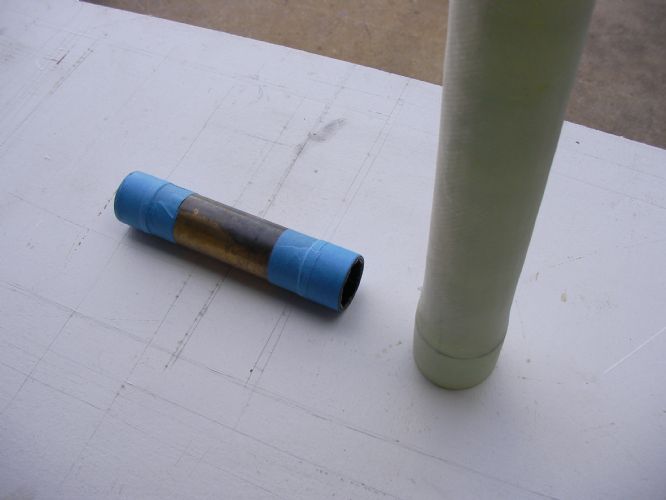
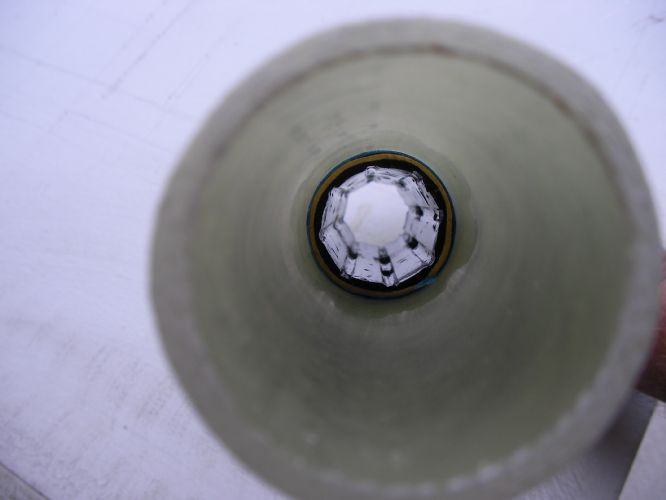
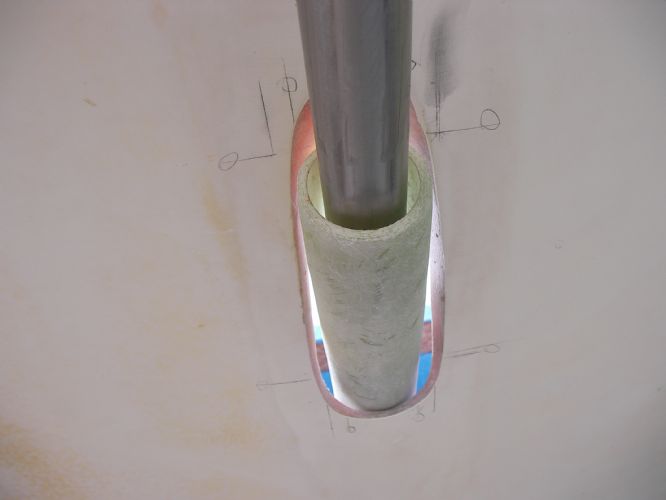
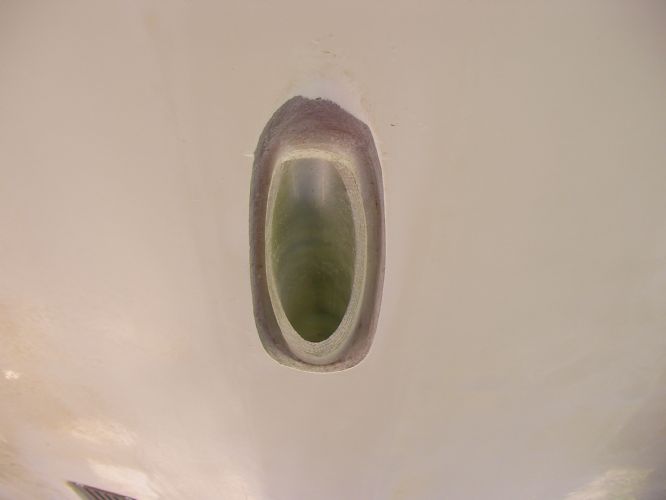
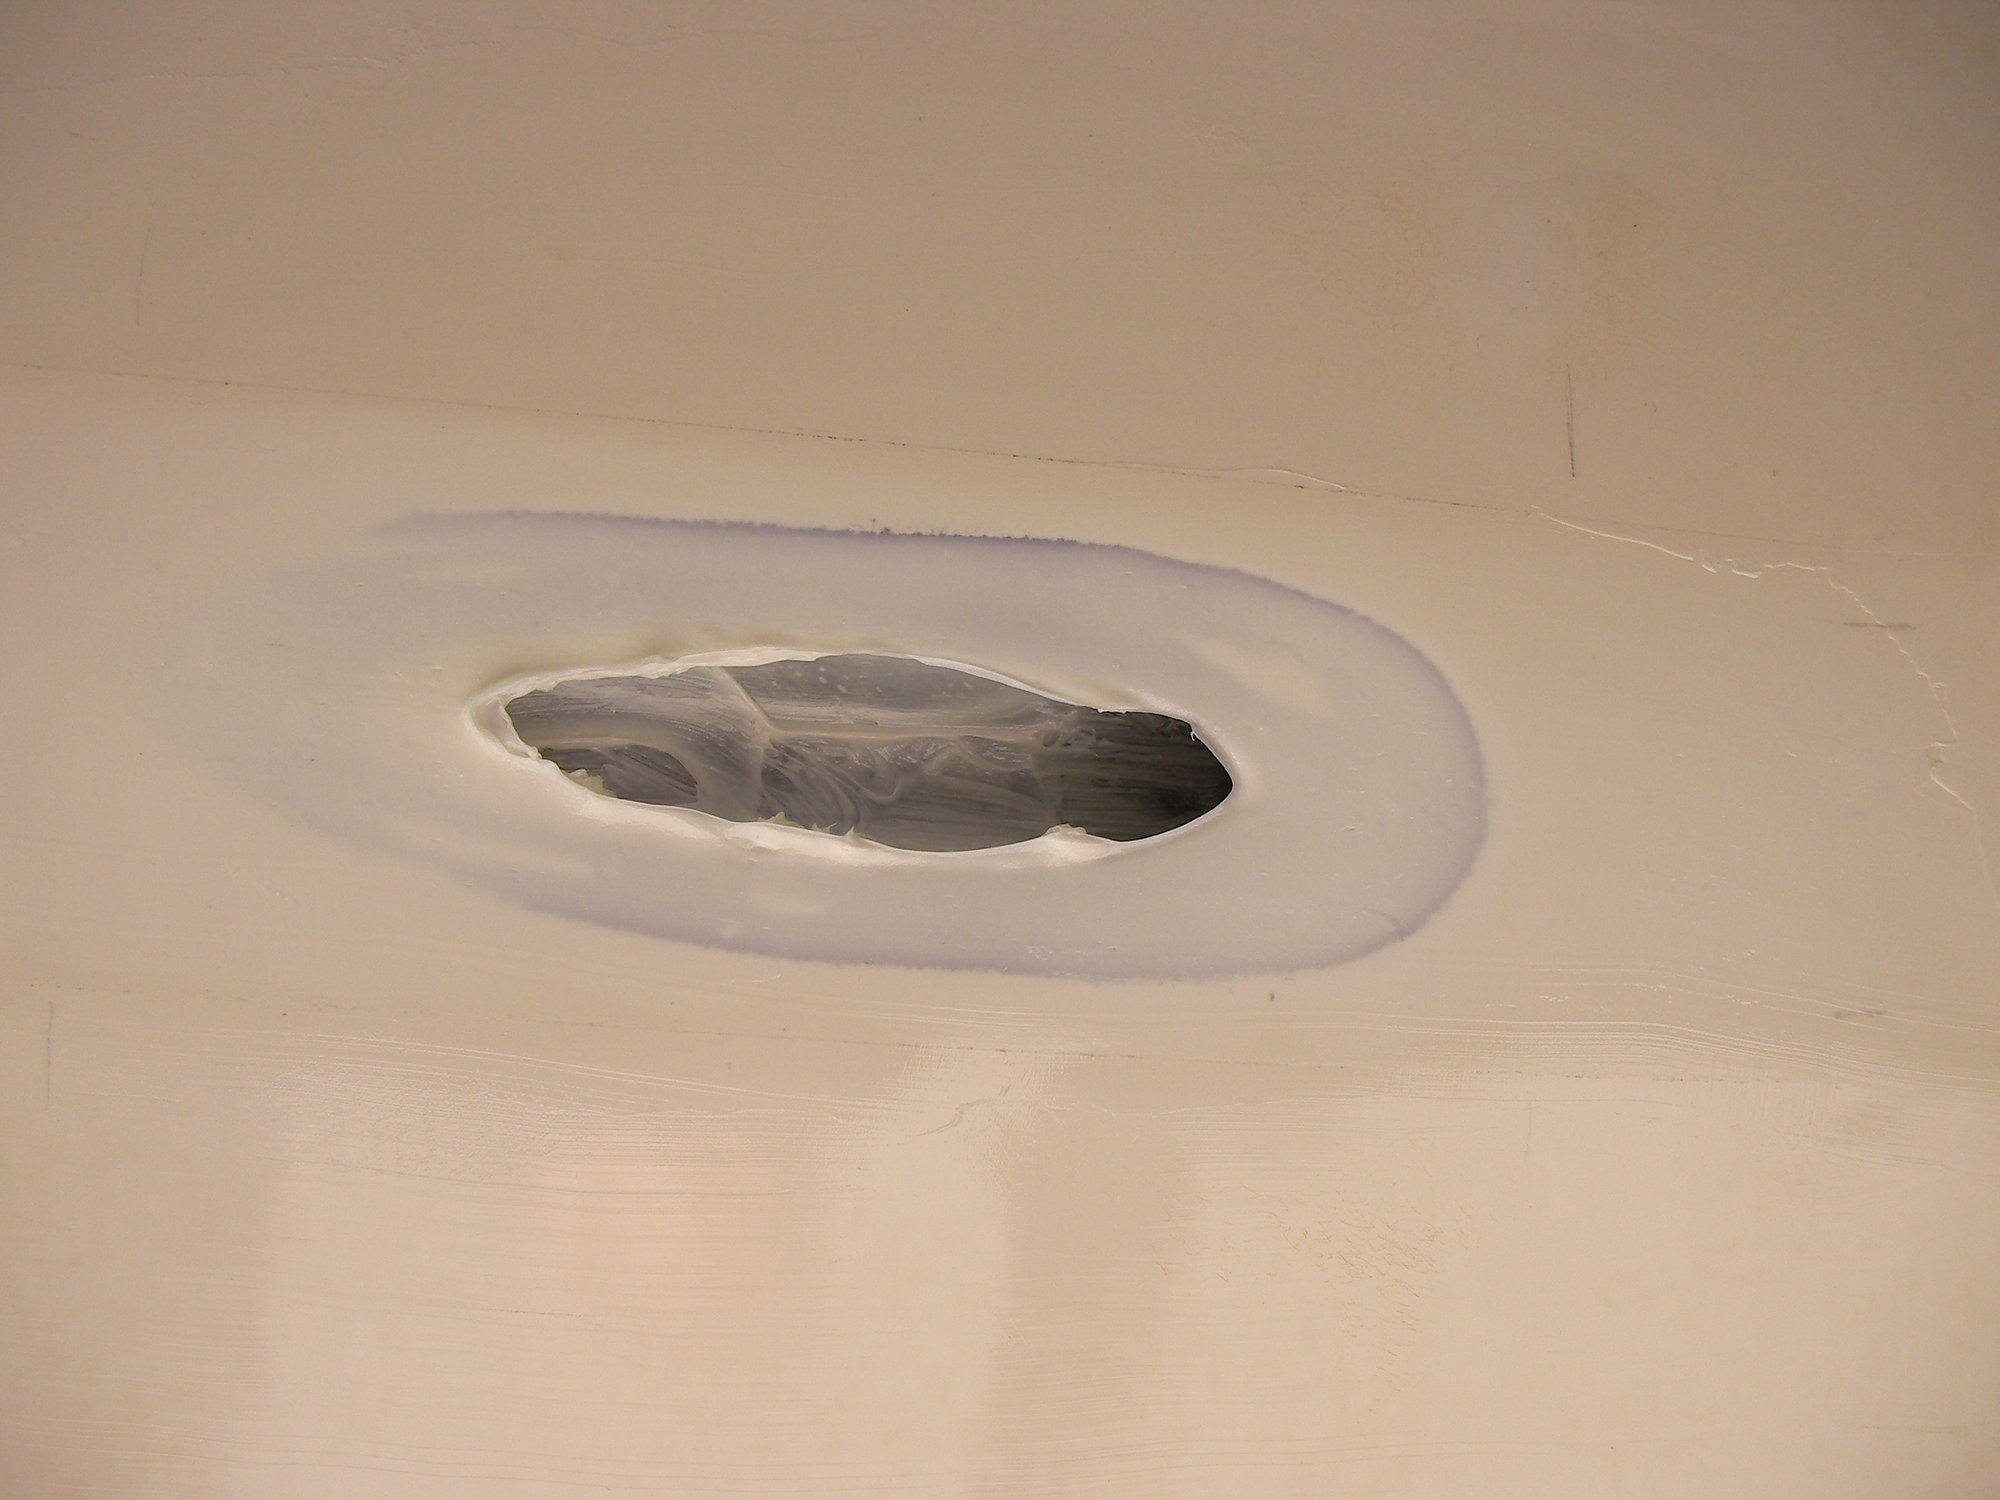
The tube is for the packing gland, it's a tube i made from epoxy and 1708 bi-axial fiberglass.
Originally the tube didn't stick out, just the shaft like you said. The original pocket molded into the hull required alot of build up in order to use the bronze piece. This one had room to get glassed over with the shaft intalled without much compound, maybe 4 oz. Thanks, should have asked last night.
|
|
|
|
|
wayoutthere
Senior Member
Joined: February-28-2020 Location: Florida Status: Offline Points: 391 |
Post Options
Thanks(0)
Quote Reply
Posted: September-26-2021 at 11:56am |
|
I'll get to the cutting now. Thank you
|
|
|
|
|
wayoutthere
Senior Member
Joined: February-28-2020 Location: Florida Status: Offline Points: 391 |
Post Options
Thanks(0)
Quote Reply
Posted: September-26-2021 at 2:40pm |
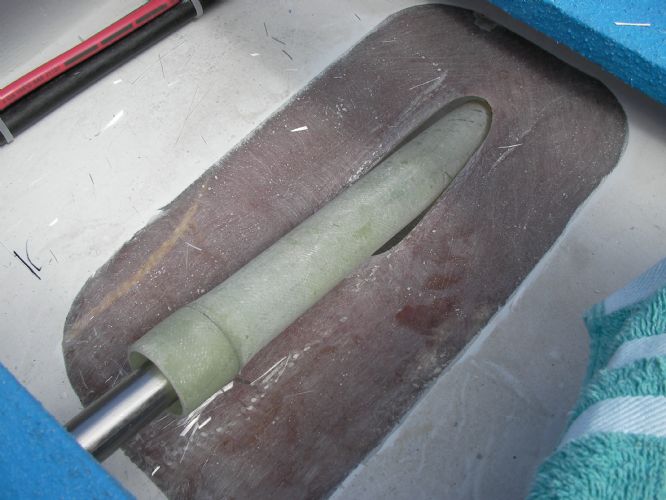
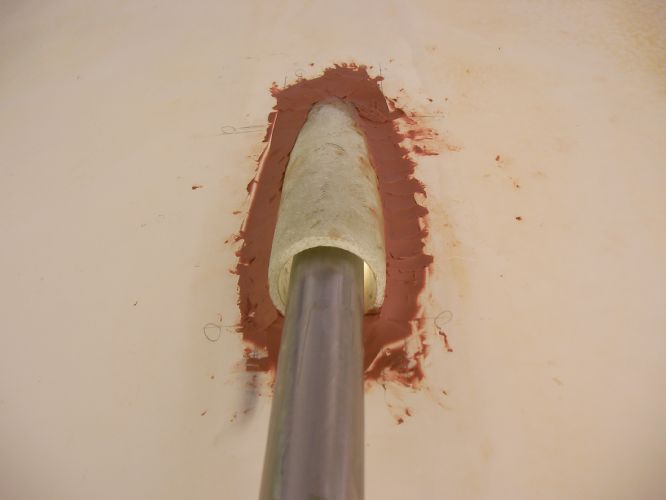
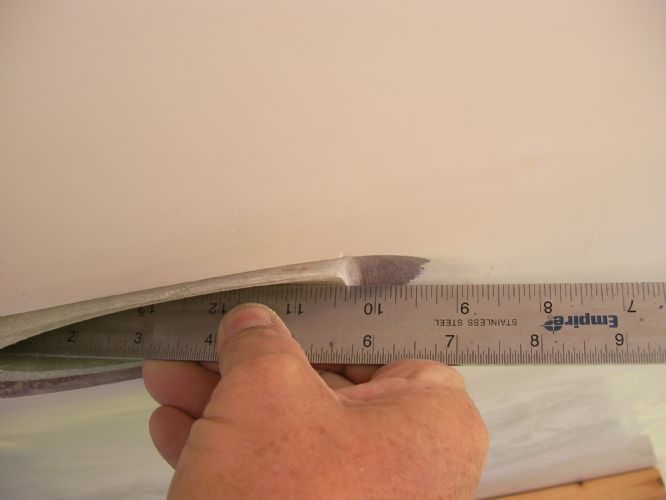 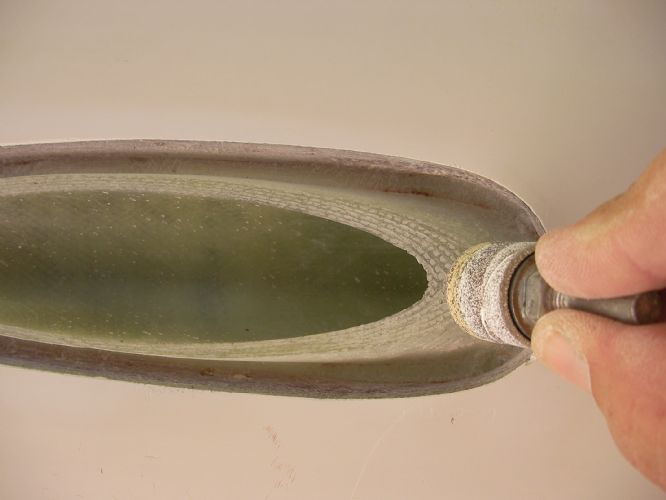 I can cut up and knead some glass in there then sand it all flush. in the last 2 pictures a couple things ; Second last pic the tube can get opened up flush with the hull and glassed. The last picture, the tube can be barrel sanded up to the hull and glassed. It would be closer to the original pocket in shape plus glassed from the outside as well. Either way moves putting it in the water to see it float and maybe adjust the drip on shaft and rudder back a day.
|
|
|
|
|
wayoutthere
Senior Member
Joined: February-28-2020 Location: Florida Status: Offline Points: 391 |
Post Options
Thanks(0)
Quote Reply
Posted: September-28-2021 at 4:14pm |
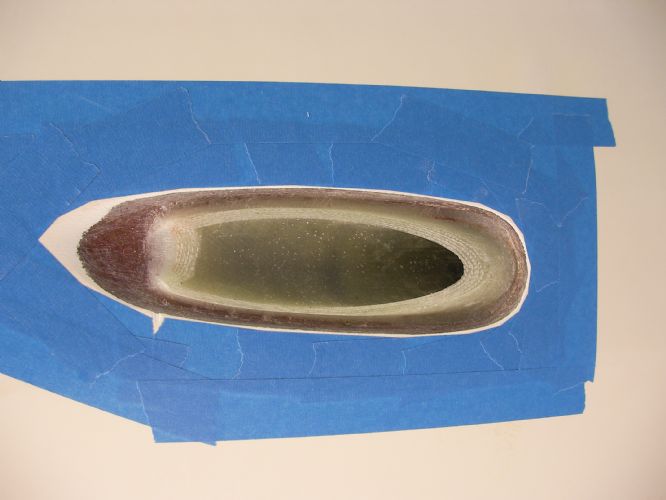 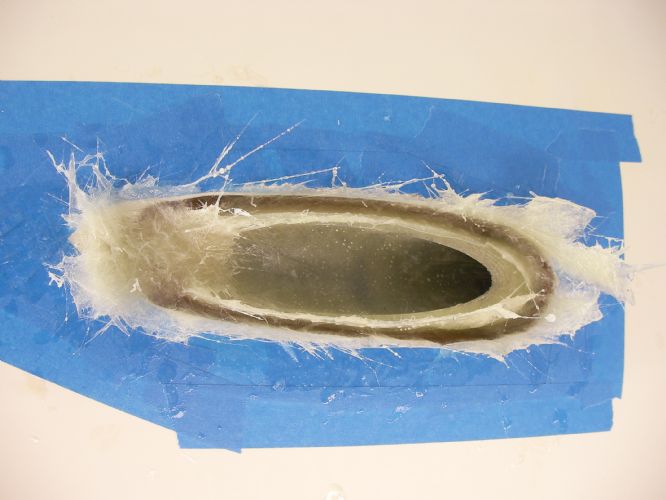 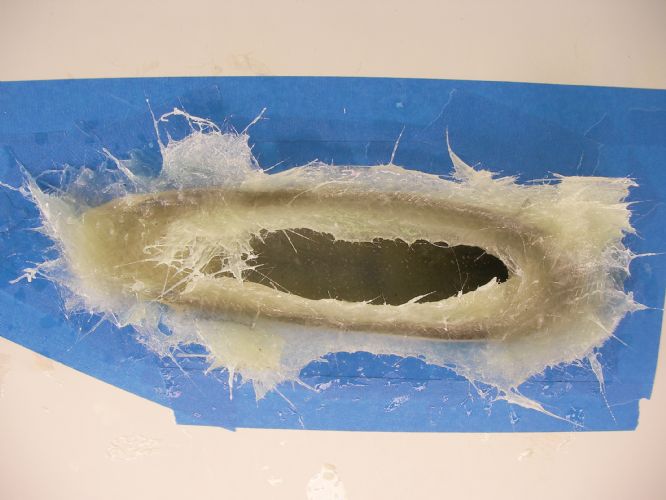 
Yesterday i ground and sanded the hull and tube to lay some glass in there. Cut a bunch of 1x1 sqaures, 1x3 strips and other scrap sizes from 1708. My buddy who's a pro glass guy told me to use a little cabosil in the mix just to make it stickey but not so much as to thicken it. I did that and with a small mold release wedge got 3 layers up there pretty good. Today i ground it down, still a few low spots after the clean up but nothing thickened epoxy and some white pigment can't take care of. |
|
|
|
|
wayoutthere
Senior Member
Joined: February-28-2020 Location: Florida Status: Offline Points: 391 |
Post Options
Thanks(0)
Quote Reply
Posted: September-29-2021 at 11:07am |
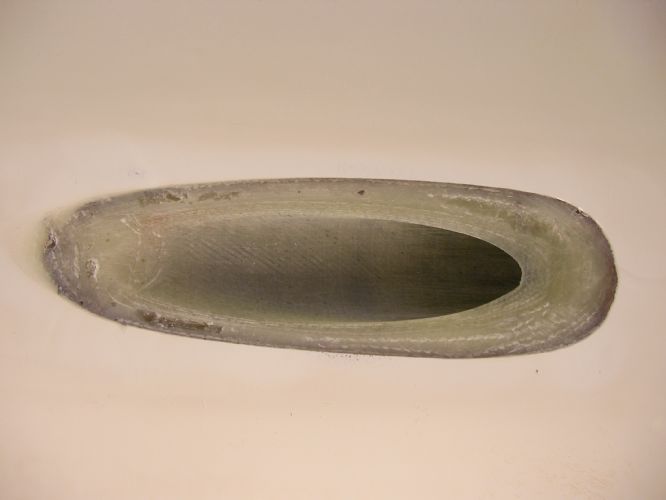
 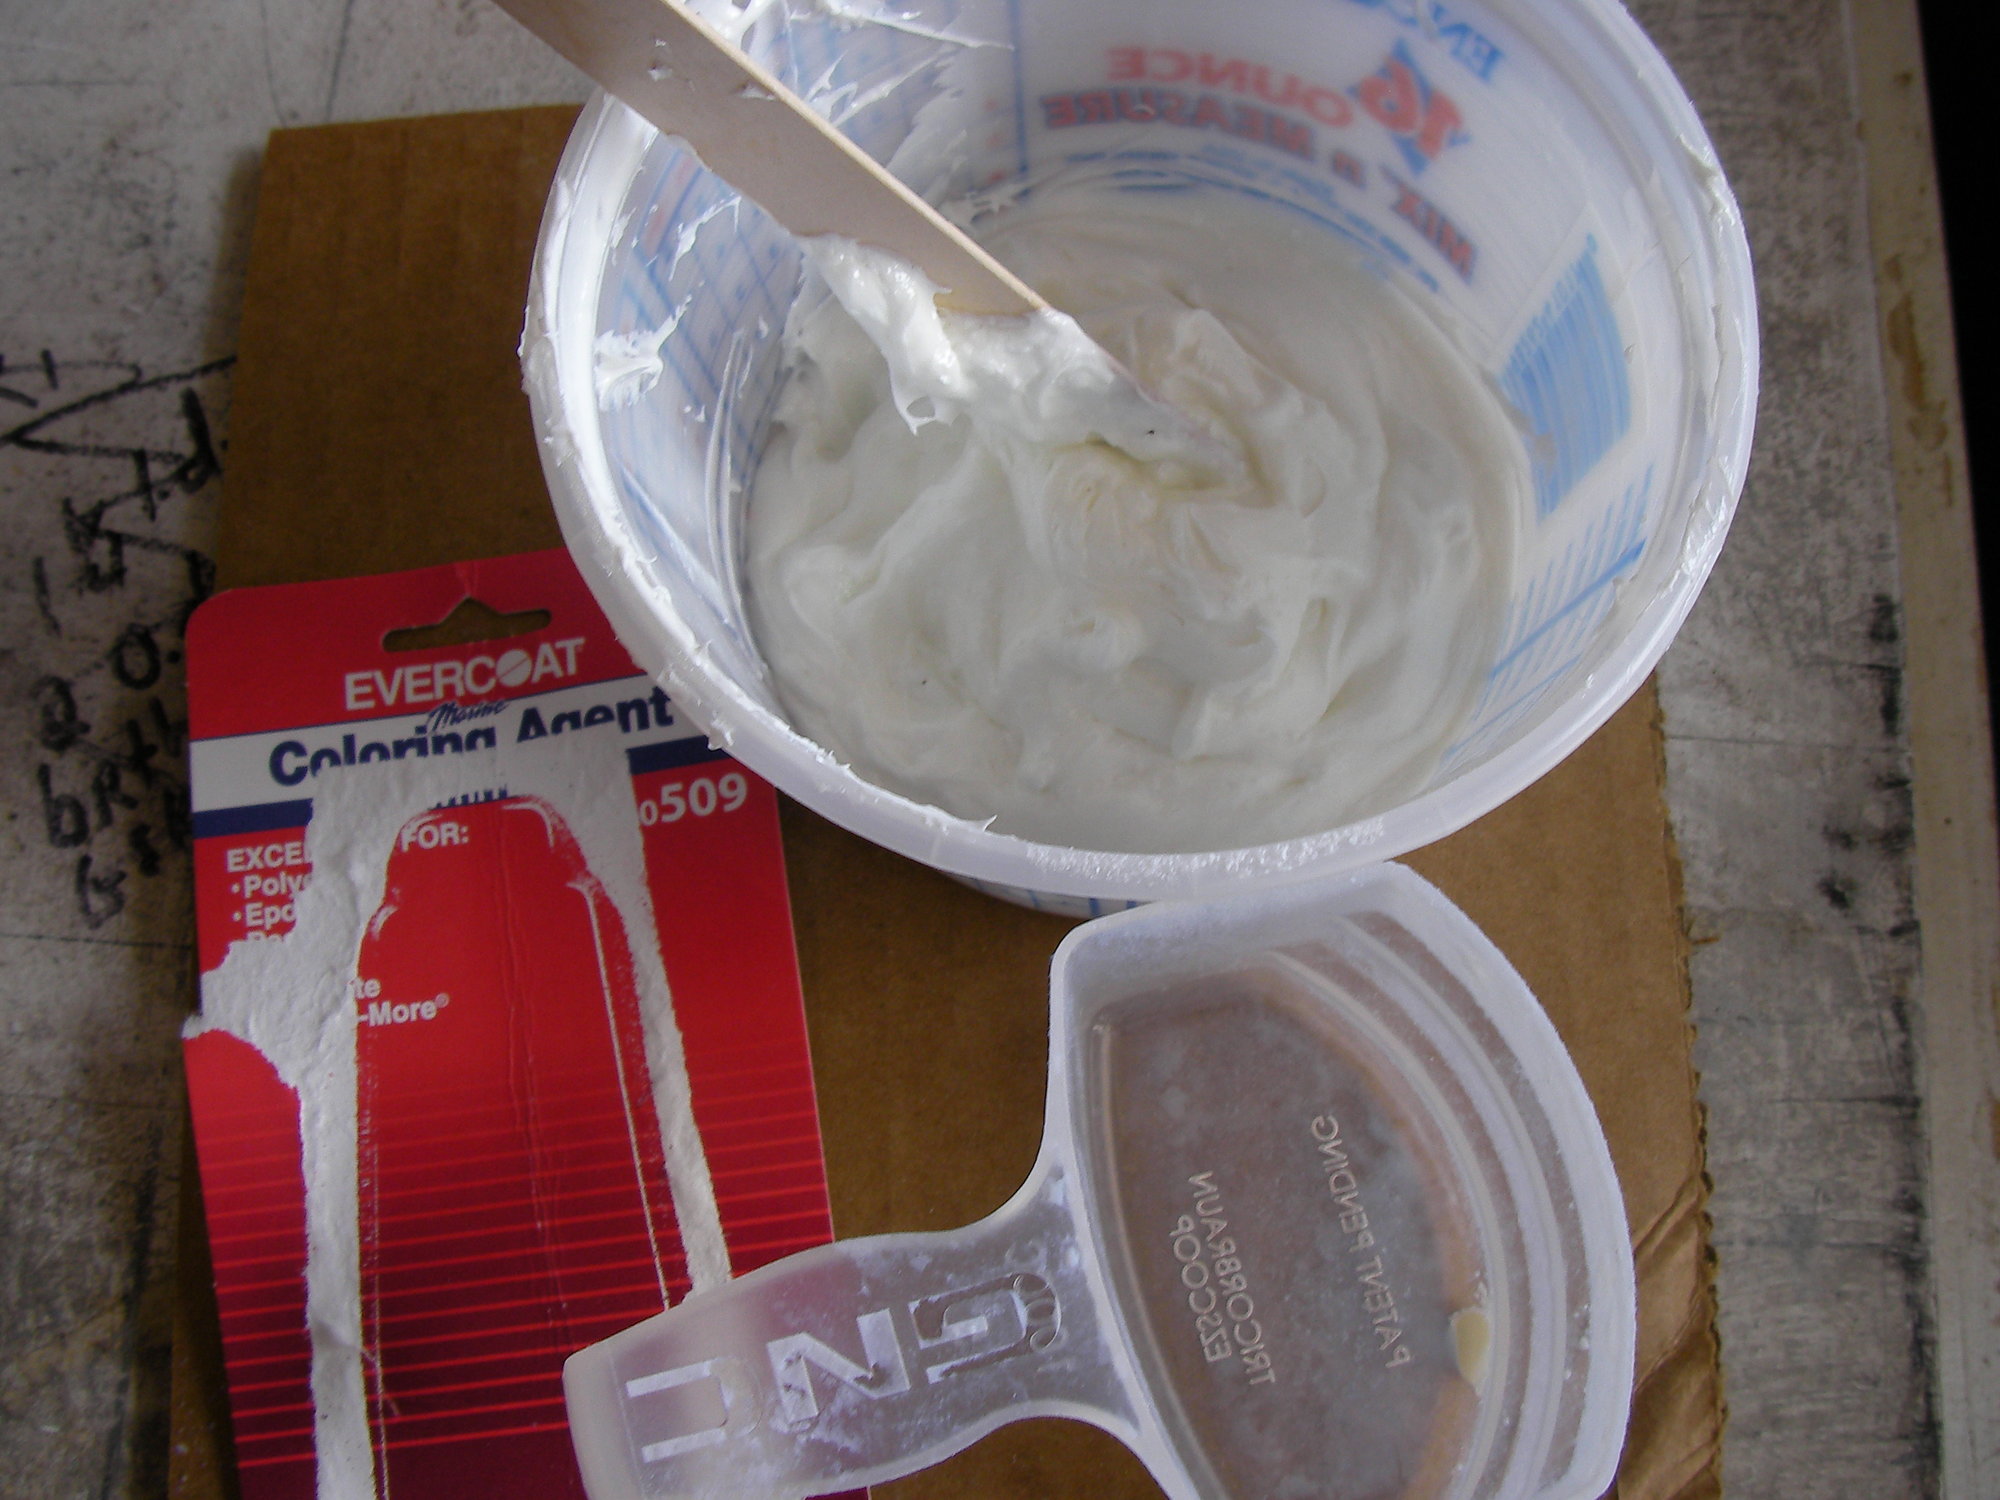  it needed some filling/bodywork, and out of desperation i put 7 drops of white pigment in 4 oz of 635 thin epoxy and 2 scoops of cabosil. it was like mayo and filled it perfectly but didn't cover because it's swiped on thin. should have saved the 15 bucks used the gray color i have or spent the15 on black, it might have covered better and looked better |
|
|
|
|
wayoutthere
Senior Member
Joined: February-28-2020 Location: Florida Status: Offline Points: 391 |
Post Options
Thanks(0)
Quote Reply
Posted: September-30-2021 at 10:37pm |
  well i cut it down and filled it, but it's no better. It was smooth yesterday and is smooth today. i think that's part of the problem, i know it's supposed to be a bigger area and i'm supposed to fill and sand a hundred times till it's all feathered. I suck at bodywork, i can shape and rough in to 80 grit, the high grits and all that magic touch is way above and far beyond my capabilities. Tomorrow i'll wash off the blush and start around the edges with 800 and it'll be what it'll be. |
|
|
|
|
wayoutthere
Senior Member
Joined: February-28-2020 Location: Florida Status: Offline Points: 391 |
Post Options
Thanks(0)
Quote Reply
Posted: October-08-2021 at 9:20am |
|
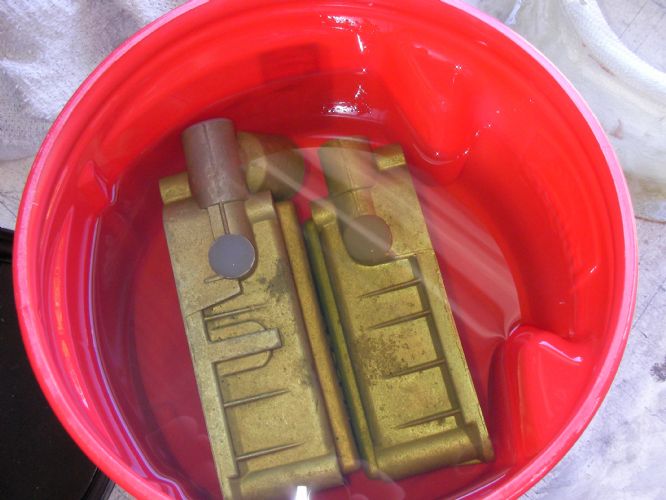
No email with shipping info from holley on the floats so this morning i took it apart.
The old floats sound empty when shook. With bowls upright and blowing into the supply there is air flow, when rotated upside down the air flow is cut off. The power valve is cracked. An observation that may be unimportant (because the 2ndary vac is removed right now) is a linkage question. With the idle speed screw not touching the primary linkage, there is a gap in the 2ndary qaurter turn grooved linkage, this gap will increase after idle screw is adjusted. When throttle is held open and 2ndary rotated to 90 degrees the same gap exists on the other end of the grooved linkage, meaning the 2ndary can over rotate until it hits the stop. Releasing the throttle back to idle, because of the gap in the grooved linkage the rod between primary and 2ndary doesn't fully close the 2ndaries. Guessing the vac diagphram handles this and play in the grooved linkage and rod is how it's supposed to be, but i read that other thread where another member bent that rod trying to solve an issue and thought i'd ask. It almost seems worth it to install new power valve and try to run it, but it's apart and everything minus the floats are here. Give it a shot or go all in ? 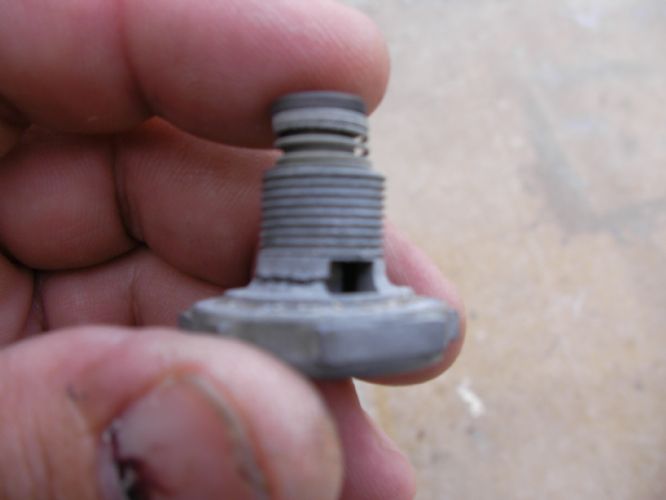 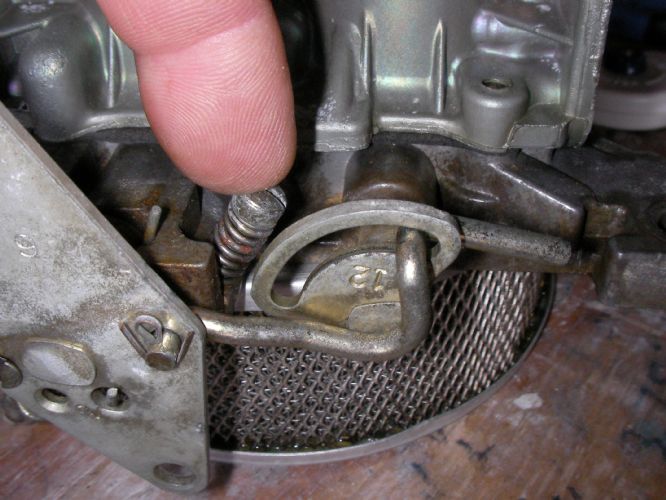 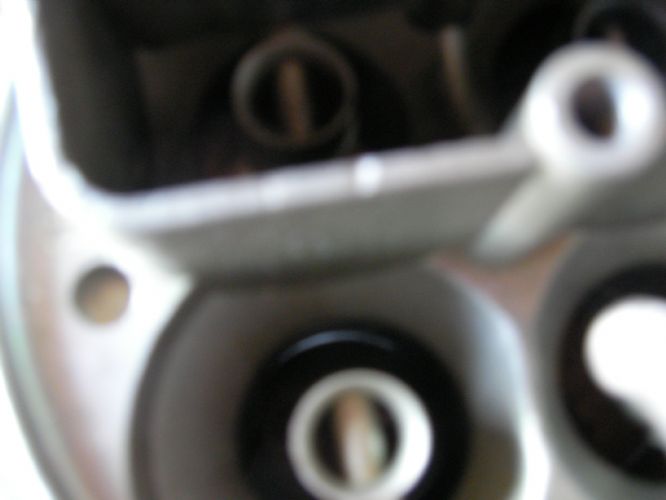  |
|
|
|
|
67 ski nat
Platinum Member
Joined: July-19-2018 Location: Santa rosa Status: Offline Points: 1180 |
Post Options
Thanks(0)
Quote Reply
Posted: October-08-2021 at 10:15am |
These guys Rebiuld every piece, put on a motor and tune perfect for your application |
|
|
|
|
KENO
Grand Poobah
Joined: June-06-2004 Location: United States Status: Offline Points: 10644 |
Post Options
Thanks(0)
Quote Reply
Posted: October-08-2021 at 12:39pm |
|
I'd give it a shot with the old floats, since they don't leak and worry about the secondary override linkage till you have things running and the idle adjusted, then the rod may need a little tweak.
The blue book is a good one to have
|
|
|
|
|
wayoutthere
Senior Member
Joined: February-28-2020 Location: Florida Status: Offline Points: 391 |
Post Options
Thanks(0)
Quote Reply
Posted: October-09-2021 at 3:52pm |
|
Thanks keno, it should be back together tomorrow, prepping the o.r. now.
67, i will contact them for price and lead time if i have any trouble, thank you.
|
|
|
|
|
67 ski nat
Platinum Member
Joined: July-19-2018 Location: Santa rosa Status: Offline Points: 1180 |
Post Options
Thanks(0)
Quote Reply
Posted: October-10-2021 at 10:31am |
|
Ok good luck WOT, you are doing fine
I’m not a carb guy at all, so I just wanted mine perfect as start point. I like that they put on a motor and tune mixture, choke etc |
|
|
|
|
wayoutthere
Senior Member
Joined: February-28-2020 Location: Florida Status: Offline Points: 391 |
Post Options
Thanks(0)
Quote Reply
Posted: October-11-2021 at 12:54am |
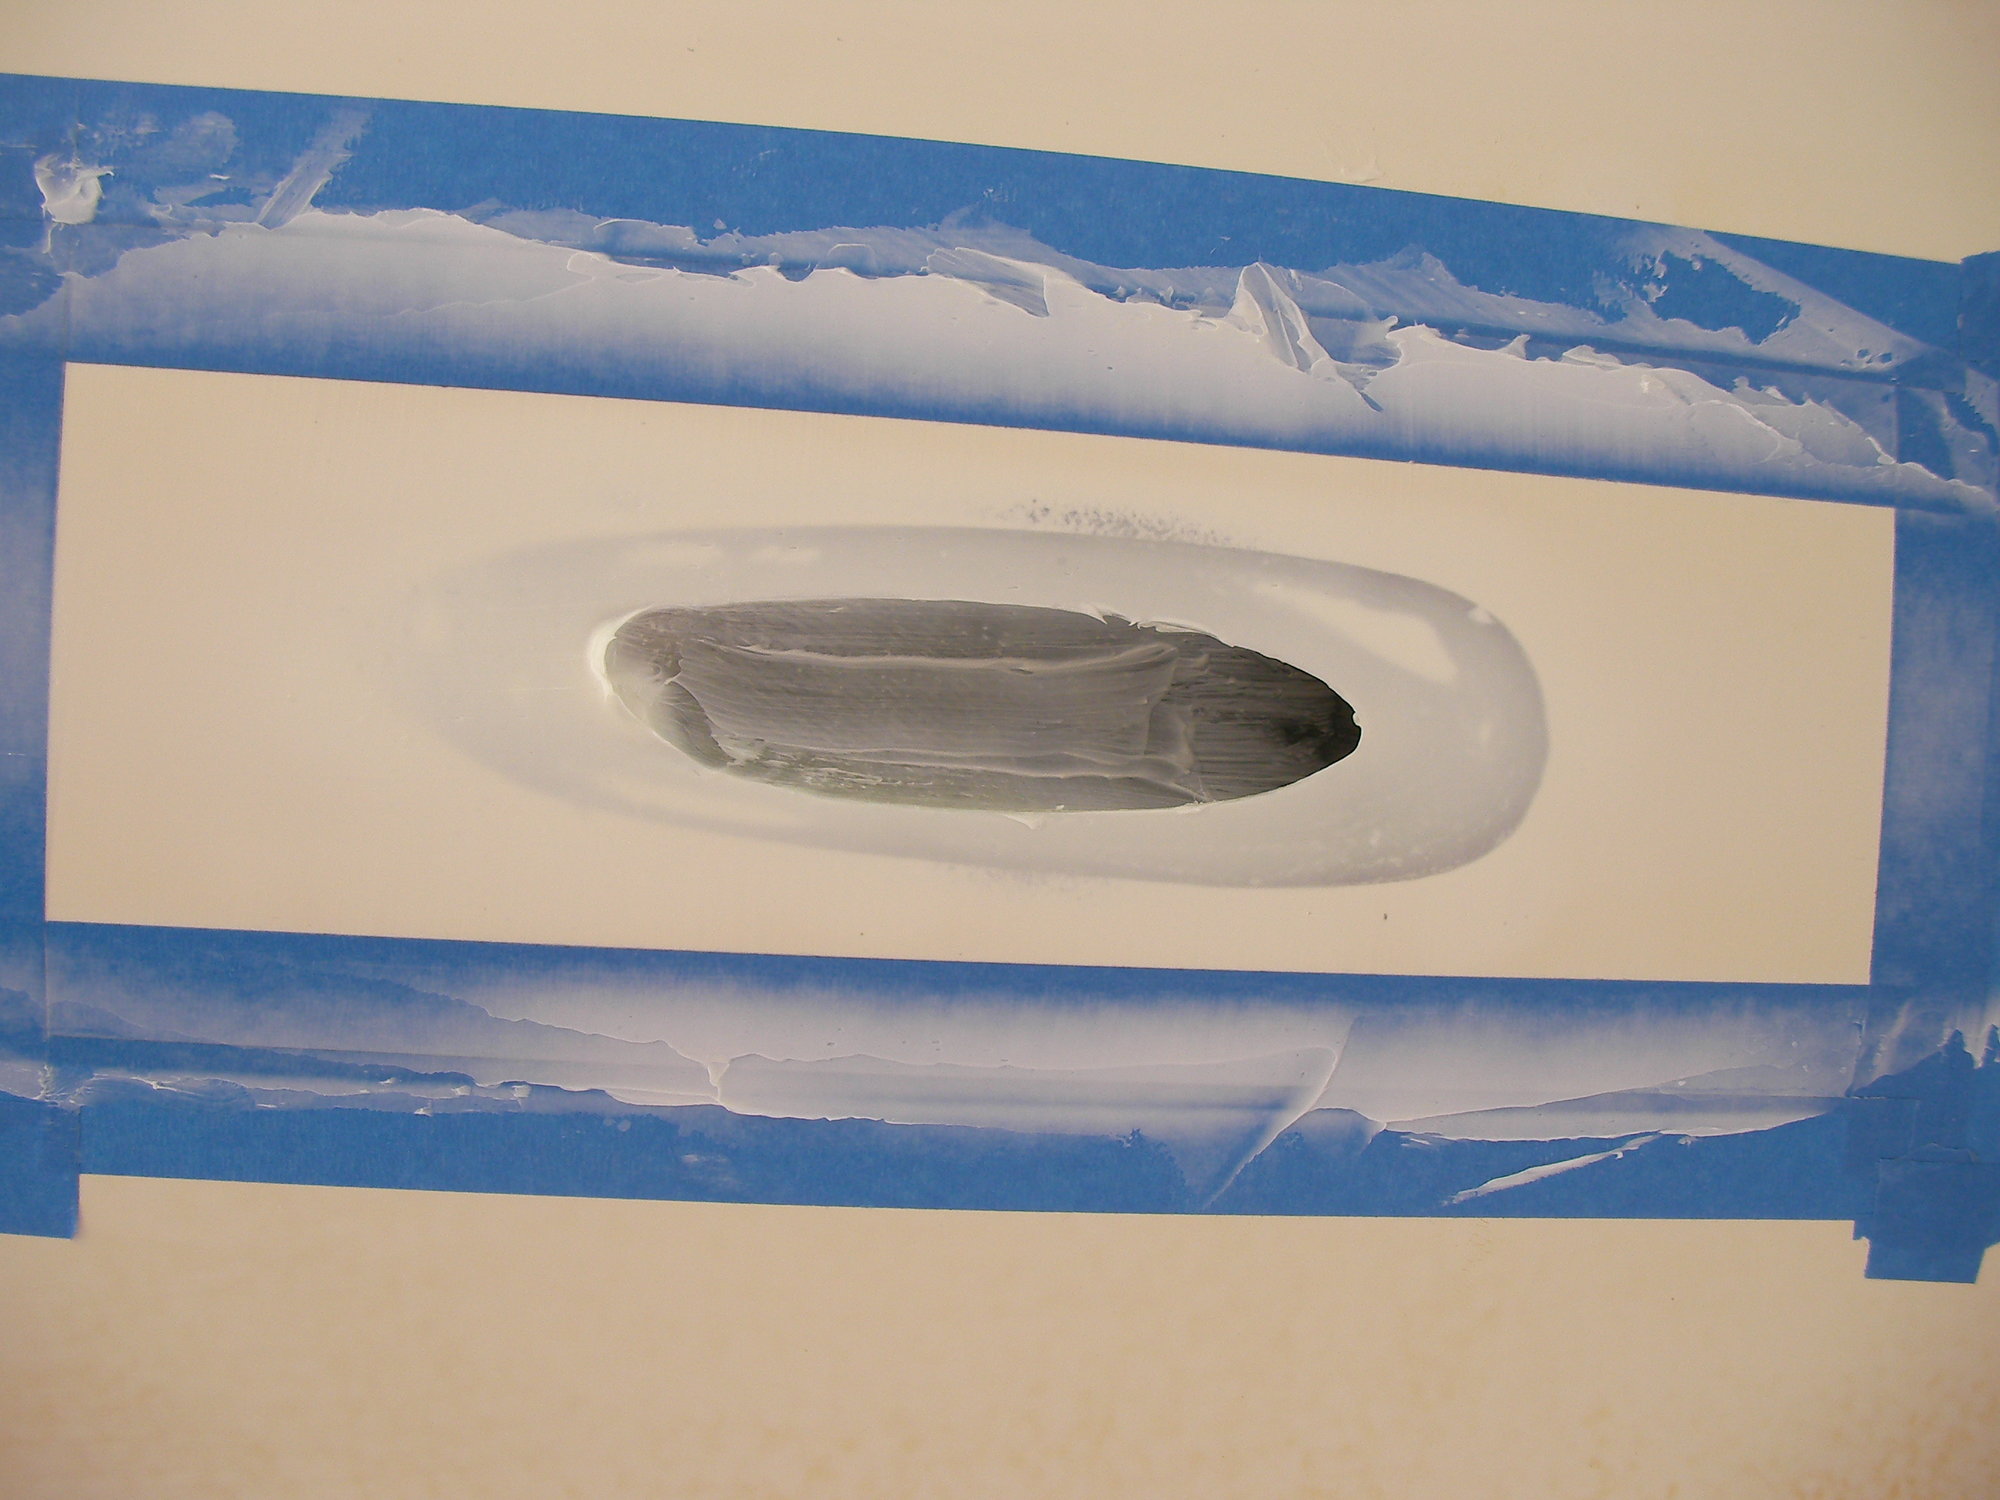
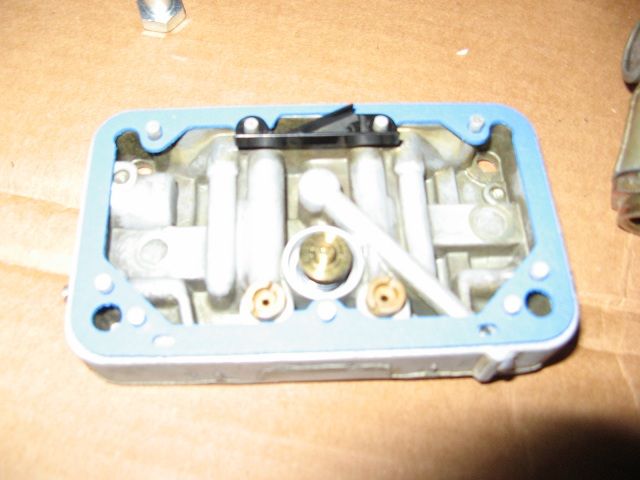
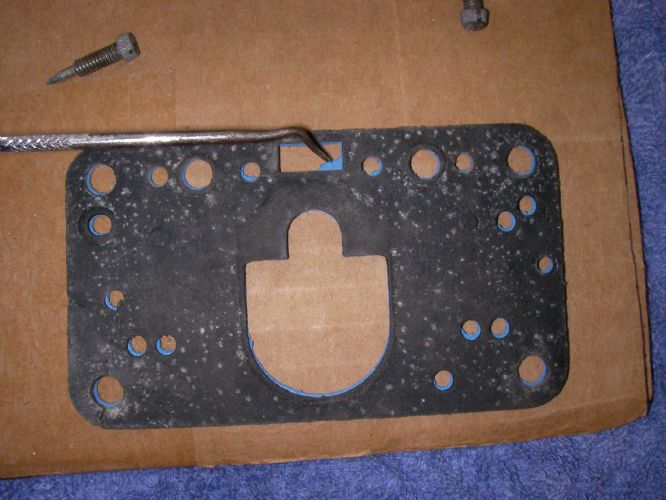 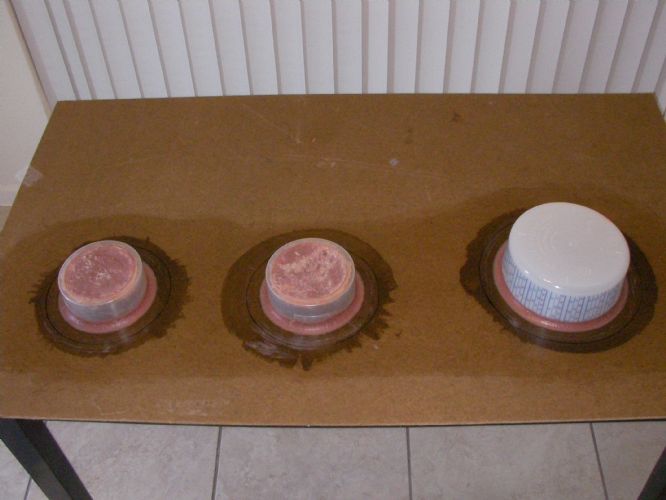 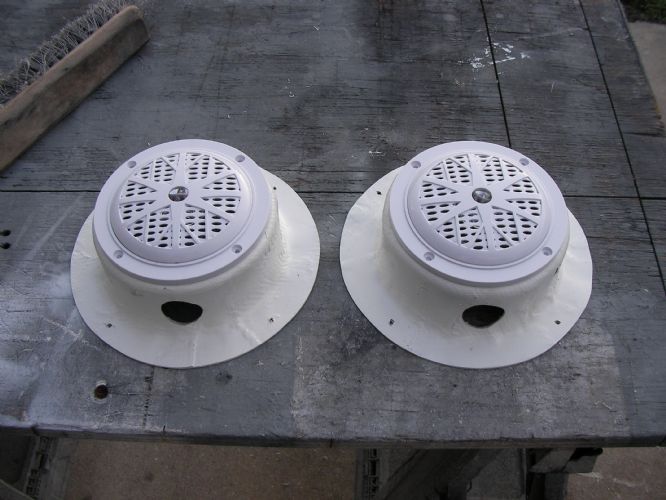 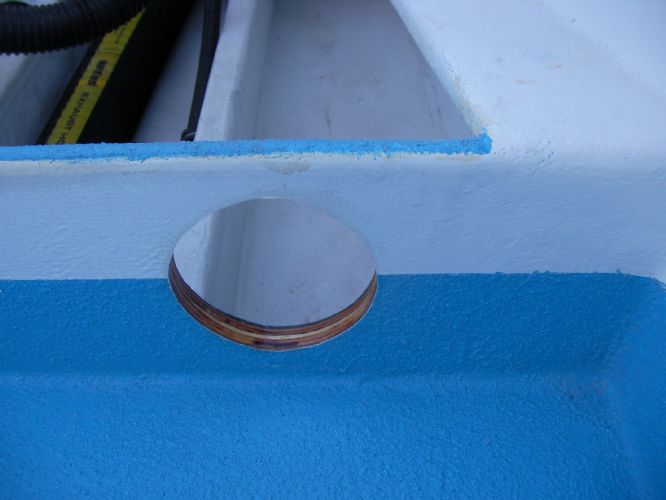 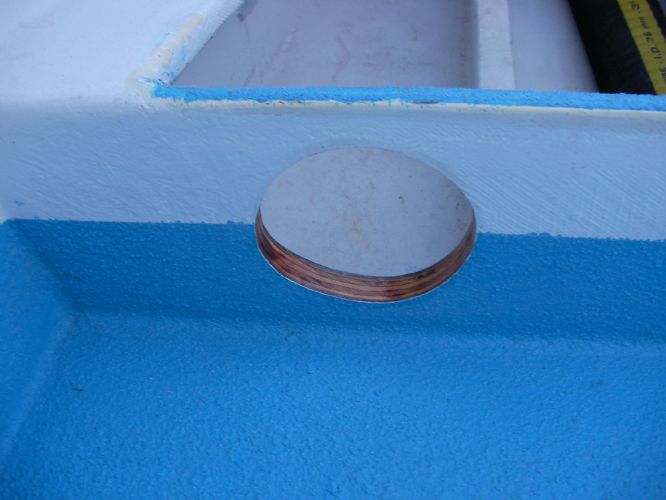 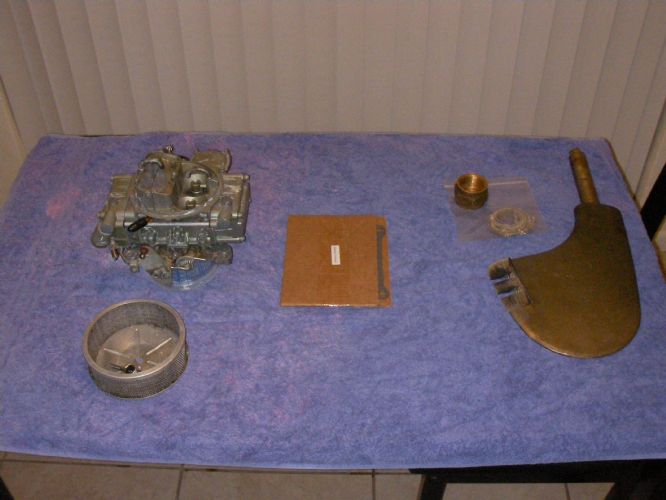 I can't bring myself to cut holes in the gunnels for speakers so last week i made some quick speaker boxes and finished them today. The 2 small ones are made off 4 inch grinding disc containers, they'll get mounted under the deck. The big one was off a 5 1/2 qaurt mixing pail and fit the 6 1/2 inch speakers perfectly but there is nowhere on the boat that the 6 1/2's fit without being in the way. All 3 were a 1 shot deal, the big one got tossed in the small mold to do pile. The other 2 speakers go in the kick panel under the back seat, the holes got epoxy soaked and will get a second coat tomorrow evening. The bowls were soaked in gas overnight and most of the day, the floats do not leak. I used 3 cans of brake kleen on the carb body the 8 holes and the meter block, it seemed like there was good flow and no blockage anywhere. Sprayed the holes in both directions numerous times. The only difference in any of the gaskets is pictured, i didn't trim it, the carb is assembled but the bowls aren't torqued yet just in case it needs trimmed. Picking safety wire up tomorrow 041 stainless is what's on the shelf
|
|
|
|
|
KENO
Grand Poobah
Joined: June-06-2004 Location: United States Status: Offline Points: 10644 |
Post Options
Thanks(0)
Quote Reply
Posted: October-11-2021 at 8:03am |
Is it safe to assume that you have a vent baffle that covers the extra piece of the gasket you're pointing at? Here's a picture of one In this photo it's shown on top of the gasket, but it should be between the metering block and the gasket
 |
|
|
|
|
KENO
Grand Poobah
Joined: June-06-2004 Location: United States Status: Offline Points: 10644 |
Post Options
Thanks(0)
Quote Reply
Posted: October-11-2021 at 8:25am |
|
Here's a picture of one installed the right way
 |
|
|
|
|
Post Reply
|
Page <1 7891011 12> |
 Tweet
Tweet
|
| Forum Jump | Forum Permissions You cannot post new topics in this forum You cannot reply to topics in this forum You cannot delete your posts in this forum You cannot edit your posts in this forum You cannot create polls in this forum You cannot vote in polls in this forum |


 Topic Options
 wayoutthere wrote: