 Boats For Sale:


1978 Nautique Mechanical Refurbishment |
Post Reply 
|
Page 12> |
| Author | |
Jllogan 
Platinum Member 

Joined: May-18-2011 Location: canton, OH Status: Offline Points: 1728 |
 Post Options Post Options
") Thanks(0) Thanks(0)
 Quote Reply Quote Reply
 Topic: 1978 Nautique Mechanical Refurbishment Topic: 1978 Nautique Mechanical RefurbishmentPosted: January-30-2012 at 11:49am |
|
good choice!
|
|
 |
|
|
DrStevens
Senior Member 

Joined: October-15-2011 Location: Columbus, OH Status: Offline Points: 422 |
Post Options
Thanks(0)
Quote Reply
Posted: January-28-2012 at 8:30pm |
|
Just dropped off my boat with mr Eric la vine today, planning on having him upgrade my boat.
|
|
|
|
|
Jllogan
Platinum Member
Joined: May-18-2011 Location: canton, OH Status: Offline Points: 1728 |
Post Options
Thanks(0)
Quote Reply
Posted: January-15-2012 at 11:06pm |
|
I used a heat gun and a plastic putty knife like you use for body filler. Any remaining glue can be removed with a rag soaked in rubbing alcohol
|
|
|
|
|
Fl Inboards
Grand Poobah 

Joined: January-20-2008 Location: United States Status: Offline Points: 2066 |
Post Options
Thanks(0)
Quote Reply
Posted: January-15-2012 at 10:57pm |
|
Heat gun and your fingernails,,, Be careful though as one can burn their fingers.
|
|
|
Hobby Boats can be expensive when the hobbyist is limited on their own skill and expertise.
1993 Shamrock "fat" 20. 2008 Nautique 196 5.0 |
|
|
|
|
DrStevens
Senior Member
Joined: October-15-2011 Location: Columbus, OH Status: Offline Points: 422 |
Post Options
Thanks(0)
Quote Reply
Posted: January-15-2012 at 9:34pm |
|
Any suggestions for removing old decals, the correct craft since 1925, flag? They are worn out but still stuck to the boat well, I don't want to dig holes in the gel getting them off.
|
|
|
|
|
Jllogan
Platinum Member
Joined: May-18-2011 Location: canton, OH Status: Offline Points: 1728 |
Post Options
Thanks(0)
Quote Reply
Posted: January-09-2012 at 11:42am |
|
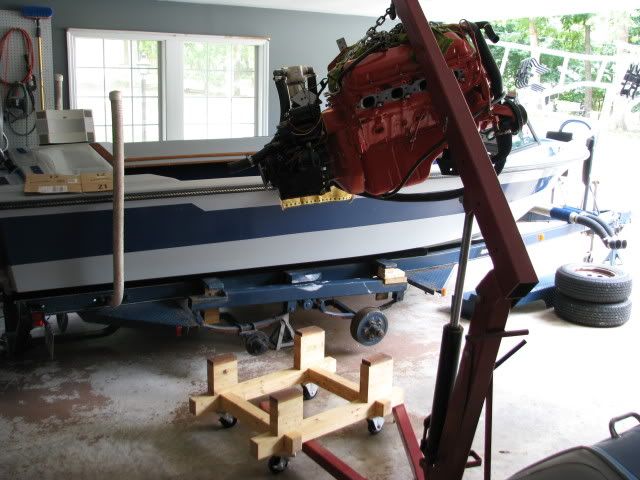
Also doc, remember with tranny on she will be A** heavy, I found that positioning the hoist right over the back bowl on the carb was a fairly well balanced spot to lift from. I agree on removing the carb, its easy to pop off and just better to have it out of the way. If you drain the oil first, if you really got into a bind you could pop the oil pan off and that could give you the extra clearance you need.
|
|
|
|
|
BuffaloBFN
Grand Poobah

Joined: June-24-2007 Location: Gainesville,GA Status: Offline Points: 6094 |
Post Options
Thanks(0)
Quote Reply
Posted: January-08-2012 at 11:30pm |
|
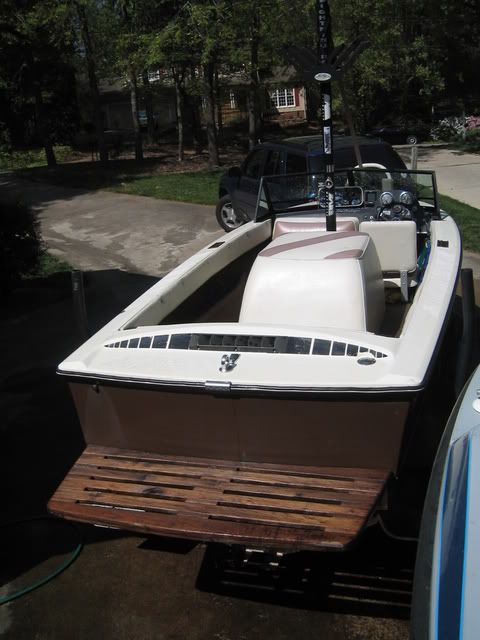
The carpet and upholstry were original I think and I know the skirt on the trailer was. The brown hull was paint and there was reddish bottom paint under that on the low side. I hadn't gotten to fixing the paint when the BFN came up so I can't swear to the gel color on the hull.
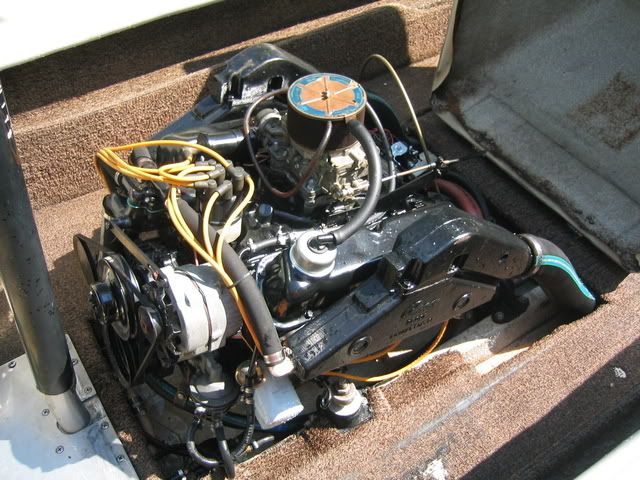
One note I should have included with that engine pic...it was all pre-CCFan. Thanks guys, I know better now. 
|
|
|
|
|
DrStevens
Senior Member
Joined: October-15-2011 Location: Columbus, OH Status: Offline Points: 422 |
Post Options
Thanks(0)
Quote Reply
Posted: January-08-2012 at 10:30pm |
|
Sorry Greg, my mistake
|
|
|
|
|
DrStevens
Senior Member
Joined: October-15-2011 Location: Columbus, OH Status: Offline Points: 422 |
Post Options
Thanks(0)
Quote Reply
Posted: January-08-2012 at 10:29pm |
|
Gary, have never seen one that color, the "Brown Pearl". Is that an original color? Thanks
|
|
|
|
|
BuffaloBFN
Grand Poobah
Joined: June-24-2007 Location: Gainesville,GA Status: Offline Points: 6094 |
Post Options
Thanks(0)
Quote Reply
Posted: January-08-2012 at 10:13am |
|
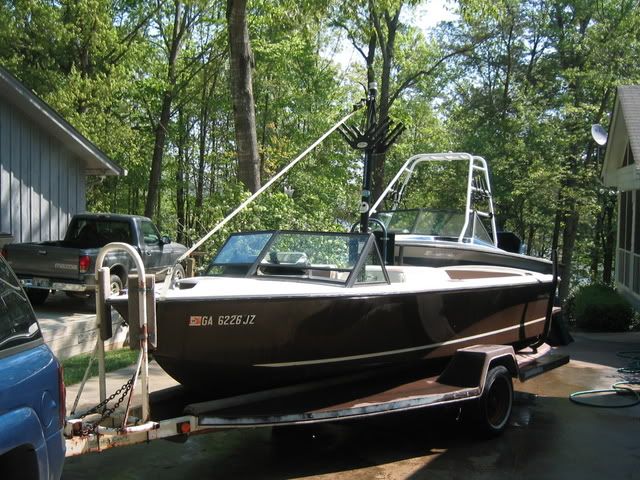
Welcome and thanks Doc. Here's the 79:
|
|
|
|
|
DrStevens
Senior Member
Joined: October-15-2011 Location: Columbus, OH Status: Offline Points: 422 |
Post Options
Thanks(0)
Quote Reply
Posted: January-08-2012 at 9:55am |
|
Thanks Greg, nice photos, post some of you 79 pics when available please.
|
|
|
|
|
BuffaloBFN
Grand Poobah
Joined: June-24-2007 Location: Gainesville,GA Status: Offline Points: 6094 |
Post Options
Thanks(0)
Quote Reply
Posted: January-08-2012 at 2:26am |
A few things that may help are removing the near exhaust manifold and setting your boom hook short but still long enough to swing. Pulling the carb may allow a shorter lift chain and it's delicate. Another delicate may be the distributer. I haven't lifted a 351 in a long time so some or all of this may be off. Just try to think ahead a few steps and realize that most things will lose against a chain with an engine hanging on it. 
|
|
|
|
|
DrStevens
Senior Member
Joined: October-15-2011 Location: Columbus, OH Status: Offline Points: 422 |
Post Options
Thanks(0)
Quote Reply
Posted: January-07-2012 at 11:38pm |
|
Nice day here, used onand off, and 3m rubbing compound and an orbital polisher to clean up my gel coat. Looks a lot better, thanks to all the CCF posters about how to do this.
|
|
|
|
|
DrStevens
Senior Member
Joined: October-15-2011 Location: Columbus, OH Status: Offline Points: 422 |
Post Options
Thanks(0)
Quote Reply
Posted: December-30-2011 at 7:11pm |
|
Thanks for the advice, and offer to help, your post replies are a help.
|
|
|
|
|
Jllogan
Platinum Member
Joined: May-18-2011 Location: canton, OH Status: Offline Points: 1728 |
Post Options
Thanks(0)
Quote Reply
Posted: December-30-2011 at 7:07pm |
|
ya I know New Albany,I used to live in dublin, so very familiar with Cbus. Well too bad you arent closer to canton, I would offer to lend a hand.
|
|
|
|
|
DrStevens
Senior Member
Joined: October-15-2011 Location: Columbus, OH Status: Offline Points: 422 |
Post Options
Thanks(0)
Quote Reply
Posted: December-30-2011 at 7:05pm |
|
New Albany, a northeast suburb of Columbus, boat to spend its time in Michigan.
|
|
|
|
|
Jllogan
Platinum Member
Joined: May-18-2011 Location: canton, OH Status: Offline Points: 1728 |
Post Options
Thanks(0)
Quote Reply
Posted: December-30-2011 at 6:30pm |
|
Doc,
where you at in OH? |
|
|
|
|
Jllogan
Platinum Member
Joined: May-18-2011 Location: canton, OH Status: Offline Points: 1728 |
Post Options
Thanks(0)
Quote Reply
Posted: December-30-2011 at 5:39pm |
|
well its coming along, I will probably get to work on it more this weekend. I am just about done grinding, which will be nice, Im tired of the dust and itching. I also have most of the wood fabricated so hopefully things will start going quicker.
I havent touched the engine yet, just sitting on the stand. Hope no surprises lurk therein, like a rebuild. Yuck. |
|
|
|
|
DrStevens
Senior Member
Joined: October-15-2011 Location: Columbus, OH Status: Offline Points: 422 |
Post Options
Thanks(0)
Quote Reply
Posted: December-30-2011 at 5:24pm |
|
Probably try it in about 10 days, then tranny to Medina to visit Eric's FF hospital, and engine to be worked on locally. Thanks a lot Justin, how is your project?
|
|
|
|
|
Jllogan
Platinum Member
Joined: May-18-2011 Location: canton, OH Status: Offline Points: 1728 |
Post Options
Thanks(0)
Quote Reply
Posted: December-30-2011 at 2:48pm |
|
It took about an hour from start to finish to get it on the engine stand. The engine was out in 20 minutes took more time to get it adjusted so it would sit on the stand. Really pretty simple.
Also obviously you will have to unhook the fuel line from the pump, plug a socket extension or big screw driver in the hose so gas doesnt pour everywhere. I think thats everything I can think of. |
|
|
|
|
Jllogan
Platinum Member
Joined: May-18-2011 Location: canton, OH Status: Offline Points: 1728 |
Post Options
Thanks(0)
Quote Reply
Posted: December-30-2011 at 2:46pm |
|
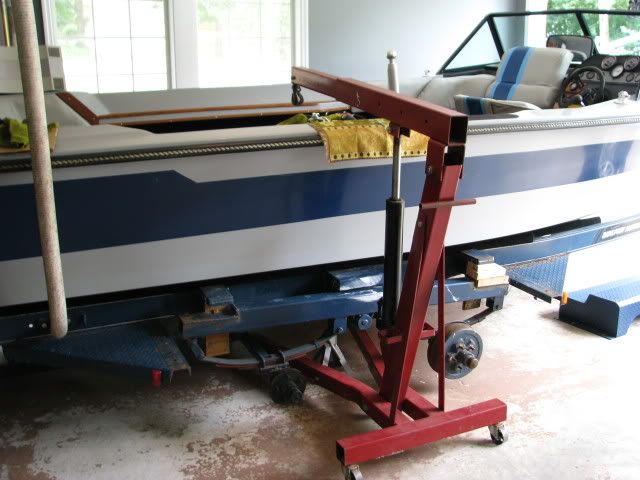
ya may want to measure a bit and run the hoist up all the way and see what kind of clearance you have. You could always remove the oil pan to gain some clearance. That would be a last resort though. Watch the valve covers too, the chain will want to bind against them and you wouldnt want to crush them so if you use the lifting rings that are on the heads you cant make that chain too short. Just dont get in a hurry.
Also on mine the drive coupler was really froze on. After I removed the four bolts, I worked a putty knife inbetween and pushed forward on the engine and it came free. |
|
|
|
|
DrStevens
Senior Member
Joined: October-15-2011 Location: Columbus, OH Status: Offline Points: 422 |
Post Options
Thanks(0)
Quote Reply
Posted: December-30-2011 at 1:30pm |
|
Yes, I have an engine hoist, having not done it, seems daunting. I suppose the more skillful part is reassembling the watch. Your tip on the chain length, clearance are the type of things I was looking for, pitfalls to avoid, thanks.
|
|
|
|
|
Jllogan
Platinum Member
Joined: May-18-2011 Location: canton, OH Status: Offline Points: 1728 |
Post Options
Thanks(0)
Quote Reply
Posted: December-30-2011 at 11:43am |
|
uhh well, it has been documented. I just did it. Just unhook the wiring harness, the batter cables, the water line, the throttle and shifter cables, the 4 bolts in the coupler from the tranny to the shaft... I dont think anyone really did a step by step. Its not too difficult. Do you have a cherry picker? Just make sure you have clearance to get over the side of the boat, so dont make your chain to long or you will not be able to get it over. I know some people have had to let the air out of a tire to get it over the side.
|
|
|
|
|
DrStevens
Senior Member
Joined: October-15-2011 Location: Columbus, OH Status: Offline Points: 422 |
Post Options
Thanks(0)
Quote Reply
Posted: December-29-2011 at 11:43pm |
|
Going to pull my engine, any threads that exists for how to,tips?
|
|
|
|
|
DrStevens
Senior Member
Joined: October-15-2011 Location: Columbus, OH Status: Offline Points: 422 |
Post Options
Thanks(0)
Quote Reply
Posted: December-28-2011 at 8:09pm |
|
Thanks Gary, that is the type of result I am shooting for, really amazing when you see the starting point on some of these boats.
|
|
|
|
|
Gary S
Grand Poobah

Joined: November-30-2006 Location: Illinois Status: Offline Points: 14096 |
Post Options
Thanks(0)
Quote Reply
Posted: December-28-2011 at 6:21pm |
|
My valve covers Steve are part of the original Holmam Moody conversion.You can get chrome ones at just about any Ford vendor. Don't tell anyone but I added 35hp just by changing over to these

|
|
|
|
|
DrStevens
Senior Member
Joined: October-15-2011 Location: Columbus, OH Status: Offline Points: 422 |
Post Options
Thanks(0)
Quote Reply
Posted: December-28-2011 at 4:27pm |
|
I found Eastwood paints has a Dark Ford Blue used from mid 70's through 1980. Gary your color, and engine look great, where did you get your valve covers?
|
|
|
|
|
Gary S
Grand Poobah
Joined: November-30-2006 Location: Illinois Status: Offline Points: 14096 |
Post Options
Thanks(0)
Quote Reply
Posted: December-28-2011 at 4:15pm |
|
Just for reference Steve I painted mine 1941-48 Ford Blue

|
|
|
|
|
DrStevens
Senior Member
Joined: October-15-2011 Location: Columbus, OH Status: Offline Points: 422 |
Post Options
Thanks(0)
Quote Reply
Posted: December-28-2011 at 4:00pm |
|
Ok, thanks, old Ford blue is name I thought I had looked at the auto parts store,and internet search. I will check again, it is definitely a darker blue and green than Keegan's. There are at least 3 shades of Ford blue depending on the era.
|
|
|
|
|
TRBenj
Grand Poobah

Joined: June-29-2005 Location: NWCT Status: Online Points: 21131 |
Post Options
Thanks(0)
Quote Reply
Posted: December-28-2011 at 3:53pm |
|
I pulled those pictures from 4 different boats in the diaries- all from the '74-77 vintage. I would say that if your engine matches them, then its the original colors.
I cant help you on the particular colors- I havent had to match them before. I do think the Rustoleum Grabber Green looks pretty close, at least on this monitor... but youre best off going to an auto parts store to see what they have thats close. You'll want to use high temp paint on the manifolds, and preferably the block as well. |
|
|
|
|
Post Reply
|
Page 12> |
 Tweet
Tweet
|
| Forum Jump | Forum Permissions You cannot post new topics in this forum You cannot reply to topics in this forum You cannot delete your posts in this forum You cannot edit your posts in this forum You cannot create polls in this forum You cannot vote in polls in this forum |


 Topic Options
 DrStevens wrote: