The old girl got a face lift
Printed From: CorrectCraftFan.com
Category: Repairs and Maintenance
Forum Name: Boat Maintenance
Forum Discription: Discuss maintenance of your Correct Craft
URL: http://www.CorrectCraftFan.com/forum/forum_posts.asp?TID=27244
Printed Date: May-09-2024 at 7:30pm
Topic: The old girl got a face lift
Posted By: gun-driver
Subject: The old girl got a face lift
Date Posted: July-30-2012 at 7:58pm
|
Finally got around to wet sanding, buffing, new graphics, new pin stripe, new rub rail and rope. Wet sanding 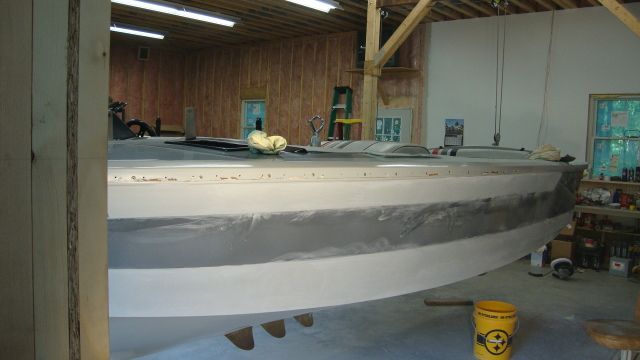 Prepping for new rub-rail 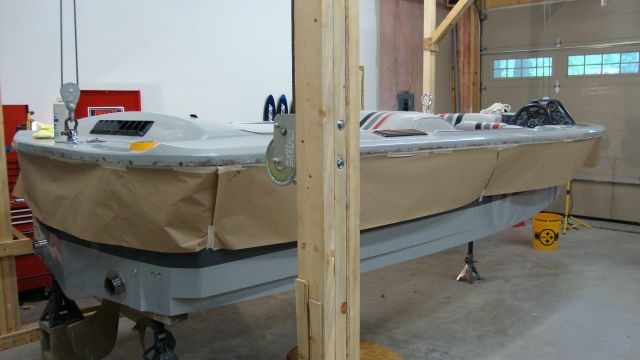 Getting the new graphics 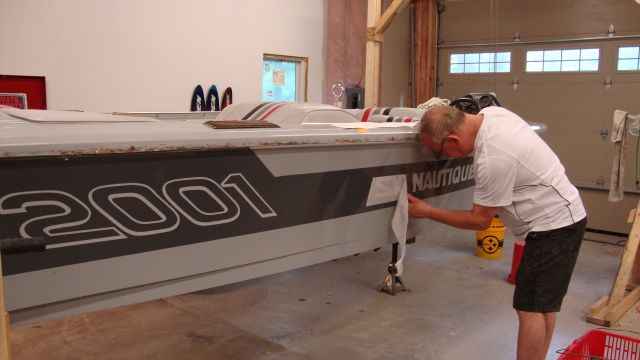 Graphics with pinstripe 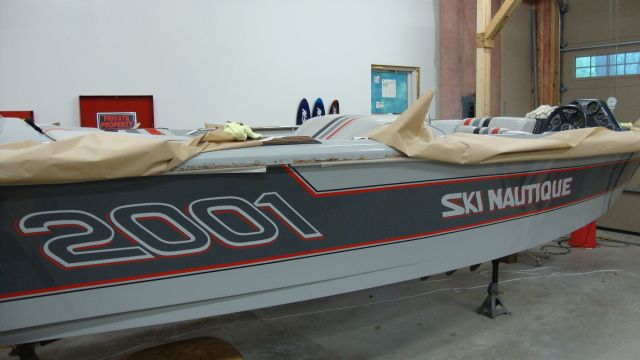 New rub-rail 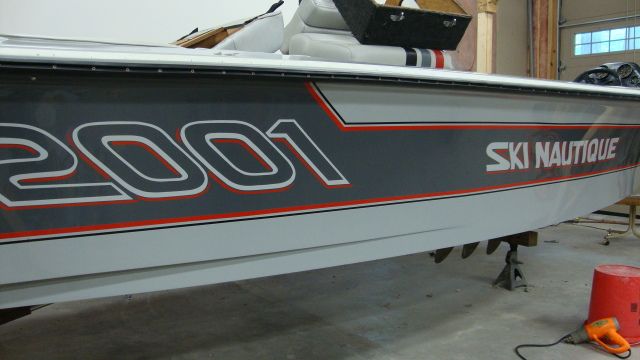 Rub-rail and rope  All done 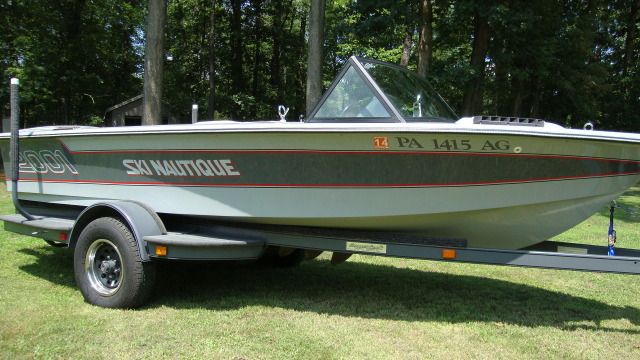 
|
Replies:
Posted By: Jllogan
Date Posted: July-30-2012 at 8:00pm
|
nice, is it coming to salt fork this weekend? ------------- http://correctcraftfan.com/diaries/details.asp?ID=5792&sort=&pagenum=1" rel="nofollow - 1986 Ski Nautique 2001 |
Posted By: grim007
Date Posted: July-30-2012 at 8:04pm
|
a job well done and i'm sure very satisfying to do it yourself ------------- shaken not stirred |
Posted By: 8122pbrainard
Date Posted: July-30-2012 at 8:23pm
 ------------- /diaries/details.asp?ID=1622" rel="nofollow - 54 Atom /diaries/details.asp?ID=2179" rel="nofollow - 77 Tique 64 X55 Dunphy Keep it original, Pete < |
Posted By: Big Pappa
Date Posted: July-30-2012 at 8:25pm
|
Looks Awesome!!! ------------- http://bit.ly/Mghpvx" rel="nofollow - Big Pappa http://bit.ly/L4zRW0" rel="nofollow - My Project |
Posted By: dwcar
Date Posted: July-30-2012 at 9:23pm
|
Nice work. Nice shop! ------------- 83Ski |
Posted By: gun-driver
Date Posted: July-30-2012 at 9:43pm
Not sure yet the wifey likes the '95 better with the kids.(her boat) 
|
 Jllogan wrote:
Posted By: 8122pbrainard
Date Posted: July-30-2012 at 9:52pm
Paul, You have "his" and "hers" boats? Wow!!! In the Brainard household, All I can call "hers" is the damn PWC she bought! It's a 1990 500 Seadoo and it's actually not going in the water this year. Last summer, when I was winterizing all the boats, the damn thing would not start. I understand the ignition system is on the weak side on the 500's. The high end spark plugs have gotten me through many years but now it's time to take it in. I refuse to work on the thing standing on my head with said head in a black hole!!! Any help/input on the 500's? ------------- /diaries/details.asp?ID=1622" rel="nofollow - 54 Atom /diaries/details.asp?ID=2179" rel="nofollow - 77 Tique 64 X55 Dunphy Keep it original, Pete < |
Posted By: gun-driver
Date Posted: July-30-2012 at 10:07pm
|
Pete 2 stroke or 4. Are the plugs getting wet(fuel) Those carbs can clog up right quick. I'm not sure about the '90s but when I had my '01 600 it had to run the recommended plugs. |
Posted By: 8122pbrainard
Date Posted: July-30-2012 at 10:31pm
|
Paul. It's a 2 stroke. The Platinum Spark Plugs for at least 5 years have held up damn good. The ignition system on the 500 is so weak that the fall fogging will not allow a spring start. The cure is a new set of plugs. The platinum plugs are the proper replacements for the originals per the charts. ------------- /diaries/details.asp?ID=1622" rel="nofollow - 54 Atom /diaries/details.asp?ID=2179" rel="nofollow - 77 Tique 64 X55 Dunphy Keep it original, Pete < |
Posted By: gun-driver
Date Posted: July-30-2012 at 10:34pm
WOW you got 5 years out of a set of plugs on a 2 stroke!!! Send some of that luck my way  I always figure a new set a year in our 2 stroke sleds. |
Posted By: 8122pbrainard
Date Posted: July-30-2012 at 10:39pm
Paul, No No No!!!! The plugs were replaced EVERY year!! That's why I mentioned the damn thing would not start on fogged plugs from the previous fall! ------------- /diaries/details.asp?ID=1622" rel="nofollow - 54 Atom /diaries/details.asp?ID=2179" rel="nofollow - 77 Tique 64 X55 Dunphy Keep it original, Pete < |
Posted By: SNobsessed
Date Posted: July-31-2012 at 12:39am
|
Paul - Great job, you will get many compliments at the ramp! Pete - does she pull a tube with it? ------------- “Beer is proof that God loves us and wants us to be happy.” Ben Franklin |
Posted By: gun-driver
Date Posted: July-31-2012 at 12:41am
|
Gottcha On fall start up I usually pull the plugs shoot a shot of starter fluid in each hole.(if you can shoot it through the carb it's even better to get it down in the crankcase) Then a few wide open throttle pulls to get the carbs fuel bowls filling. Then one more shot of starter fluid replace plugs and they usually fire right up. I think using the starter fluid for the first couple pulls helps thin the oil and helps the sled light off the oil. |
Posted By: davidg
Date Posted: July-31-2012 at 1:20am
| Great job!! The boat looks great! A classic color combination. |
Posted By: AussieNorts
Date Posted: July-31-2012 at 2:13am
|
Paul, Would you care to elaborate on the process you went through to install the rub rail, I have to do this on a 1997 Sport and have heard you need to heat it up in a bath or hot water, did you use this method? I just can not see how warm water will enable this to stretch at all. How many people did you need to install that new rub rail? I wish it was just easier but then it would not be a boat right. Thanks again everyone on here for there help with all matters correct craft. Steve ------------- Correct craft.....is there any other boat? |
Posted By: AussieNorts
Date Posted: July-31-2012 at 2:13am
|
Sorry and by the way the boat looks great!! ------------- Correct craft.....is there any other boat? |
Posted By: Kristof
Date Posted: July-31-2012 at 6:25am
That looks shiny...  Great job! ------------- - Gun control means: using BOTH hands! - Money doesn't make one happy, but when it rains cats and dogs, it's still better to cry in a Porsche than on a bicycle... |
Posted By: 8122pbrainard
Date Posted: July-31-2012 at 9:19am
Paul, I agree. It looks fantastic! ------------- /diaries/details.asp?ID=1622" rel="nofollow - 54 Atom /diaries/details.asp?ID=2179" rel="nofollow - 77 Tique 64 X55 Dunphy Keep it original, Pete < |
Posted By: JoeinNY
Date Posted: July-31-2012 at 10:52am
|
That boat is looking pretty darn good Paul! The only problem I see is that both of your boats are getting close to perfect... you won't have anything to work on. Don't worry... I can drop off one or two of my boat backlog to keep you busy. ------------- http://www.correctcraftfan.com/diaries/details.asp?ID=1477 - 1983 Ski Nautique 2001 1967 Mustang 302 "Decoy" http://www.youtube.com/watch?v=cO5MkcBXBBs - Holeshot Video |
Posted By: gun-driver
Date Posted: July-31-2012 at 11:11am
|
Steve, I did it by myself. The first thing I did is fill all the old holes with thickened epoxy resin using a big syringe tube. I took a small drill bit and enlarged the hole slightly. I sprayed WD-40 on the plunger to help it slide and keep the resin from sticking to it. I had to refill it three times to do all the holes. Once all the holes were filled I took a putty knife and smoothed out the resin that oozed out of the holes. It worked great. I then took masking tape and laid out(every 3")where I was going to drill so I wouldn't hit the old holes or cap rivets. I then put the roll of rub rail on a chair with wheels and as I rolled the rub rail out I used stripes of duct tape to hold it in place. There is no need to warm it up just go 1 screw at a time in sequence and the slack will push forward. You will have to adjust where you taped it as the slack pushes forward. I used two drills one to drill the holes and the other to run the screws in with. To install the rope I used the 1/2" copper pipe trick with a slight bend to guide the rope into the groove. 187 screws and 4-5 beers later it was done. Here's the big syringe I used 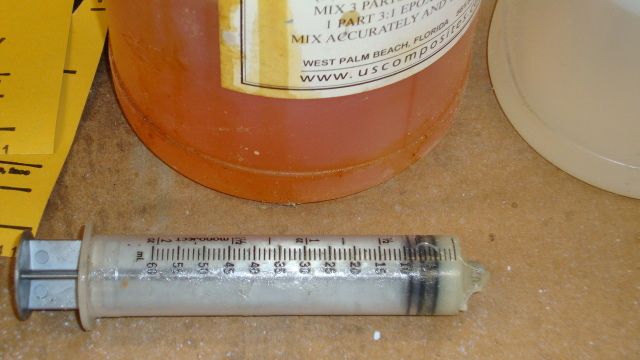 Here you can see the lay out marks above the rub rail.
|
Posted By: gun-driver
Date Posted: July-31-2012 at 11:17am
|
Joe send'em on down we'll get them shined up after a run two...enty in the river
|
Posted By: Jllogan
Date Posted: July-31-2012 at 11:50am
ya better bring the 95 that way you dont make my 86 look so shabby. ------------- http://correctcraftfan.com/diaries/details.asp?ID=5792&sort=&pagenum=1" rel="nofollow - 1986 Ski Nautique 2001 |
Posted By: turningpoint84
Date Posted: July-31-2012 at 11:56am
|
Love your Cincinnati Bengals boat, great color scheme! ------------- Proud 1968 mustang owner and now http://www.correctcraftfan.com/diaries/details.asp?ID=6454&sort=&pagenum1" rel="nofollow - 1970 Mustang |
Posted By: gun-driver
Date Posted: July-31-2012 at 1:00pm
Bengals went to gray on gray????? I thought they were prissy pumpkin orange and black
|
Posted By: AussieNorts
Date Posted: July-31-2012 at 8:10pm
|
Paul, Thanks for the explanation on the rub rail install, I just could not find on here anyone that had documented it. I truly appreciate it and your method sounds alot easier than heating the thing up. I have filled all my holes so I will probably attempt it this weekend. Steve ------------- Correct craft.....is there any other boat? |
Posted By: gun-driver
Date Posted: August-01-2012 at 11:32am
|
Steve Also when your putting in your screws just snug them up secure. If you run them in two tight you'll get bulges in the side of the rail. Theres plenty of screws to hold it solid so they dont have to be to tight just snug. Good luck with yours. |
Posted By: C-Bass
Date Posted: August-01-2012 at 11:44am
|
Paul, it looks great. Info on your decals and pinstripe source (TimD?) is appreciated, they look like an exact match. Did you have trouble lining up the shadow graphic after the main was placed? ------------- Craig 67 SN 73 SN http://www.correctcraftfan.com/diaries/details.asp?ID=6103" rel="nofollow - 99 Sport 85SN |
Posted By: 87nautique
Date Posted: August-02-2012 at 3:37pm
|
Hi, I have an 87 nautique, grey hull and black lettering. Where did you get the rope to replace the rail? How much did you get? What diameter is rope? Any information is appreciated. Thanks, Paul |
Posted By: quinner
Date Posted: August-02-2012 at 4:03pm
|
Paul, nice work, looking good! Now that the boats are done time to get that siding up on your boat barn!! ------------- http://www.correctcraftfan.com/diaries/details.asp?ID=1143" rel="nofollow - Mi Bowt |
Posted By: AussieNorts
Date Posted: August-03-2012 at 1:21am
|
Paul, I just need some clarification here I am not sure the rob rail you used is the same to what I have purchased from Nautique Parts. Is this the same rub rail? Mine is very rigid and has the white backing in it, did yours look like this?  I only ask this as the rail seems too rigid to fit to the boat without some heat, but if it the same as yours I will try as you got it no worries. Paul also did you measure to find the middle and work from the bow down one side and then the next side? Sorry for all the questions,am totally new to this job never seen it done or done myself, I am in the dark!!! I just spoke with my local dealer this morning and he made it sound like it is very hard to do. Thanks again Steve ------------- Correct craft.....is there any other boat? |
Posted By: KRoundy
Date Posted: August-09-2012 at 5:43pm
|
Steve, That does not look right. Assuming that your 1993 Sport and my 1993 Ski have similar rub rails, I don't think you got the right part. First, here is a close-up of my rub rail, before it was removed from the boat (other parts of the rub rail were trashed): 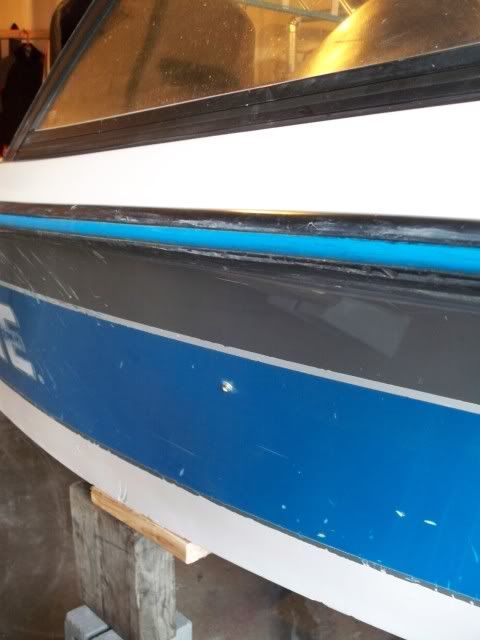 I also have spent some time at the http://www.tacomarine.com/" rel="nofollow - Taco Metals Marine Products web site. If you go to this site and wander down to the FAQ's you can get a list of the rub rails that go on Correct Craft boats. Based upon this information, and the advice of others here on CCF, I believe that the right rub rail for my boat is a http://tacomarine.com/item--1-1-4-x-15-16-Flexible-Rub-Rail--V11-3447.html" rel="nofollow - V11-3447 . This rail is the closest to the OEM rail for our era Correct Craft boats. Note that the rails now only come with a black or a white insert tube now (you can't get say, a blue one, that would match the color of your boat or look like the brochures. I hope this helps. I'm not sure why you were sent what appears to me to be the wrong part. Paul - did you get a Taco rub rail? If so, which part number? ------------- Previous: 1993 Electric Blue/Charcoal Ski Nautique Current: 2016 Ski Nautique 200 Open Bow |
Posted By: gcam4
Date Posted: April-15-2021 at 6:09am
| Super old thread, but has anyone had any more luck locating tubing for colored inserts? I'm looking for teal. I wanted to just flip it around but the screw heads have damaged the insert on the inside and I don't want to use it except as a last resort. |