 Boats For Sale:


1968 Mustang Resto-mod Jax, FL |
Post Reply 
|
Page <1 45678 10> |
| Author | |
jbear 
Grand Poobah 

Joined: January-21-2005 Location: Lake Wales FL. Status: Offline Points: 8193 |
 Post Options Post Options
") Thanks(0) Thanks(0)
 Quote Reply Quote Reply
 Posted: September-07-2014 at 1:18am Posted: September-07-2014 at 1:18am |
|
man am I enjoying following this...just an awesome job!
john |
|
|
"Loud pipes save lives"
AdamT sez "I'm Canadian and a beaver lover myself"... |
|
 |
|
|
AAM196
Gold Member 

Joined: October-23-2012 Location: Pittsburgh, PA Status: Offline Points: 846 |
Post Options
Thanks(0)
Quote Reply
Posted: September-07-2014 at 10:23am |
|
[QUOTE=jbear] man am I enjoying following this...just an awesome job!/QUOTE]
I as well! I couldn't even imagine doing that work in the hot Florida sun! Stellar work Bill. You will be skiing from her soon enough. |
|
|
|
|
dangerwil
Senior Member 

Joined: June-20-2013 Location: Orange Park, FL Status: Offline Points: 319 |
Post Options
Thanks(0)
Quote Reply
Posted: September-07-2014 at 1:17pm |
|
Thanks for all the kind words.
It really is a life long dream to own this boat. I have had boats all my life and done lots of work on them, but nothing to this extent. Here is a pic of me in the summer of 1967 at Lake Tarpon in Tampa, FL. Its hard to beleive I am only 2 years older than the boat! If only she could talk! What stories could it tell? 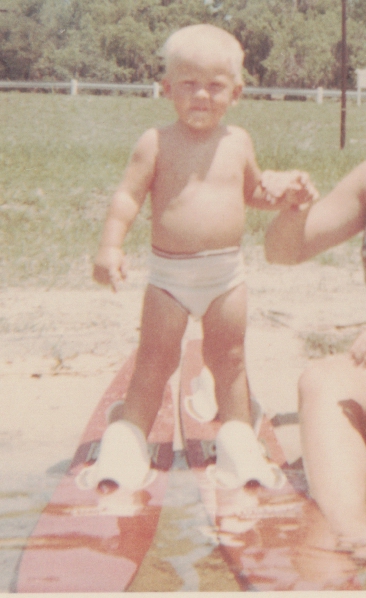
|
|
|
|
|
fanofccfan
Platinum Member

Joined: December-13-2009 Location: North Bend NE Status: Offline Points: 1720 |
Post Options
Thanks(0)
Quote Reply
Posted: September-07-2014 at 4:10pm |
   ^^^^ ^^^^
|
|
|
|
|
Kristof
Grand Poobah
Joined: October-08-2007 Location: Bree, Belgium Status: Offline Points: 3390 |
Post Options
Thanks(0)
Quote Reply
Posted: September-07-2014 at 5:22pm |

|
|
|
- Gun control means: using BOTH hands!
- Money doesn't make one happy, but when it rains cats and dogs, it's still better to cry in a Porsche than on a bicycle... |
|
|
|
|
dangerwil
Senior Member
Joined: June-20-2013 Location: Orange Park, FL Status: Offline Points: 319 |
Post Options
Thanks(0)
Quote Reply
Posted: September-17-2014 at 9:26pm |
|
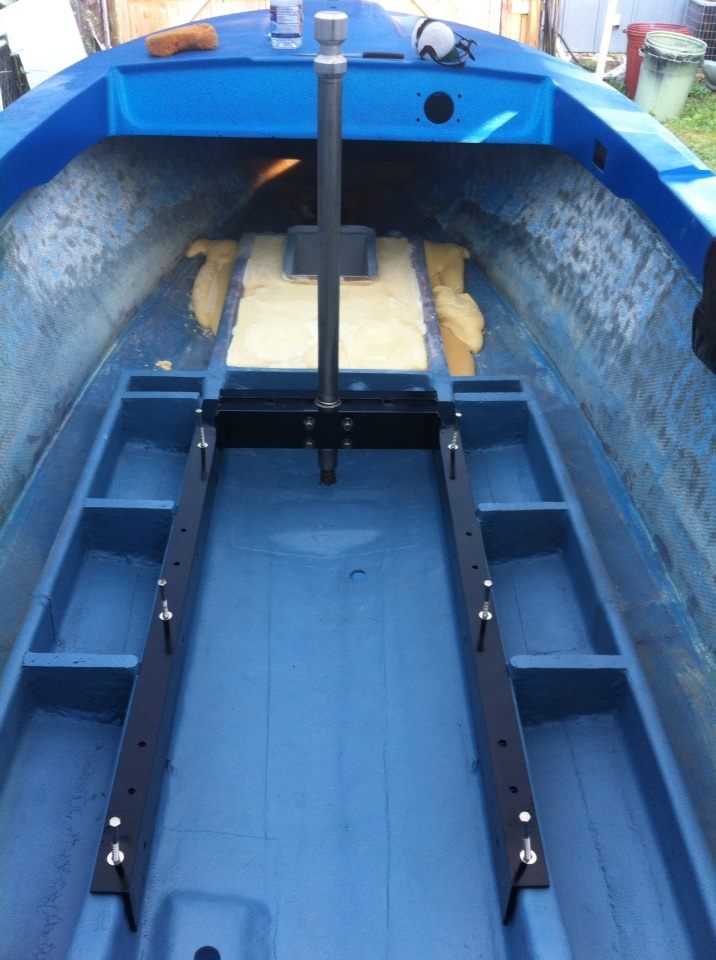
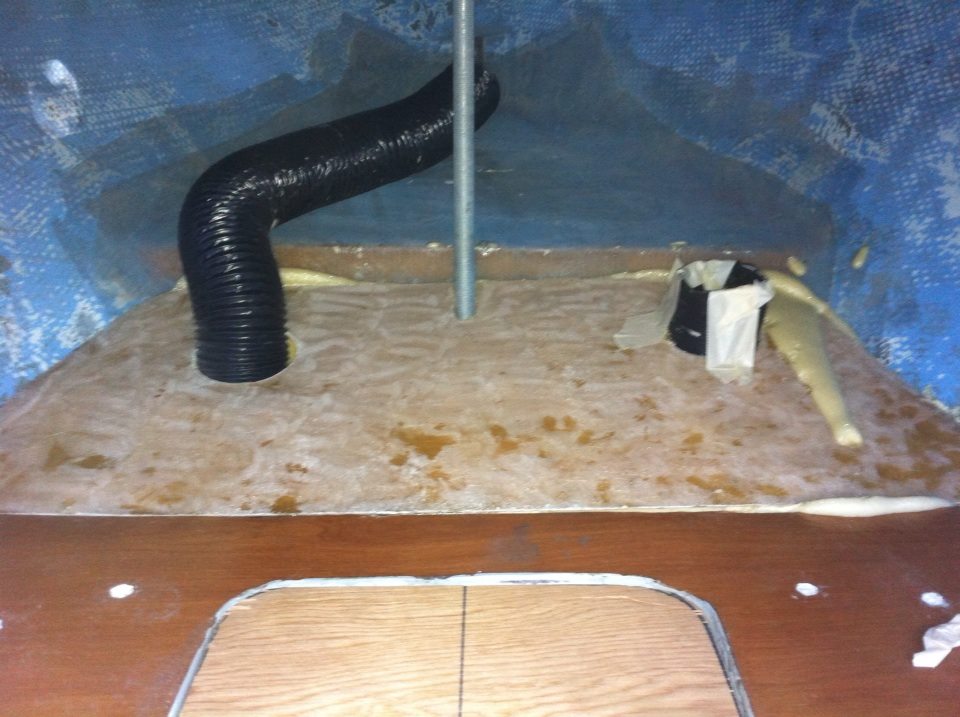
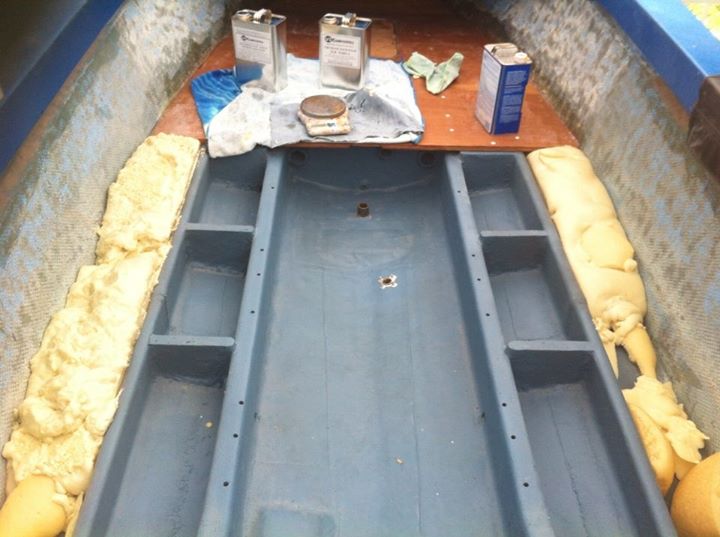
This working for a living thing is really getting in the way of my boat project... I made some time to get the battery box foamed in and cut out. I have the engine frame and new ski pole in and ready to measure for floor template.
|
|
|
|
|
dangerwil
Senior Member
Joined: June-20-2013 Location: Orange Park, FL Status: Offline Points: 319 |
Post Options
Thanks(0)
Quote Reply
Posted: September-20-2014 at 9:25pm |
|
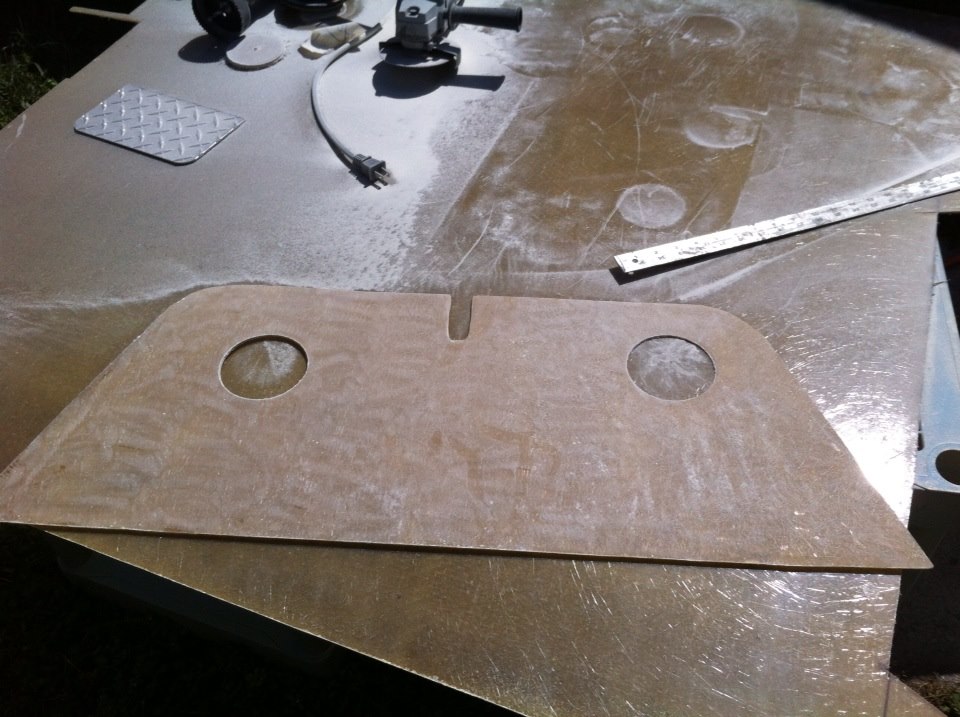
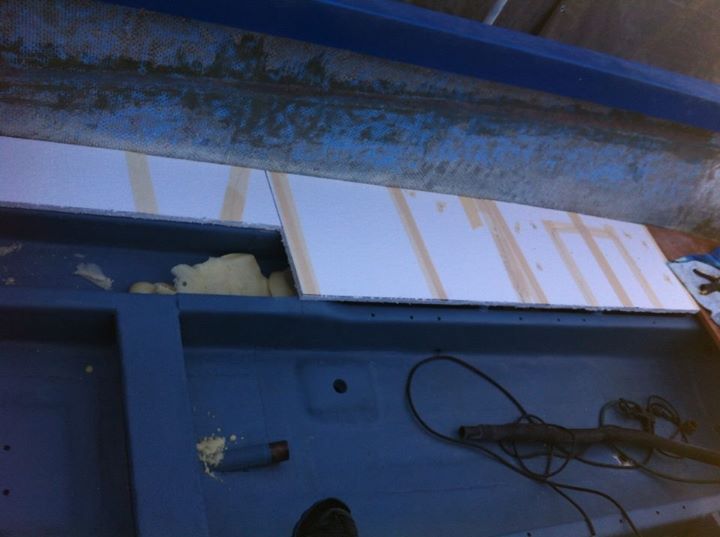
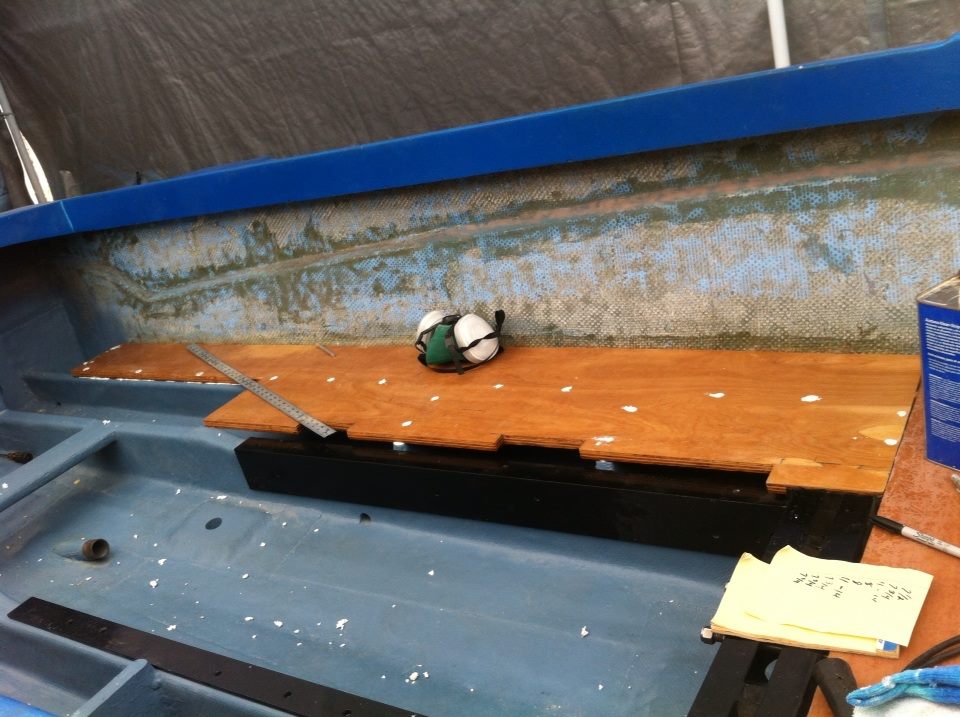
I spent a rainy Saturday fitting the front part of the floor, with some help from a friend. First I measured the opening, then made a cardboard template. Once we got that to fit nicely, we made another template from 3/4 inch foam board. I got that in place, then pushed down on it over the battery box. The edges of the battery box left a nice impression in the foam that made it super easy to cut the hole for it.
We placed the foam over the floor plywood and traced it out. I cut it out with a jigsaw and used a belt sander to get a perfect fit! Now I have to mark the height, finish the foam up under it and then laminate both sides with fiberglass and cpes the edge grain. Once installed I can fit the flex pipe up front and foam and glass in the last bit of the bow. 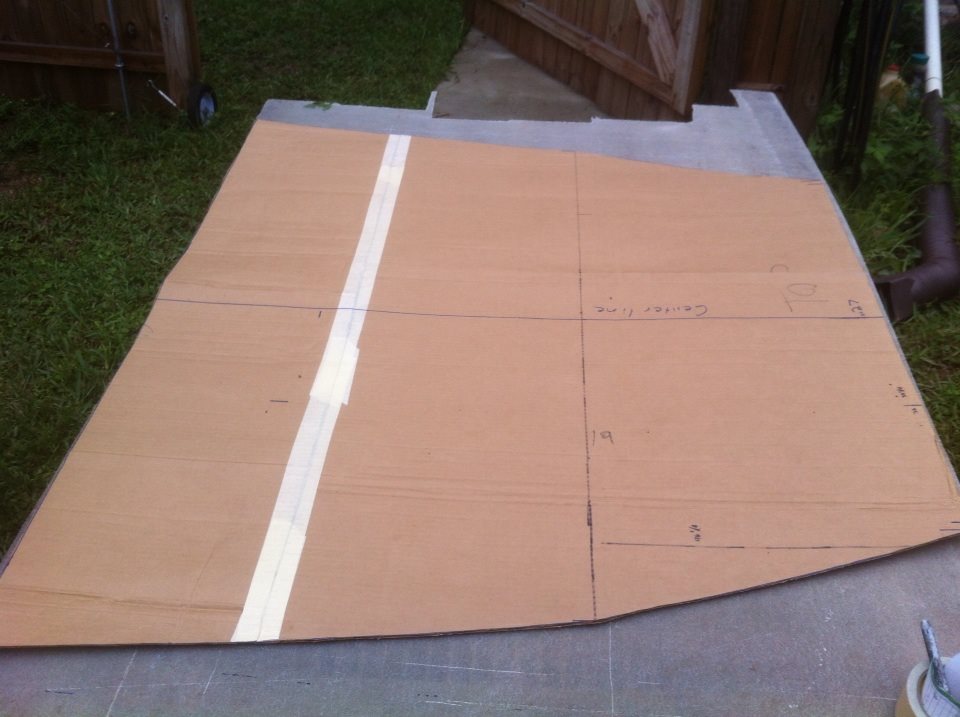 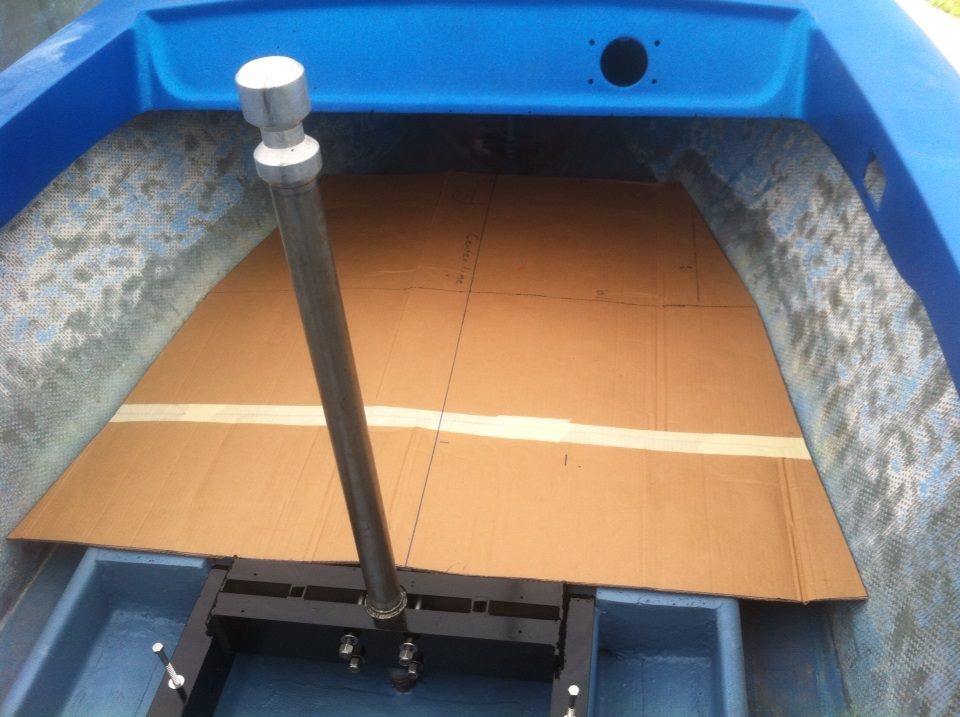 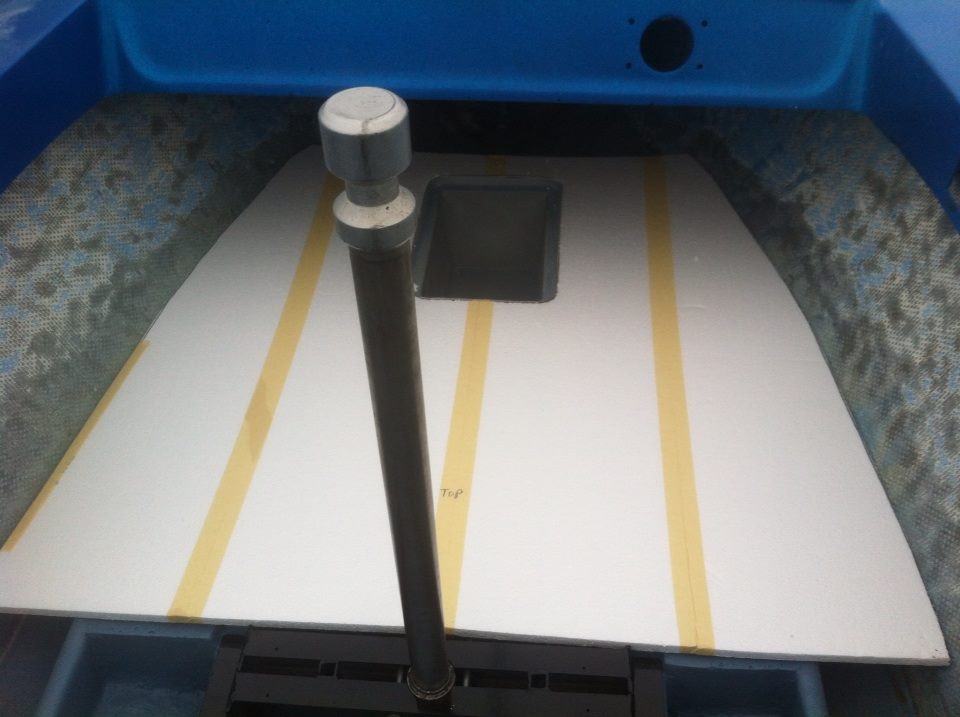 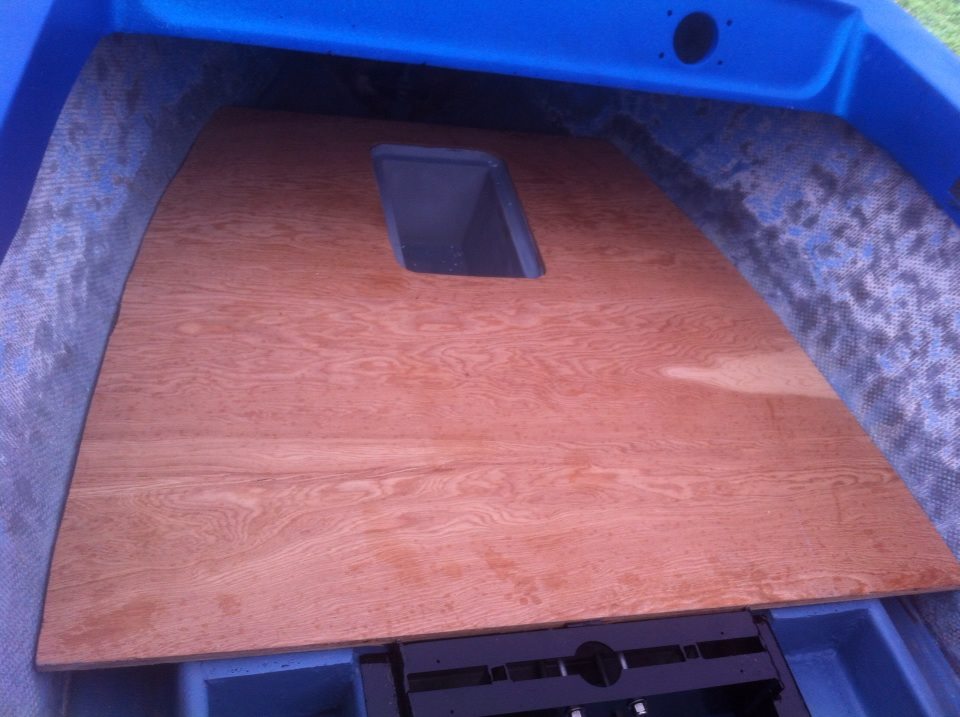
|
|
|
|
|
dangerwil
Senior Member
Joined: June-20-2013 Location: Orange Park, FL Status: Offline Points: 319 |
Post Options
Thanks(1)
Quote Reply
Posted: September-28-2014 at 2:11pm |
|
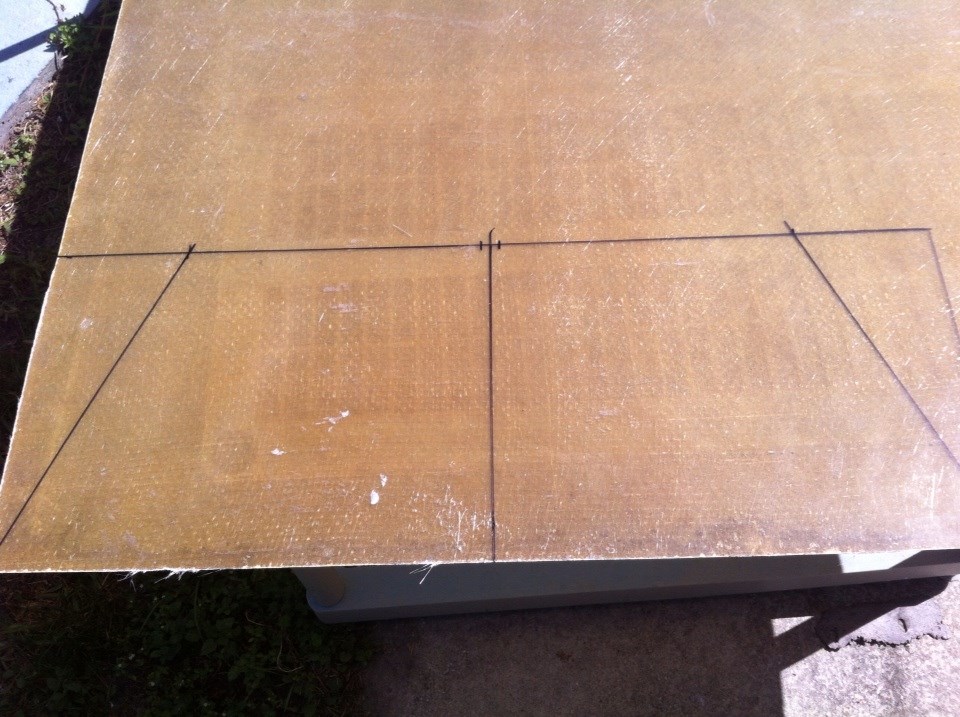
Working on getting the forward floor in this morning. I have the foam cut and ready. The floor plywood 3/4 exterior a/c fir is laminated on both sides with 1 sheet of chop strand and polyester resin. I laminated the first side last weekend. Turns out love bugs not only like to die on the front of your car. I started fiberglassing and there were suddenly hundreds of them lining up to land and roll around in my fresh resin. Ended up with 35 embedded in the glass.
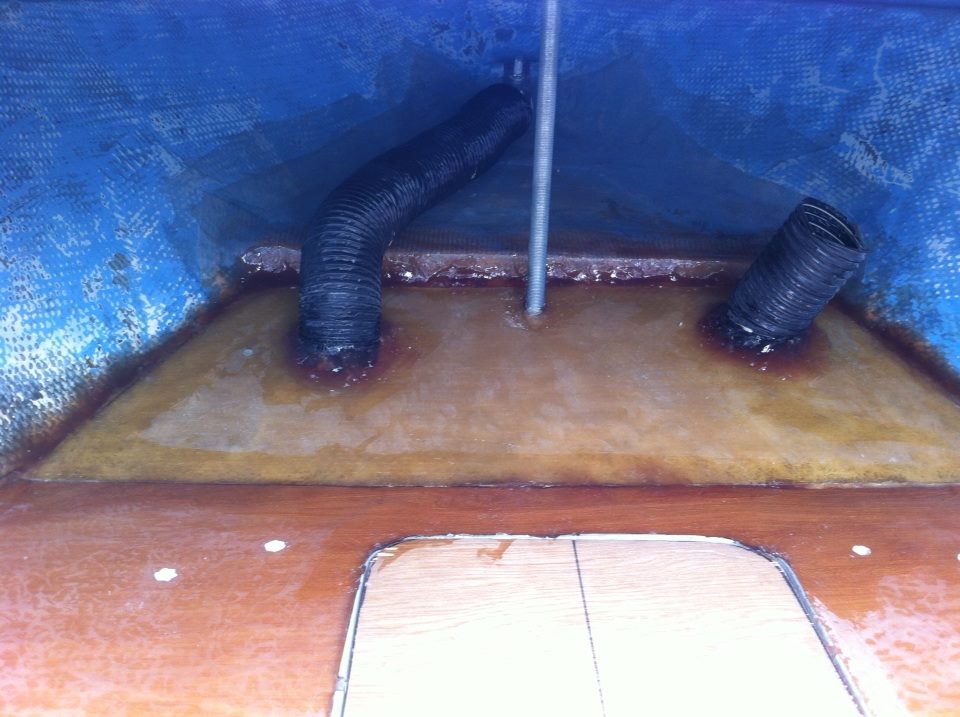
I have to cpes the edge grain. I am laying out the foam template so I can mark all the screw holes. Then I can pre drill them and cpes them too. 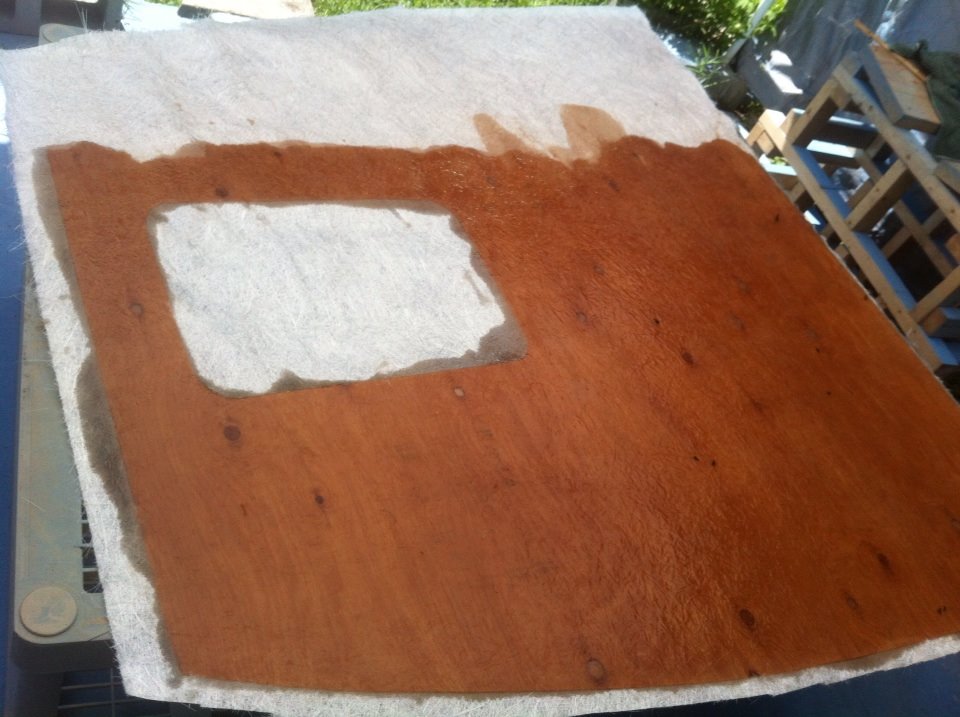 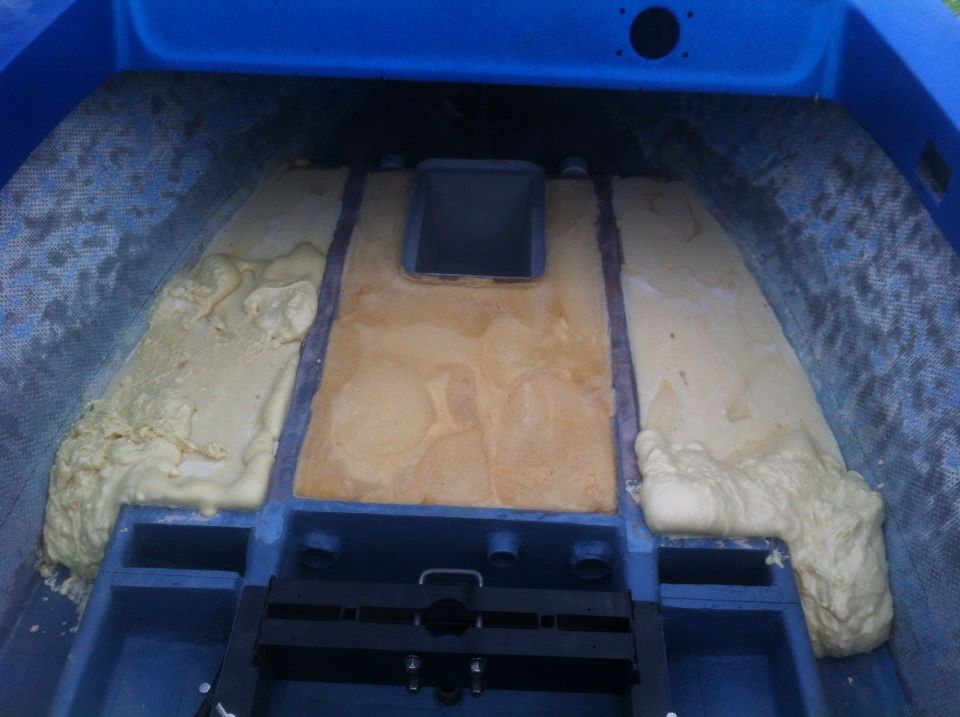 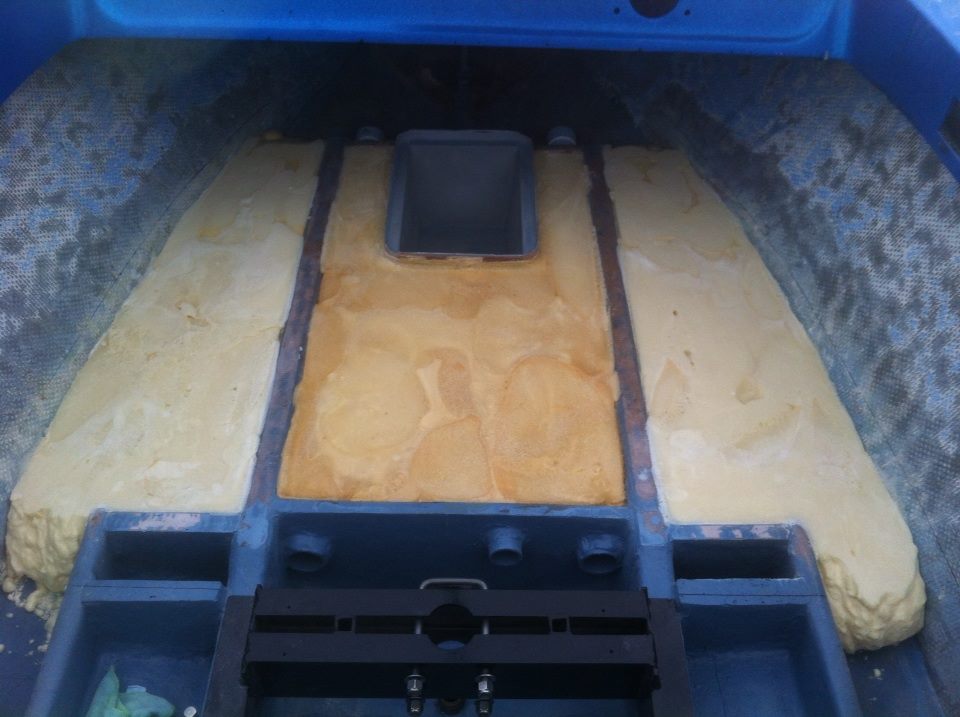 Here is waht it looked like taking out the old foam  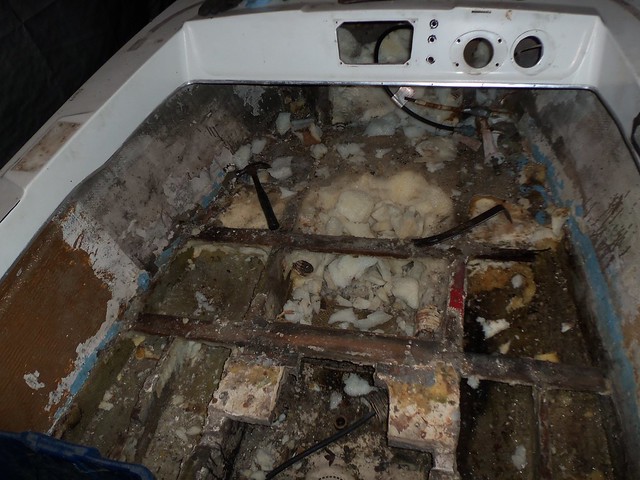
|
|
|
|
|
dangerwil
Senior Member
Joined: June-20-2013 Location: Orange Park, FL Status: Offline Points: 319 |
Post Options
Thanks(0)
Quote Reply
Posted: October-05-2014 at 9:23pm |
|
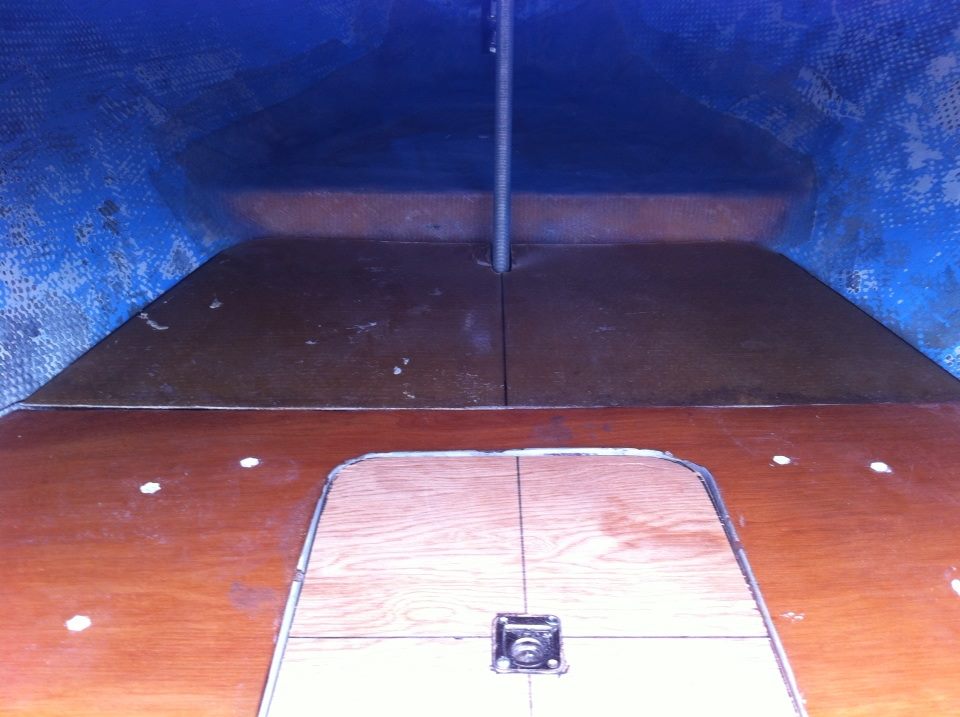
I sealed up the edge grain of the floor with cpes and bedded it in with lots of peanut butter. I got it screwed in and sealed all screws with 5200.
Today I worked on getting the front lifting bar set and installed. Then I cut the tubing for the air intake and the cabling. 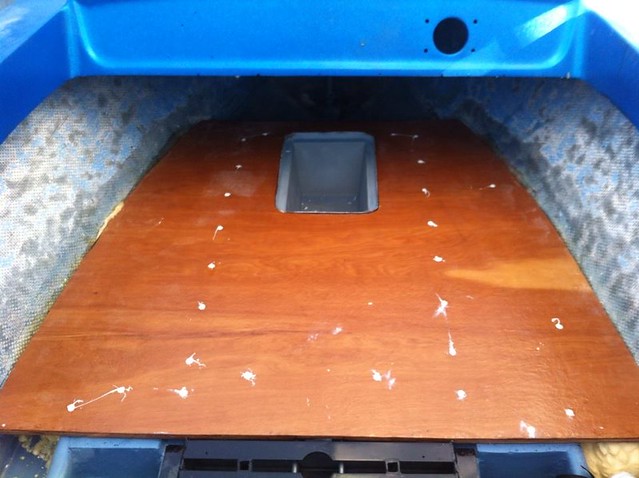 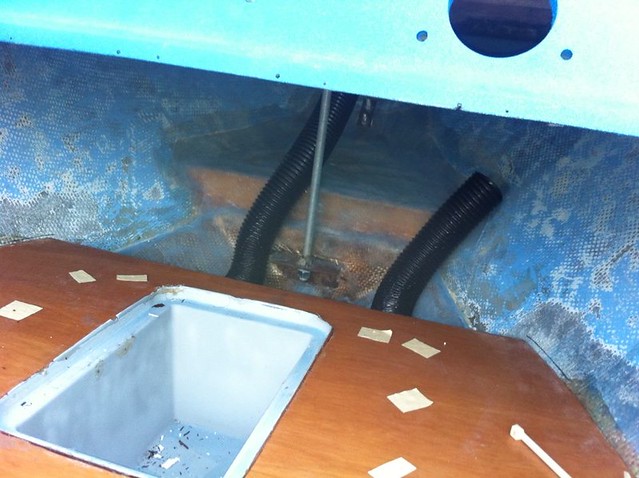
|
|
|
|
|
dangerwil
Senior Member
Joined: June-20-2013 Location: Orange Park, FL Status: Offline Points: 319 |
Post Options
Thanks(0)
Quote Reply
Posted: October-11-2014 at 4:43pm |
|
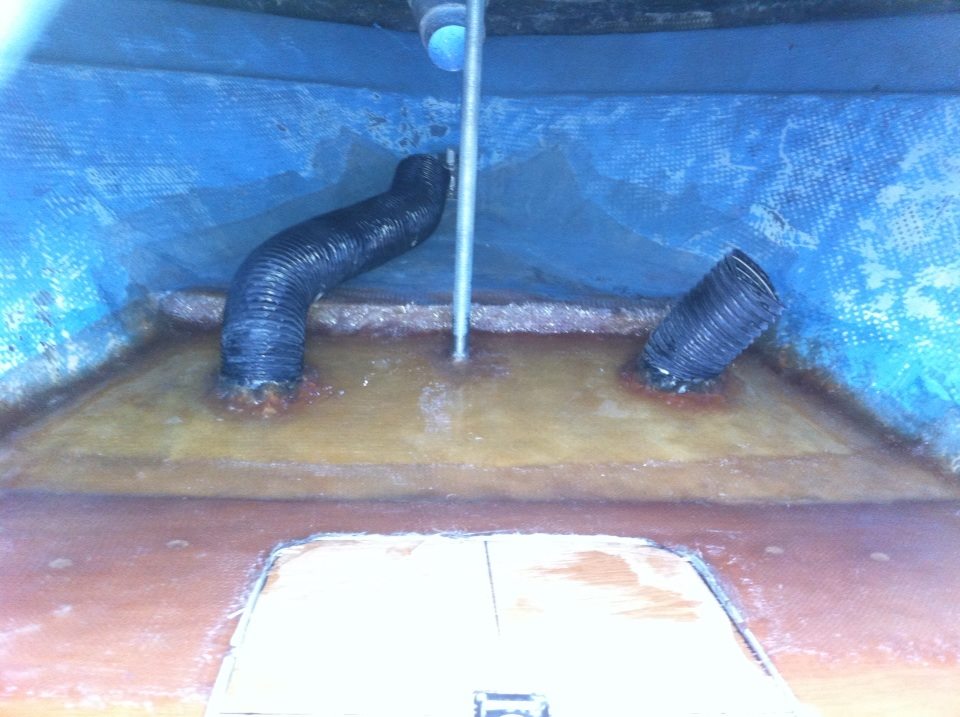
Working today on getting the last of the bow foamed in and closed up. Cutting the sheet fiberglass to go over the foam and tubing.
|
|
|
|
|
dangerwil
Senior Member
Joined: June-20-2013 Location: Orange Park, FL Status: Offline Points: 319 |
Post Options
Thanks(0)
Quote Reply
Posted: October-11-2014 at 8:52pm |
|
Foamed in.
|
|
|
|
|
dangerwil
Senior Member
Joined: June-20-2013 Location: Orange Park, FL Status: Offline Points: 319 |
Post Options
Thanks(0)
Quote Reply
Posted: October-12-2014 at 6:22pm |
|
Finished up glassing in under the bow! Sanded everything down, acetone wipe, peanut butter and 1708 glassed in. Next up, make a cardboard template of engine cover. Foam in along sides and template up the side floor panels.
  |
|
|
|
|
dangerwil
Senior Member
Joined: June-20-2013 Location: Orange Park, FL Status: Offline Points: 319 |
Post Options
Thanks(0)
Quote Reply
Posted: October-19-2014 at 7:35pm |
|
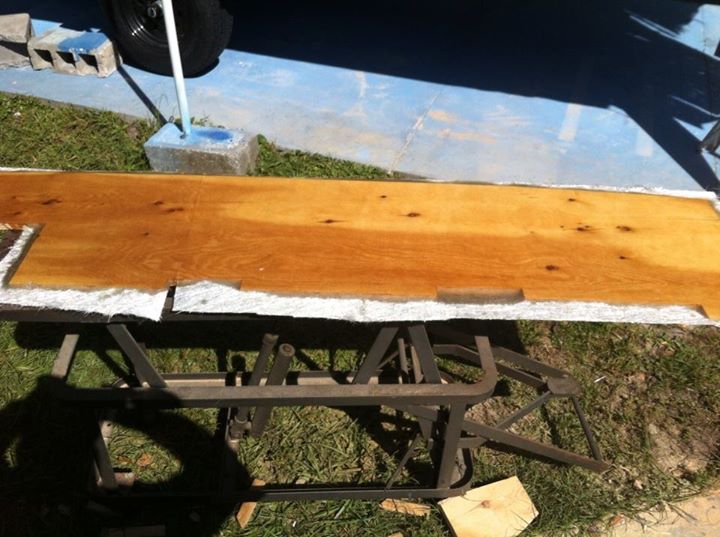
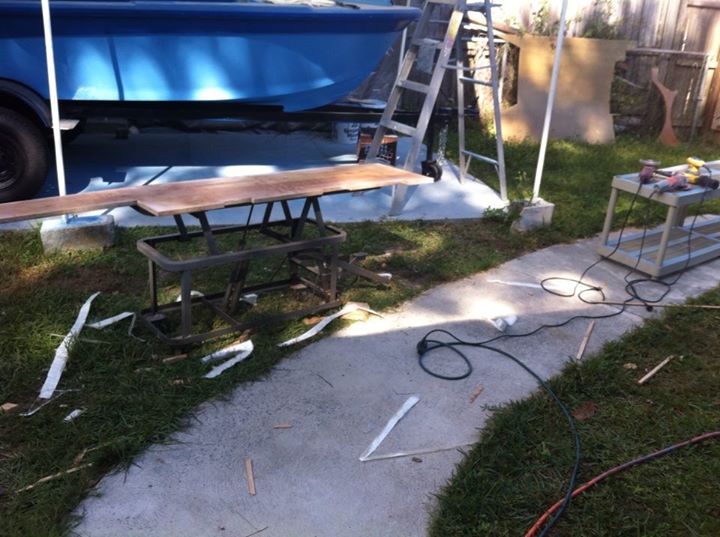
Busy weekend, perfect weather :) Cleaned up the boat, then foamed in both sides. Cut and sanded the foam down. Then I made up some templates out of foam and cardboard. I got both pieces of wood cut and the port side glassed and CPES'd. I went through a gallon of resin and all my chop strand. Still have the underside of the starboard board to do. I also made a huge mess in the back yard.
|
|
|
|
|
dangerwil
Senior Member
Joined: June-20-2013 Location: Orange Park, FL Status: Offline Points: 319 |
Post Options
Thanks(0)
Quote Reply
Posted: October-26-2014 at 5:09pm |
|
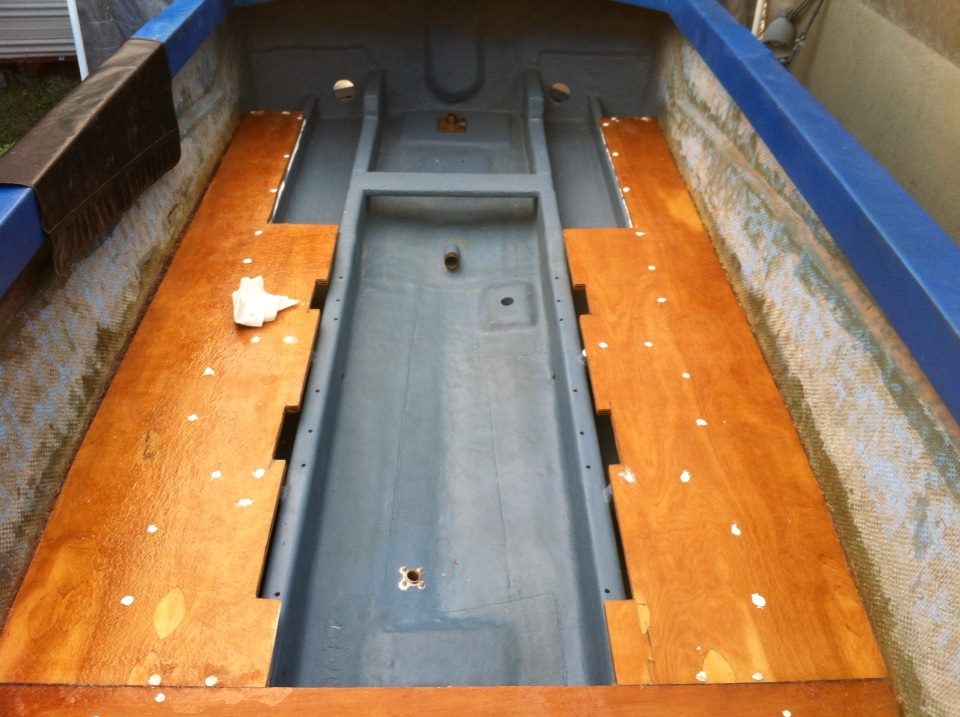
I spent the weekend getting the floor installed. Peanut butter along the side of the hull. 5200 on all the stringers. Screwed the floor down with stainless deck screws, sealed with 5200. Peanut buttered all gaps along the sides and its pretty much rock solid!
|
|
|
|
|
8122pbrainard
Grand Poobah

Joined: September-14-2006 Location: Three Lakes Wi. Status: Offline Points: 41040 |
Post Options
Thanks(0)
Quote Reply
Posted: October-26-2014 at 5:20pm |
|
Bill,
Your project is moving along and looking great. I do have a couple suggestions. On your next project, do not use any screws but rather just thicken epoxy the sole down. Screws are a stress point. Also people think stainless screws are the way to go and they are not. Unless stainless is exposed to oxygen, it rusts in the presence of moisture. At least you sealed them off with the 5200. You mentioned you "peanut buttered" the sole to the hull sides. I'd get some glass at that junction as well. Keep up the great work. The water isn't that far away for the boat! |
|
|
|
|
dangerwil
Senior Member
Joined: June-20-2013 Location: Orange Park, FL Status: Offline Points: 319 |
Post Options
Thanks(0)
Quote Reply
Posted: November-03-2014 at 8:28pm |
|
Not alot to show with pictures. It was too cold to glass Saturday, so I spent most of the day color sanding the deck. Sunday I did the tabbing in of the deck and the final layer of chop strand mat for the floor. It was cool but warm in the sun, so I was turning the boat around in the front yard most of the day.
Drove to Melrose Monday to talk with Don about the helm and throttle cables. I just need to lay a layer of chop strand mat down the sides, then decide where to put the mounting blocks for the side covers and I can gelcoat the interior. 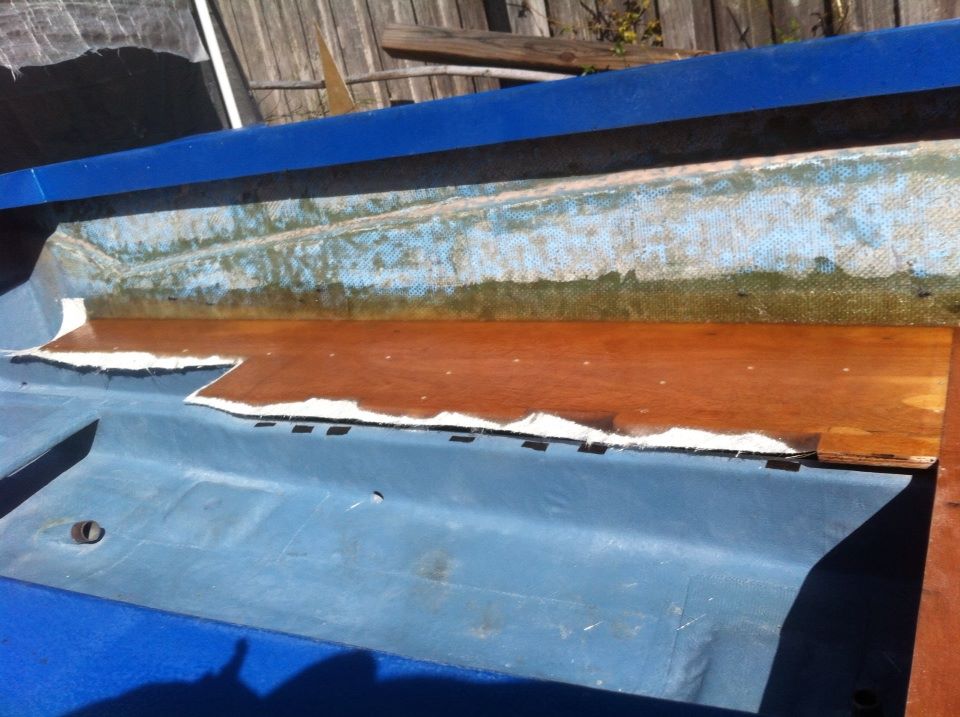
|
|
|
|
|
dangerwil
Senior Member
Joined: June-20-2013 Location: Orange Park, FL Status: Offline Points: 319 |
Post Options
Thanks(0)
Quote Reply
Posted: November-17-2014 at 10:48pm |
|
A bit of progress to show. I now have emblems! Thanks TRbenj
Modified the rudder port and installed it to test fit rudder. 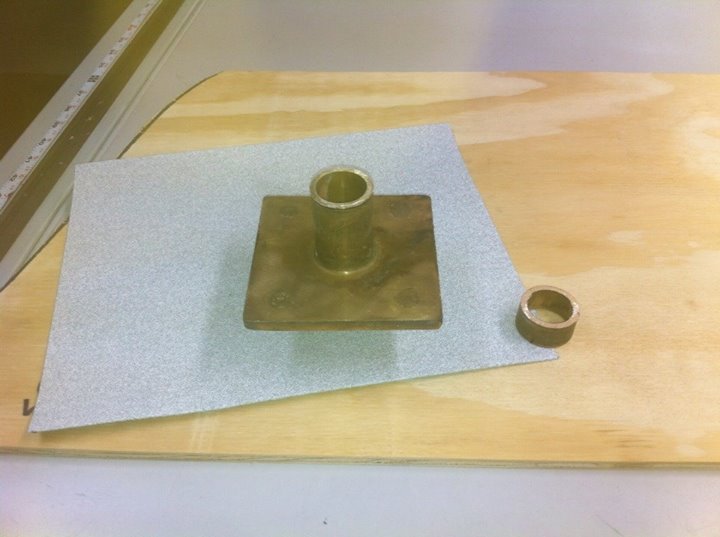 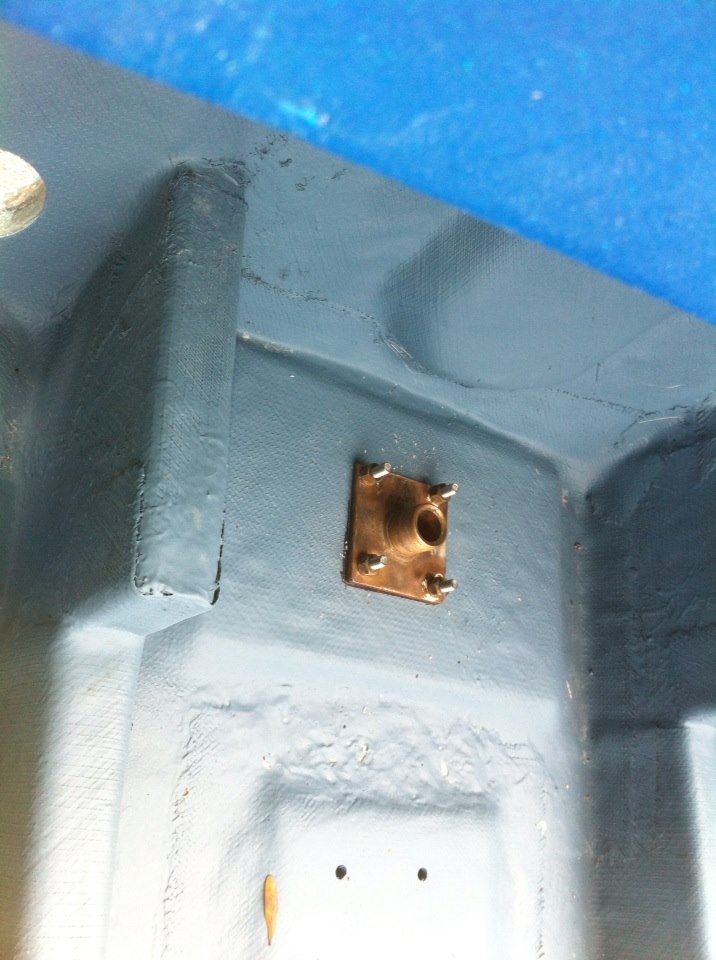 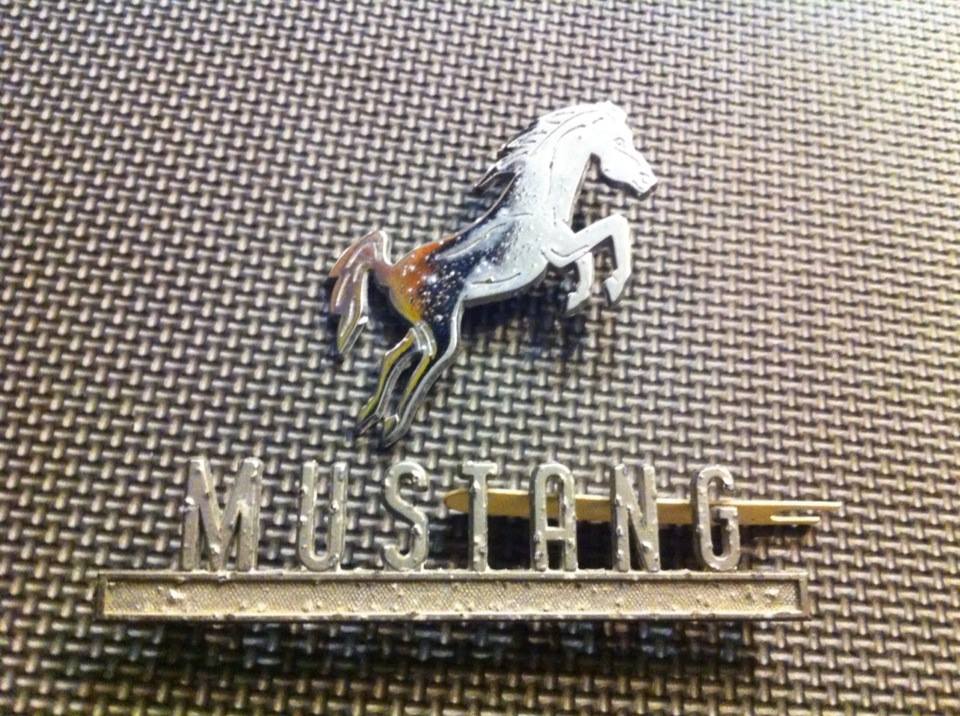
|
|
|
|
|
dangerwil
Senior Member
Joined: June-20-2013 Location: Orange Park, FL Status: Offline Points: 319 |
Post Options
Thanks(0)
Quote Reply
Posted: December-01-2014 at 3:06pm |
|
Its been really difficult to get any time on the Mustang the last couple of weeks. Too much real life stuff going on. I did make a little time this weekend to make the first mold for redoing the mustang emblem.
|
|
|
|
|
dangerwil
Senior Member
Joined: June-20-2013 Location: Orange Park, FL Status: Offline Points: 319 |
Post Options
Thanks(0)
Quote Reply
Posted: December-02-2014 at 11:13am |
|
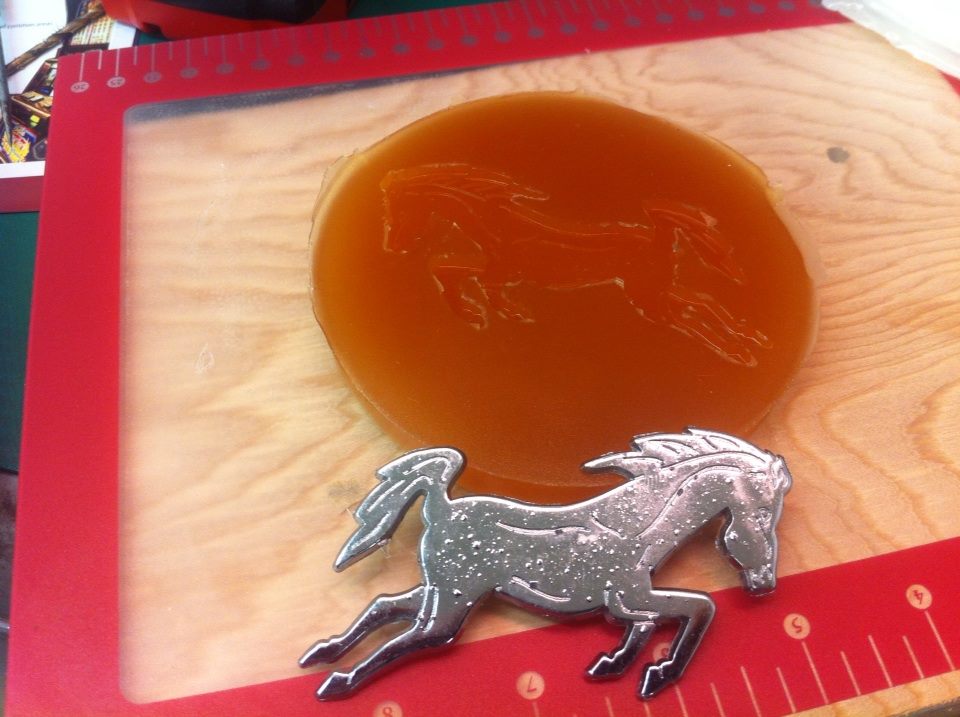
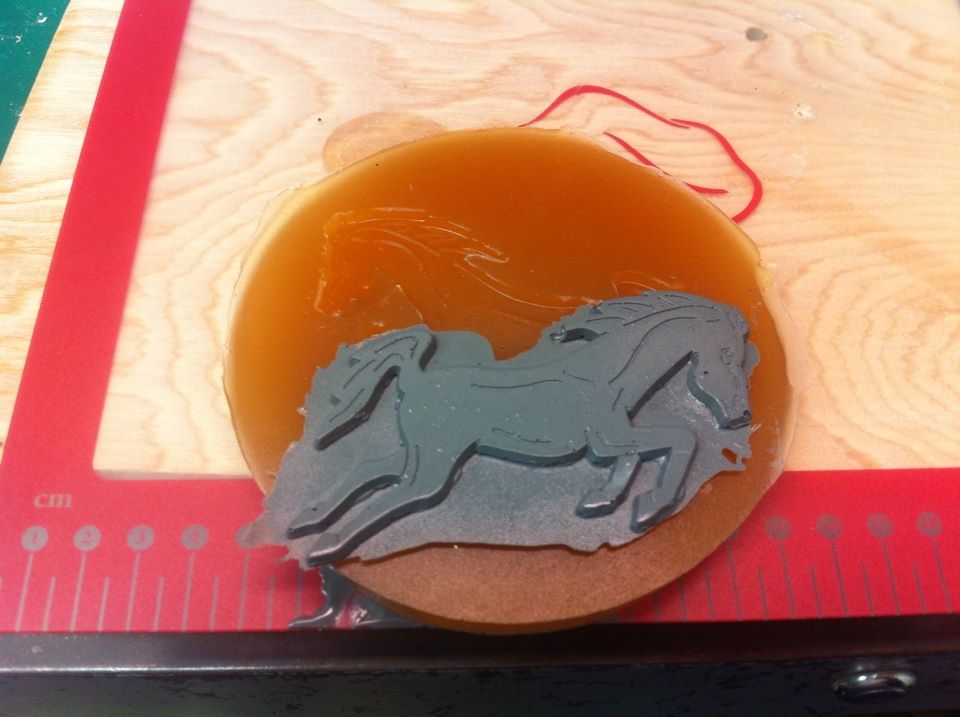
1st pony.
|
|
|
|
|
8122pbrainard
Grand Poobah
Joined: September-14-2006 Location: Three Lakes Wi. Status: Offline Points: 41040 |
Post Options
Thanks(0)
Quote Reply
Posted: December-02-2014 at 11:28am |
|
|
|
|
|
dangerwil
Senior Member
Joined: June-20-2013 Location: Orange Park, FL Status: Offline Points: 319 |
Post Options
Thanks(0)
Quote Reply
Posted: December-24-2014 at 4:43pm |
|
I have been so busy with work, combined with some crappy weather it has been really tough to find time to work on the boat.
I did get under the dash filled in with peanut butter to reinforce it. Then I ground out all the high spots in the floor. Today I laid in a layer of chop strand on the inside walls of the boat. Hopefully that should be it for fiberglass work. I have the boat back up on the stand and I will be doing lots of color sanding and gel coat work.... 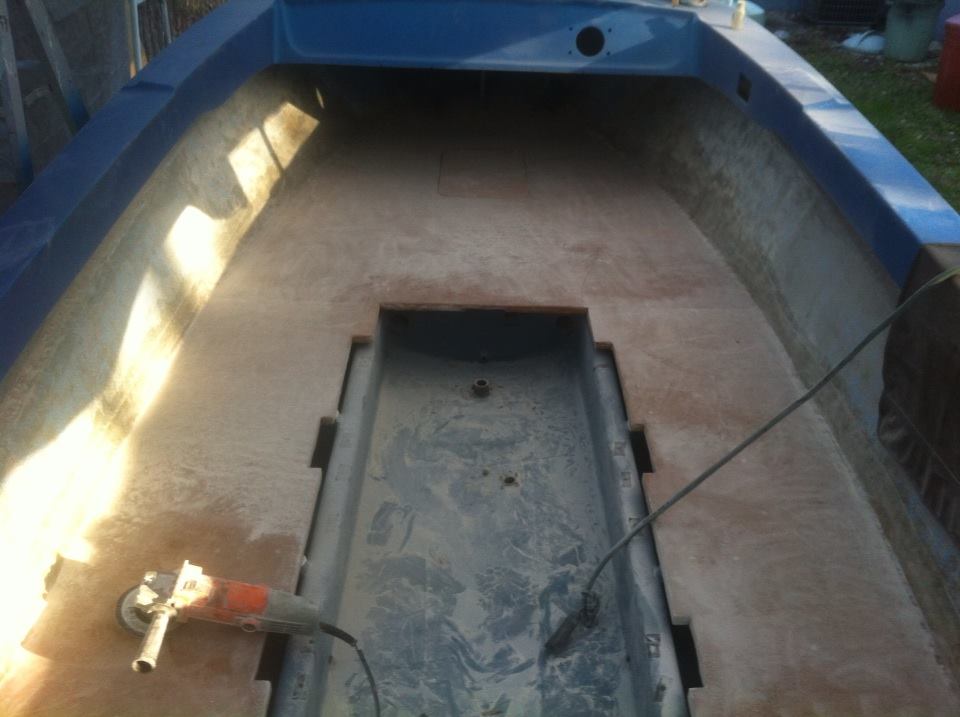 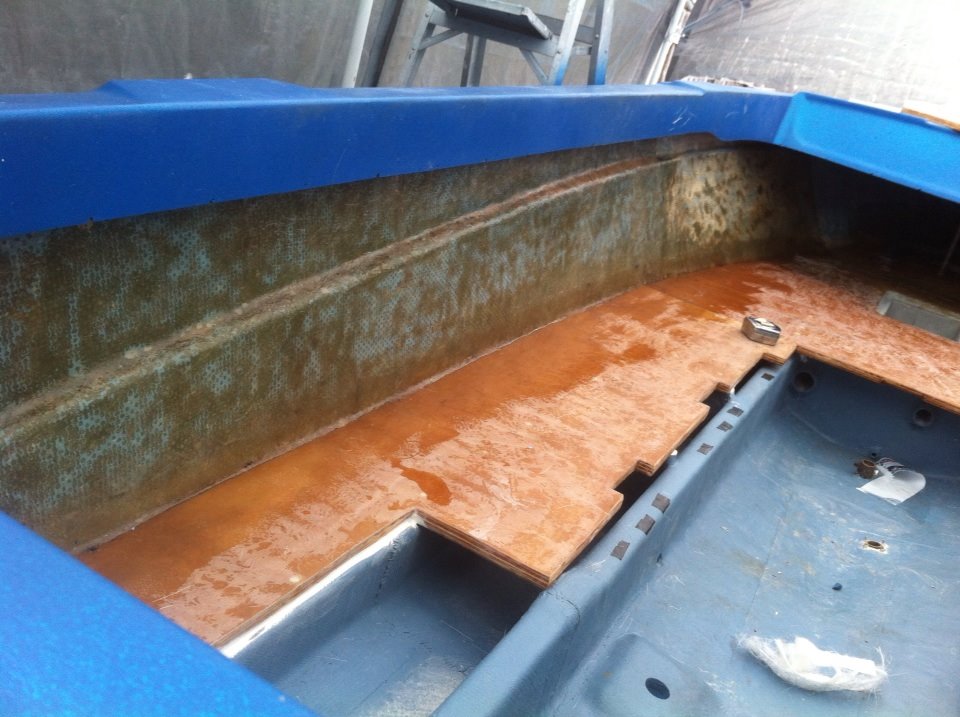 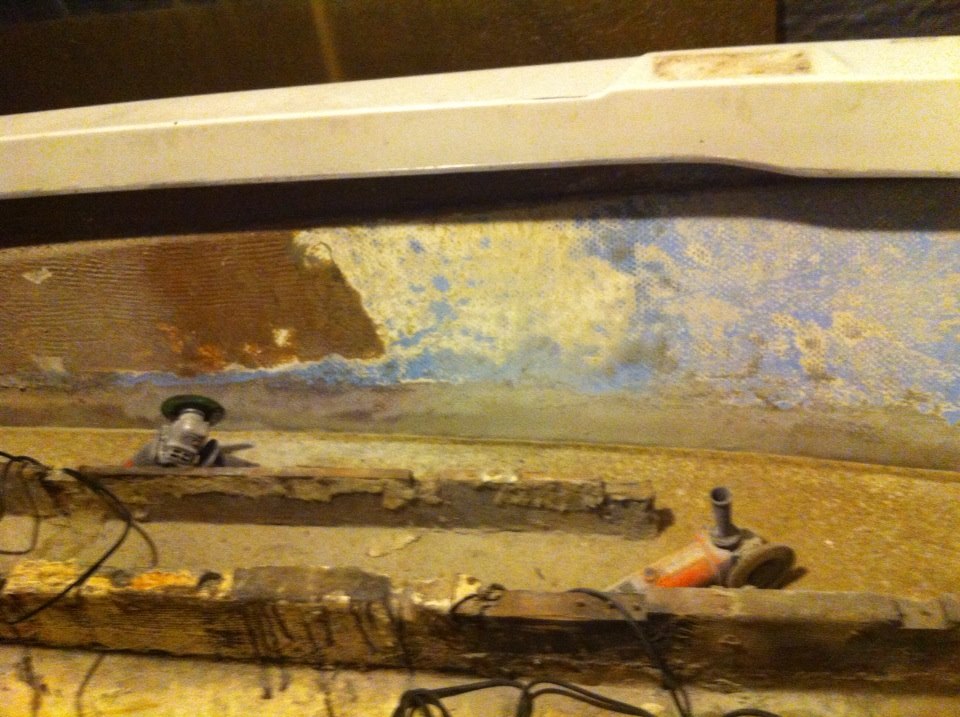 |
|
|
|
|
dangerwil
Senior Member
Joined: June-20-2013 Location: Orange Park, FL Status: Offline Points: 319 |
Post Options
Thanks(0)
Quote Reply
Posted: December-27-2014 at 1:47pm |
|
SOOOO much sanding....
|
|
|
|
|
dangerwil
Senior Member
Joined: June-20-2013 Location: Orange Park, FL Status: Offline Points: 319 |
Post Options
Thanks(0)
Quote Reply
Posted: December-28-2014 at 5:52pm |
|
Finished color sanding for today, its getting closer.
|
|
|
|
|
dangerwil
Senior Member
Joined: June-20-2013 Location: Orange Park, FL Status: Offline Points: 319 |
Post Options
Thanks(0)
Quote Reply
Posted: January-05-2015 at 9:16pm |
|
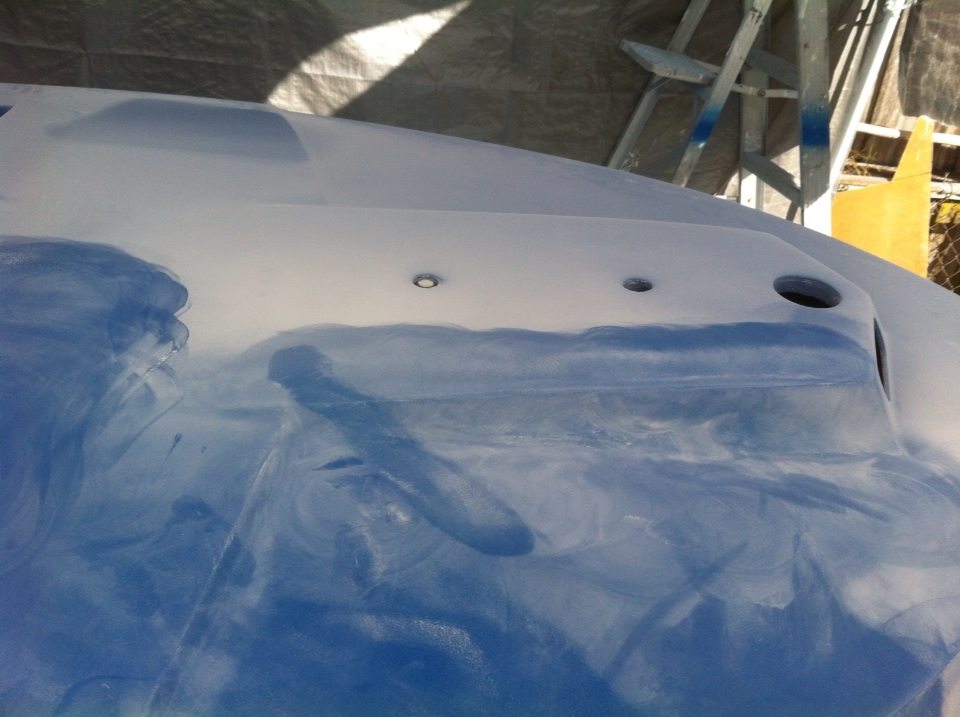
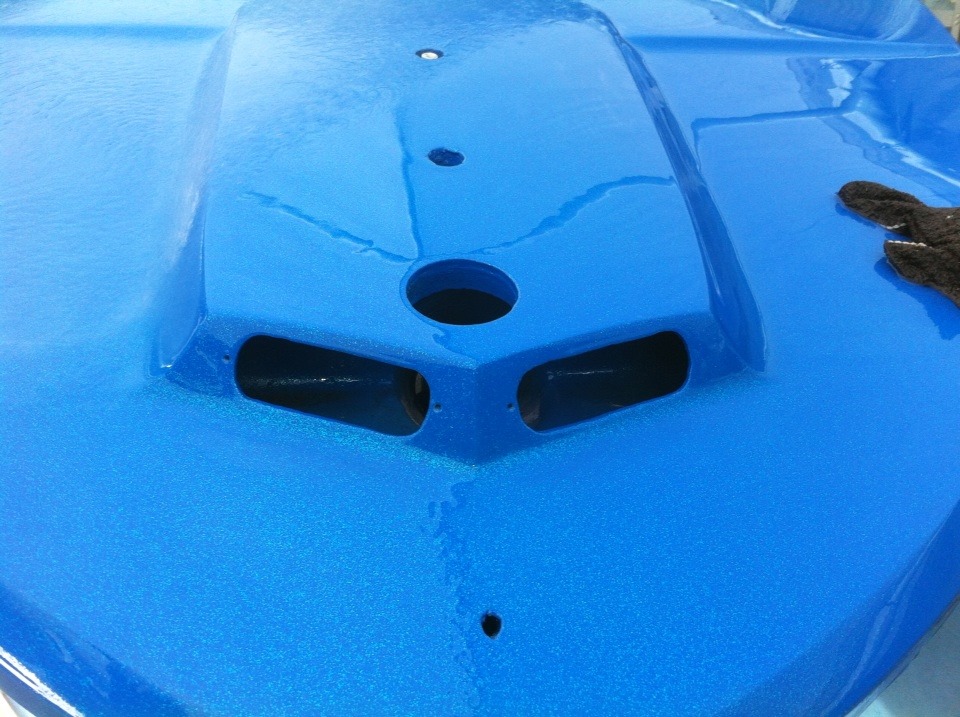
I sanded prepped and masked on Saturday. Shot the hull swoosh strip Sunday. Temp was mid '70s.
Used my touch up gun to spray blue base over all the burn throughs on the flake. Then shot 16oz of clear with flake over the hull swoosh. Buried it with 48oz of clear gel 50/50 with high gloss duratec. It worked a treat! Hard and shiny when I got home from work this evening. 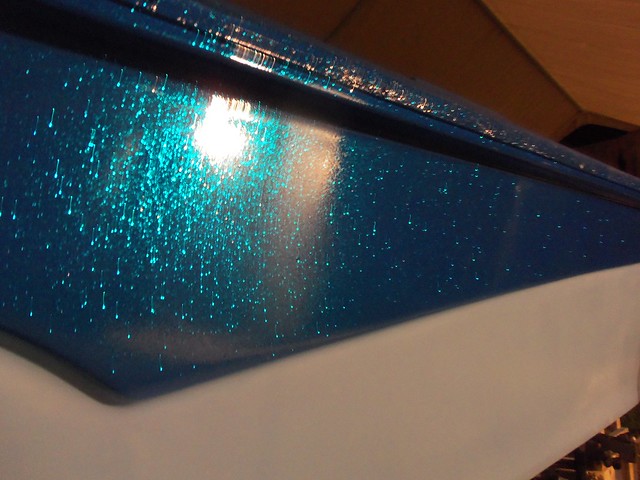
|
|
|
|
|
Dreaming
Platinum Member

Joined: May-21-2010 Location: Tacoma, WA Status: Offline Points: 1870 |
Post Options
Thanks(0)
Quote Reply
Posted: January-06-2015 at 2:13pm |
|
looks fabulous! nice job!!!
|
|
|
|
|
8122pbrainard
Grand Poobah
Joined: September-14-2006 Location: Three Lakes Wi. Status: Offline Points: 41040 |
Post Options
Thanks(0)
Quote Reply
Posted: January-06-2015 at 2:31pm |
|
Bill,
What name did CC call that metal flake blue? 
|
|
|
|
|
Morfoot
Grand Poobah

Joined: February-06-2004 Location: South Lanier Status: Offline Points: 5311 |
Post Options
Thanks(0)
Quote Reply
Posted: January-06-2015 at 3:01pm |
Masters Metal Blue! 
|
|
|
"Morfoot; He can ski. He can wakeboard.He can cook chicken.He can create his own self-named beverage, & can also apparently fly. A man of many talents."72 Mustang "Kermit",88 SN Miss Scarlett, 99 SN "Sherman"
|
|
|
|
|
WakeSlayer
Grand Poobah

Joined: March-15-2006 Location: United States Status: Offline Points: 2138 |
Post Options
Thanks(0)
Quote Reply
Posted: January-06-2015 at 9:42pm |
|
Awesome work!
|
|
|
Mike N
1968 Mustang |
|
|
|
|
dangerwil
Senior Member
Joined: June-20-2013 Location: Orange Park, FL Status: Offline Points: 319 |
Post Options
Thanks(0)
Quote Reply
Posted: January-06-2015 at 9:53pm |
|
I think I will call it what Little Daddy Roth calls the flake I used, Bad Azz Blue. What a B!#%&! If I hadn't of done the metal flake, the engine would probably be in right now. Oh well its really shiny...
Not original, but this boat was so hacked up I'm just making it the way I want it. Bill |
|
|
|
|
john b
Grand Poobah
Joined: July-06-2011 Location: lake Sweeny Status: Offline Points: 3236 |
Post Options
Thanks(0)
Quote Reply
Posted: January-06-2015 at 10:03pm |
|
Restomod is nice when done well, and by the photos I believe yours is done VERY well. I hope I get to see it in person sometime.
|
|
|
1970 Mustang "Theseus' paradox"
If everyone else is doing it, you're too late! |
|
|
|
|
Post Reply
|
Page <1 45678 10> |
 Tweet
Tweet
|
| Forum Jump | Forum Permissions You cannot post new topics in this forum You cannot reply to topics in this forum You cannot delete your posts in this forum You cannot edit your posts in this forum You cannot create polls in this forum You cannot vote in polls in this forum |


 Topic Options
 dangerwil wrote: