 Boats For Sale:


1986 BFN Rebuild |
Post Reply 
|
Page <12 |
| Author | |
LennyBoat 
Newbie 
Joined: May-22-2023 Location: Belgium Status: Offline Points: 36 |
 Post Options Post Options
") Thanks(0) Thanks(0)
 Quote Reply Quote Reply
 Posted: February-12-2024 at 12:56pm Posted: February-12-2024 at 12:56pm |
|
It's been a while since the last update, but we managed to get some work done over the past few weeks. The deck has been sanded, the glass from the stringers was removed and the boat was moved to a garage of one of the co-owners of the boat. After Inspection, we noticed that the state of the stringers wasn't all that bad. Most parts were still rock solid, and the places with rot where mostly on the surface. We used an electric heater pointed at the stringers for a few days to get as much of the moisture out as possible, afterwards we treated them with a penetrating epoxy as described by KENO and they were ready to be glassed over again.  Next up was installing the floor panels. The previous owners started the rebuild proces with HPL plates (used for facade cladding) while this material doesn't rot and is quite sturdy I'm not sure I would go this way again. It doesn't take screws very well, and is a bit flexible. This became a problem when installing the panels and especially when foaming the cavities. The foam pushing up against the HPL panel made a bump in some places and pulled out the screws in other. we ended up removing the floor, pouring in extra foam where needed, and cutting off the excess.  Due to the different colors in panels and a not so straight crossmember, it does seem that the front part of the floor is extremely uneven / not level. Its a bit of an optical illusion as in reality the floor is only slightly crooked  . .We also replaced the original HVAC tubing with hard PVC pipes and moved them a bit closer to each other to create more space. Afterwards it was time to glass in the stringers and floor.   For us it was the first time working with fiberglass, and while its defenitley not as professional as a lot of repairs i saw on this website, we're still quite happy with the end result. Next up will be finishing of the foot support for the driver, glassing the last part between floor and stringer, making the floor panels for the middle parts and treating all the new glass with a waterproof primer (gelshield). We also started on making a custom glove box, as the original owner cut it out for some reason, and nothing will fit the dimensions of the hole that was left behind.
|
|
 |
|
|
LennyBoat
Newbie
Joined: May-22-2023 Location: Belgium Status: Offline Points: 36 |
Post Options
Thanks(0)
Quote Reply
Posted: December-12-2023 at 3:56am |
|
Hi TRBenj, Thanks for the info! I'll post some more pictures of the progress soon. |
|
|
|
|
TRBenj
Grand Poobah 

Joined: June-29-2005 Location: NWCT Status: Offline Points: 21131 |
Post Options
Thanks(0)
Quote Reply
Posted: December-11-2023 at 12:11pm |
|
Speedometer pulsation dampeners, motor mount blocks, and cradle u-bolts for the pylon.
|
|
|
|
|
LennyBoat
Newbie
Joined: May-22-2023 Location: Belgium Status: Offline Points: 36 |
Post Options
Thanks(0)
Quote Reply
Posted: December-11-2023 at 6:02am |
|
We are all done with removing the foam, removing the fiberglass from the stringers, and sanding the hull/deck.
We'll move the boat to a heated garage to dry out the stringers tomorrow or the day after. I got into the large pile of parts that came with the boat to see what needs replacement and whatnot. I encountered some parts where I'm not sure of what they're for. First are these "mounting plates" with two holes in them. Not quite sure where they used to go. Same for the 'U' Bolts, (they don't fit the plates)  And lastly these 2 parts. They have a hose on both sides, and looking at the length of the hose I would think these are for the Speedo's? If they are, what is their function? I assumed the hose went straight from the speedo to the pitot tube.  Thanks and have a nice week!
|
|
|
|
|
KENO
Grand Poobah
Joined: June-06-2004 Location: United States Status: Offline Points: 10719 |
Post Options
Thanks(0)
Quote Reply
Posted: December-04-2023 at 2:12pm |
|
Well at least now you know you have choices on how to take care of your issue and after some reading about things here and elsewhere and knowing what your comfort level is with doing stringers, repairing stringers etc., you can decide your course of action.
|
|
|
|
|
67 ski nat
Platinum Member 
Joined: July-19-2018 Location: Santa rosa Status: Offline Points: 1184 |
Post Options
Thanks(0)
Quote Reply
Posted: December-04-2023 at 9:13am |
|
Ace hardware has ‘PC rot terminator’
Brand. Small bottles Drill small 1/8” holes into soft areas Amazing how epoxy flows and soaks into soft woods. It is very fluid, so keep watching and basting overflow until firms up |
|
|
|
|
LennyBoat
Newbie
Joined: May-22-2023 Location: Belgium Status: Offline Points: 36 |
Post Options
Thanks(0)
Quote Reply
Posted: December-04-2023 at 4:28am |
|
Thank you for your advice! I've taken action and removed the fiberglass from the stringers where I suspected wood rot. While the surface of the stringers is damp, it hasn't permeated all the way through. There's a single soft spot, limited to around 1/2" deep, situated on the strongest part of the stringer (toward the stern, where the crossmember used to be). I'm optimistic that I can use the "wood conservation method" to address this. Keno, thanks for bringing this method to my attention—didn't know about it! Now, I'm exploring ways to dry the stringers without removing them from their original position. I came across a suggestion to speed up drying by soaking them in acetone. I might give this a try while the boat is still under the tent. Appreciate your insights! 😊 Picture of the soft spot:
|
|
|
|
|
67 ski nat
Platinum Member
Joined: July-19-2018 Location: Santa rosa Status: Offline Points: 1184 |
Post Options
Thanks(0)
Quote Reply
Posted: December-03-2023 at 9:10am |
|
Keno is correct I just didn’t want to type zero
A little bit in some locations is treatable I had a couple soft bolt holes repaired with penetrating epoxy Larger areas all the way through probably replace stringer. You might get lucky too |
|
|
|
|
KENO
Grand Poobah
Joined: June-06-2004 Location: United States Status: Offline Points: 10719 |
Post Options
Thanks(0)
Quote Reply
Posted: December-02-2023 at 1:58pm |
|
None is the lame, easy answer So, how much rot ya' got? There are quite a few people with mid 80's wooden stringers that are still driving around without the engine ripping itself out of the stringers. You can read about things like Rot Doctor, Git Rot, CPES, homebrewed CPES mixtures etc that more or less turn the rotted areas into petrified wood  It all depends on how much work you want to put into the project and what the wood is like now and only you know those answers
|
|
|
|
|
LennyBoat
Newbie
Joined: May-22-2023 Location: Belgium Status: Offline Points: 36 |
Post Options
Thanks(0)
Quote Reply
Posted: December-02-2023 at 12:51pm |
|
Damn.
okay, painting postponed, first a stringer job... |
|
|
|
|
67 ski nat
Platinum Member
Joined: July-19-2018 Location: Santa rosa Status: Offline Points: 1184 |
Post Options
Thanks(0)
Quote Reply
Posted: December-02-2023 at 9:55am |
|
None
|
|
|
|
|
LennyBoat
Newbie
Joined: May-22-2023 Location: Belgium Status: Offline Points: 36 |
Post Options
Thanks(0)
Quote Reply
Posted: December-02-2023 at 2:20am |
|
So what percentage of woodrot would be an acceptable amount for the stringers? (Please don't let it be zero...)
|
|
|
|
|
67 ski nat
Platinum Member
Joined: July-19-2018 Location: Santa rosa Status: Offline Points: 1184 |
Post Options
Thanks(0)
Quote Reply
Posted: November-23-2023 at 10:04am |
|
WOW. Labor of love for sure
BFN awesome. Would love to own one too Good luck and try and enjoy |
|
|
|
|
Kristof
Grand Poobah

Joined: October-08-2007 Location: Bree, Belgium Status: Offline Points: 3391 |
Post Options
Thanks(0)
Quote Reply
Posted: November-23-2023 at 4:46am |
|
So happy to see this boat is getting a resto after sitting so many years in Jo's basement!!
Gonna follow up on this thread... Many memories about the beginnings of this one. Good luck guys! Oh, and on a side note: you are in the right place for pro tips on this project.
|
|
|
- Gun control means: using BOTH hands!
- Money doesn't make one happy, but when it rains cats and dogs, it's still better to cry in a Porsche than on a bicycle... |
|
|
|
|
LennyBoat
Newbie
Joined: May-22-2023 Location: Belgium Status: Offline Points: 36 |
Post Options
Thanks(0)
Quote Reply
Posted: November-22-2023 at 1:40pm |
|
Hi All,
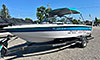
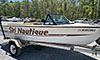
We are currently in the process of rebuilding our new to us 1986 Barefoot Nautique. For some of the members that have been around a while this boat might seem familiar, as the restoration has been started in 2009, but was never finished due to a lack of time. This is a link to the original post. We bought the boat completely disassembled, so we are figuring things out as we go. First up was dissasembling the cracked block and sourcing a new one. After hours of searching european alternatives to Craiglist it seemed that there where no suitable 454 blocks for sale. All of them where either in a very bad state, or completely rebuilt. I found one in the states for a reasonable price which we imported from Chicago and is now at the workshop awaiting inspection and refurbishing.  Due to having very limited space for working on the boat we build a temporary workshop in an old army tent In my brothers garden, flipped the boat upside down and started on the exstensive boat hull repairs that needed to be done.   We would have loved to do a re-gell, but that is simply not in the budget. Spot repairs with gelcoat would have been practicaly impossible due to the many scratches en cracks. we decided to repair everything with epoxy and do a repaint with a 2-component Polyurethane coating system above the waterline (as used on sailing yachts), below the waterline we'll use anti fouling. (there is no polyurethane coating that's completely water-vapor proof as far as I know, so its not suited for underwater use)  Few weeks ago we finally flipped the boat back upright (had to get creative as the mini excavator stopped working)  Once again there was a ton of small gouges and cracks, that we had to dremel out and repair.   Removed the foam, as we had some water getting in the boat while we where building the shelter. Also want to check the stringers as they were not replaced by the previous owner.  Now we need to sand the deck, and move the boat to a dry location to start the painting process. I'll try to keep the updates and pictures coming as we progress. |
|
|
|
|
Post Reply
|
Page <12 |
 Tweet
Tweet
|
| Forum Jump | Forum Permissions You cannot post new topics in this forum You cannot reply to topics in this forum You cannot delete your posts in this forum You cannot edit your posts in this forum You cannot create polls in this forum You cannot vote in polls in this forum |


 Topic Options